Wednesday 26 September 2018

Bridge too far rules

Gents these are the specific rules for the operational game 

1.       The rout thru Holland to Arnhem was difficult when going cross country due to the terrain which was polder with lots of drainage ditches. All movement by vehicles is at half rate, unless on the road which is at normal rate plus road bonus.
2.       Both armies can follow the directional arrows.
3.       All woods and hills on table 3B are replaced with multiple village sectors to simulate the urban sprawl of Arnhem. The original town sectors for 3B will still be represented with outskirts, all other built up areas will be multiple village blocks with a max platoon limit of 1 platoon per inch per block. This will make 3B one big city fight. Indirect fire into city block is not very effective 11/12 for guns up to 150mm and 10-12 for 150mm upwards. You can only exit and enter different city blocks if they are touching.
4.       All entry points to adjacent tables will correspond with the exit point of the last table. Entry to 3B from 3A and 1B will be as per map i.e. right half of 3A to left half of 3B and left half of 1B to right half of 3B.
5.       The bridge on table 2B has been rigged with explosives and will explode on a 4+ when allied elements cross the bridge, an engineer may defuse the explosives by being stationary for 1 turn by the bridge. If there are any axis elements within 3” of the bridge it will explode on a 3+ when the allies cross it.
6.       Allied airborne elements will drop on turn 1 using the standard paratrooper deployment. Airborne elements may be held back but will have to have a turn No and drop point allocated prior to turn 1.
7.       There will be 1No standard (no attachments) volks grenadier battalion at the town in 1C and a small garrison at the airfield. Paras’s dropping on the airfield as part of turn 1 deployment will suffer D3 attacks from the AA emplacement. (AI v AI).
8.       The volks grenadier battalions and infantry regiment will enter from the sides of tables 1A, 2A, 3A, 1D, 2D, 1B. 1 random fighting battalion will arrive each turn and a roll of a D8 will indicate the table entry (7 and 8 no show). The battalions do not have to enter that turn if not desired by the axis player and will go back into supply for another turn. This will simulate the randomness of the axis response in a supposedly quite sector.
9.       The axis panzer division is off table beyond 3B and will not respond until any battalion, axis or allied enters table 3B (Must be 6 or more platoons of a single battalion). When this happens on the very next turn the axis player can release I fighting battalion per turn onto table 3B via the road.
10.    Line of supply rules are in effect. If there are no opposing elements on a table then the line of supply is blocked in either direction, if enemy elements are on the same table then a 12” gap which no enemy can trace direct fire too must exist for units to be in supply ( out of supply = -1 shooting and -1 close combat)
11.    The allies will automatically win if they can get an armoured regiment off table 3B, otherwise it is points per table as usual.
12.    Aircraft designation must be decided on when organising the OOB. Aircraft priority will be moving vehicles, stationary vehicles, Moving infantry/support weapons, stationary infantry/support weapons all in the open. Aircraft will not be able to target units in cover i.e. woods. Aircraft can be called in to a specific target by using a HQ unit on the divisional call up table.
13.    The main bridge cannot be targeted, both sides need it.
14.    Para drop rules are in effect. Each platoon will drift 2d6 on a spinner. Units that land off table –dead, units that land on top of another unit- supressed unit landed on dead, units that don’t land in the clear-dead.
15.    Gliders will slide 2d6 from designated landing point on a half spinner (180%). If they crash into any cover/building/another glider (not hills) –dead. Units from gliders will be placed next to it in any direction and will move next turn.
16.    1A  1 pt for the ridge (centre ridge)
1B  1 pt for the farm
1C  1 pt for the town
1D  1 pt for the farm

2A  1 pt to clear the north side of the river of the enemy.  1 pt to clear the south side of the river of the enemy.
2B  1 pt to clear the north side of the river of the enemy.  1 pt to clear the south side of the river of the enemy.
2C  1 pt for the ridge, 1 pt for the large wood.
2D  1 pt for the village and 1 pt for the bridge

3A  3 pts for the airfield, 1 pt per hard point

3B  1 pt for the town, 1 pt for the bridge, 1 pt to clear north bank of the enemy

Sunday 23 September 2018

Thursday night modern spearhead game

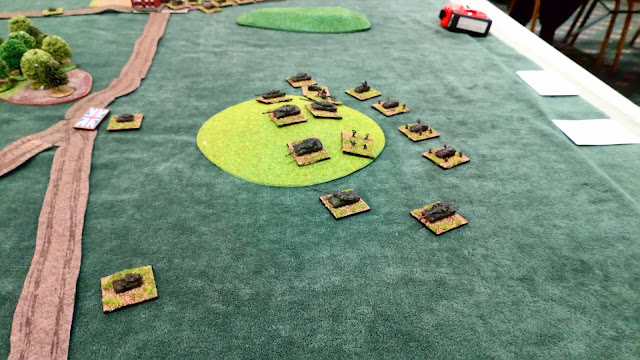
NATO exercise with the French taking on the British

 French forces of mixed armour and Potent combat teams
 British armour and not so potent combat teams, Blowpipe and rapier platoons were taken to combat the French air threat (there wasn't any)
 2nd British battalion
 British combat teams assault the French in the wood
 Main battle tanks duel as the recon intermingle, British recon tanks would not open up as they would be wiped by the French

British had Abbot 105 , 155 mm artillery a Lynx and a Harrier Off table but could not call any in Lesson learnt Take Foo and AGC to call in off table assets.
Lynx was placed on table after game end to try out the French AA, they drove it off.
British were using 2No Cymbeline radar vehicles, one on anti AA and one on anti ART 
but due to failed off table rolls failed to make an impact.

Thursday night game

Another chilly game from Phil,


Germans trying to cross the frozen river and take the town.
They found it slow going  and the Russians tough opponents 
Germans didn't achieve their objectives by game end
Nice to play on a good looking table
cheers Phil

Sunday 9 September 2018

Russ,, found your Spearhead books.

I put them on eBay.  Up to £19.50 already! 

Anyone up for a winter operational battle first week October?

I've got all scenery, troops etc. ready for a Russian attack on beleagured German forces in winter 1941.

Cavalry, tanks, hordes of infantry on the Soviet side of course.  German infantry and artillery on the German side.


Saturday 8 September 2018

Operational Ideas


Is it a change in the weather or is that time of year?  With the weather getting cooler I am definitely more in the mood for wargaming.  I had a great game with Russ revisiting PoW and the ECW.  Phil's winter war scenarios have been excellent and I know Jon is making ACW plans.

However, it's operational games that are always the ultimate objective with my current plans and Phil's winter war and Mark's "Bridge too far" operational game are on the horizon and this got me thinking about other variations.

These are my ideas;

Alamein

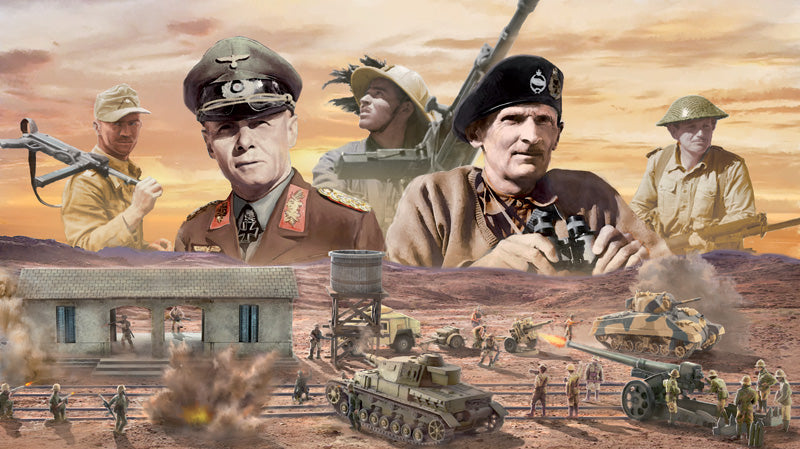
                              Image result for alamein


3 x 3 layout but part of a larger Thursday night preplanned point of attack.  The Germans have to commit there defences along a theoretical 12 x 3 layout with  two layers of off table reserves.  The British then decide where the actual attack will happen.  If the German's spread their defences too thin and keep their reserves too far away will they be able to hold Montgomery's offensive?  Or if they commit too far forward and in the wrong place will it be a walk over for the British?

All I need is a further 4 feet of concertina wire and I'm ready to go.  This is also the format I will use for a future D-Day operational game so it will be a great try out for an amphibious assault.

Tunisia

                               Image result for tunisia campaign


We have had two brilliant encounter operational  in the desert.  This would introduce mountainous terrain into our battles.  Both sides layout the battlefield and objective points and then slug it out with whatever wide variety of forces they wish to employ; well equipped but green Americans, 1940 vintage French, paratroopers on both sides,  well motivated German and British regulars and less motivated Italians - this battle has the lot.

I am ready to go with this one.

East Africa 

                                  Image result for east african campaign ww2


This is the first British (and Allied) campaign victory of WW2.  It secured a relatively secure shipping route through the Suez Canal and witnessed the first liberation of an Axis occupied country (Ethiopia if you are ever asked in a pub quiz!).  However, it has largely been forgotten in popular history.

But we don't do just popular history - this game will require a significant mountain chain across 2A, 2B, 2C and 3B.  There will be outlying fortresses, railway tunnels and significant mountain fighting as both sides commit what are essentially colonial troops to secure Mussolini's Empire.

Mark has the final components I require on order from Kallistra and then I need a few weeks to construct railway embankments and tunnels - this is imminent and will be the ultimate mountain desert game.

WW1 Somme

                                      Image result for somme battlefield

We discussed this earlier on in the year when we hoped to convince another player from the club to join us for 3 aside plus one umpire operational game amidst the trenches.  We are ready to go on this but we need that other player!

Fulda Gap 1986


                                      Image result for soviet v nato battlefield

I suspect we have everything for a standard operational attacker v defender game featuring the Soviet Behemoth attacking a British/West German/French defence.  We probably just need to get a better understanding of the rules, weapons and doctrine before we unleash WW3.

The Bridge at Remagen

                                                   Image result for v2


Only it's the Germans on the attack.  The Americans must defend their bridgehead on a standard attacker v defender operational game.  The Ludendorf bridge is on 3B and the Americans do not have the option of deploying a pontoon across the Rhine on 2B.

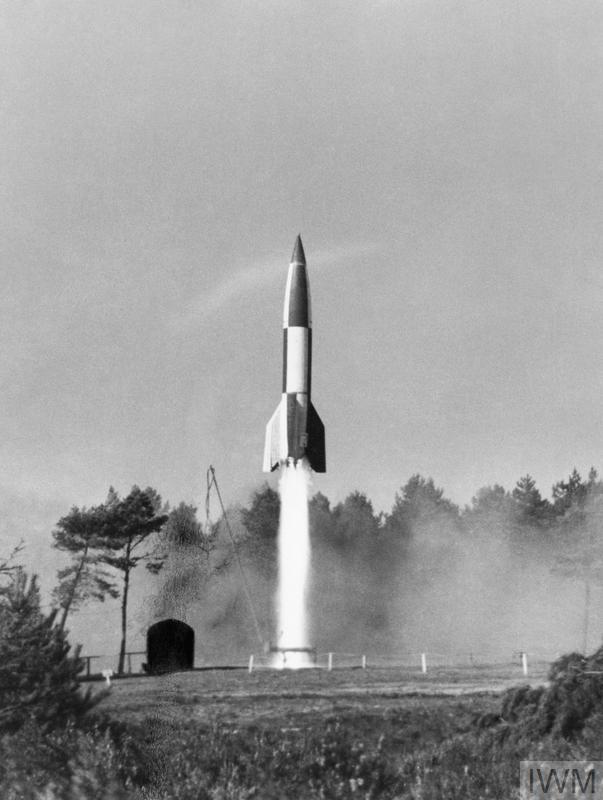
Hitler has ordered an all out attack with all reserves in order to stabilise the Western front.  Green Volksgrenadiers and veteran SS Panzer units spearhead an attack employing all the latest wonder weapons.  Jagd Tigers and King Tigers dominate the battlefield whilst the latest jets wrest local air superiority from the Allies.  Meanwhile off table V2 rocket batteries attempt to destroy the bridge and cut off the American supply line.

This is a chance to use all the toys in a "what if " 1945 scenario.  The German equipment is expensive and should ensure that the Americans get a good choice of troops to defend the battlefield.  The jets will be immune to AA and fighter cap but will have a limited choice of targets due to their speed and the risk of bad landings exacerbated if the Allies attack their airfields.  The V2 has an option of firing on the hour but if it fires consecutively the Allies may well discover it's location and destroy it.  If the V2 moves each time it fires it will miss a turn but will remain concealed (I will use this rule for Iraqi Scuds in a future game).

Not much to produce for this game.  Does any one wants to make up to four late war German jet models for the game?  I'm prepared to make the V2 - it's attack will be simulated to one side of the main game by lobbing a ball into a small cup - it's easier and more fun than working out the ballistics!

The Road to Korramshar

                                        Image result for ayatollah khomeini


This will be my first Iran-Iraq war operational game and this will take a while for me to get ready.  Apart from the armies I will need to make motorways. date plantations, waterways in the desert. oil refineries, power stations and a Middle Eastern city.  However, I am making headway and hope to put on some scenarios in the coming months.

I'm quite excited by this project as I think the poor command and control but employment of very sophisticated weaponry will give us an easier route into modern spearhead.  In addition, I am able to further develop my desert terrain; there are offensives in the mountains, across large waterways and unique as far as I can determine, huge operational battles in marshes!


Sorry about the size of this post but this is also an aide memoire for me.  I wanted to make sure I wrote down all my ideas - especially the Remagen game; I've been reading Kesselrings memoirs and this was what he was planning to do if he'd had the time and resources to hand - I think it would be a corker!

Friday 7 September 2018

Battle Of Edge Hill

On the 23rd October 1642 the first battle of the English Civil war took place between the two villages of Kineton and Radway in south Warwickshire in open fields.

Ian and I played it at his house today on a 6ft a x 4ft table


It has been some time since we fought an ECW battled and I thought it would be a good idea to play this one again as I remember it being a very good game last time in 2011.


I had played the Parliamentarian forces last time so elected to take the Royalist side.


Ian had set both armies up historically so I was pretty much happy to go with the flow and not mess around with the initial deployments.


Pre battle photos.... 


Ian deploys his dragoons in the fields  - a standard cunning trick from the master


Photo from above.... Prince Ruperts cavalry are setup on the right flank with the centre command of Royalist infantry poised to advance in the middle ground


Windy miller has just popped to the shops...


Royalist pike & shot units awaiting their orders....


Turn 1 and we are away. I felt that the setup meant no fancy stuff so my initial orders were all attack. Rupert on the right was ordered to charge the parliamentarian cavalry over on the other side of the table. My superior numbers and troops meant I was odds on before any dice were thrown.


Centre command slowly advances at 4" per turn


After turn 1 - Ian holds the position. My entire army has advanced


Rupert's cavalry were all class 5 elite so moved at max speed 10". On turn two I had managed to charge into the parliamentarian cavalry with devastating effect. Ian rolled very well on his shooting phase prior to the initial charge and inflicted 3 casualties across my line but after passing every morale test I was not stopping here!

The next turn saw me plough into the cavalry and Ian's second volley was almost negated by the charge modifier by gallopers so did not cause any casualties on my units.

I rolled on the 100 table inflicting 7 casualties. Needless to say Ian's line disintegrated and holes appeared.


Over in the centre my infantry cross the open fields of Warwickshire... uncomfortably close those guns.


Over on the left flank where technically I had a clear advantage things did not go to plan.

I only managed to charge in 50% of the units as Ian had protected his flanks using his infantry


Shaken...not stirred was the result


3 turns in and the battlefield is developing


After smashing my way through Ian's left cavalry command my biggest problem now was trying to control class 5 elite cavalry who simply just went off and did their own thing. After I hit and caused retire results I had to pursue and then went shaken as there were no new targets to contact.


Ruperts command..... all over the place but historically correct as they went off looting during the actual battle. By problem here was that I could simply not re organise an attack because the baggage was luring my units in


Tunr 5 and I am getting closer to reaching the infantry in the centre... The guns are now in effect and have already started to soften me up


Over on the left Ian changes an order and sends in some infantry to help finish off my weak attack


Charged by pikes!


Not ideal for me. Ian maximises his forces to ensure the best possible outcome but the result is mixed and I manged to hold on.


Over in the centre I was starting to feel the pressure as I quickly realised my infantry were not going to break through without some cavalry support to hit Ian's flanks. Two of my units were shaken from cannon fire so could not advance!


End of turn 5 close but not close enough...


Ruperts forces in chaos but there is nothing left of the Parliament horses over here.


Ian charged my commander and killed him to the man so I has no command points to issue on the left.


In the centre I managed to get one unit in but it got thumped. The majority of my other units was shaken again.


On turn 7 Rupert manages to re organise his cavalry. It was too little too late though


I was lucky enough to roll a 6 on the left and re order my newly appointed general to attack Ian's infantry in the flank in a last gasp attempt to break his army and send it on hold.


In they go.. come on lads don't let me down

in the centre it's getting desperate for the Royalists now.


Rupert is on his way over to rescue the left flank but he missed the bus by a mile


Last turn and after charging in on the left Ian needed to make a morale roll.

For some very strange reason neither of us has rolled a single "20" all day which I think must be a first for POW and that devil dice of Ian's, however after tempting fate Ian delivered the 20 I was looking for but it made no difference as he had won the melee so was just shaken


Much blood had been split on both sides but the Royalist attack faltered and my centre was close to collapse.


Final turn..... Ian had held on to claim a solid win for parliament but we both agreed that earlier on when Rupert's attack smashed through on the right things looked decidedly dodgy but the cavalry on the left which was meant to win was ineffective so my infantry were left to try and punch through in the centre on their own. I think even I thought this was a little optimistic in the end.


King Charles enjoys a well earned rest after a brutal defeat....


Kineton Church....


Royalist Pike & Shot.... Ready for battle


Well played to Ian and an enjoyable day. Even though we had not played the rules for some time we were pretty quick to pick things up as we left them last time. POW Renaissance are a solid set of rules which have stood the test of time.

The result felt historically "right" and I think the rules are clever enough to simulate the period nicely.

Would like to play out the other battles of the war too at some point.