Thursday 23 February 2017

Winter war is (pretty much) here.

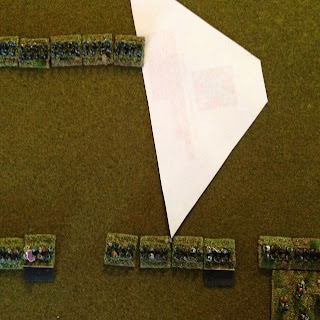
After many hours of painting and rebasing (and painting old bases as well) I can inform you that both German and Russian forces for 1941 to 1945 are done in winter uniform and camo.  The Russian tanks I'm keeping in Russian green for the time being (if only to differentiate from their German counterparts which have winter camo schemes of various types).

Russian troops are mostly in brown winter coats, padded jackets and fur hats while the Germans have a greater mix of uniforms (some white, some field grey etc.) and will include Waffen SS in their autumn / winter smocks.  I will do some work on the tank and APC's to give the SS their own Panzer colour scheme but that can come when required.

The end result fills some 26 boxes (if we include aircraft, trucks, armoured train, artillery etc.) so I think all bases are covered!

Just need to do some terrain boards now...should be simple enough (talus + white emulsion!)


Fuck You Doris

Whilst trying to sleep after my night shift ,I got disturbed by the neighbour from across the road banging on the door to tell me that ,due to the howling bloody gale outside,the garden fence and its brick supports was about to fall into the road. Managed to get outside in time to convince the swaying structure to fall into the garden and not the road. Coupled with the fact that some knob head teenager smashed into my mum whilst skiing in Austria and left her lying in the snow, for dead, with a broken pelvis, this week has just been cack. I'm just waiting for someone to kick me in the bollocks.
On the plus side, I mentioned to Pete at Baccus in an email that went with my last order for some ACW figures, that they were to be my command stands for Joy of Six and he turned it around in just over a week.

P.s This post will go under the label Rant along with the other rants we have had.


Wednesday 22 February 2017

Thursday night in the Western Desert.

Image result for operation compass
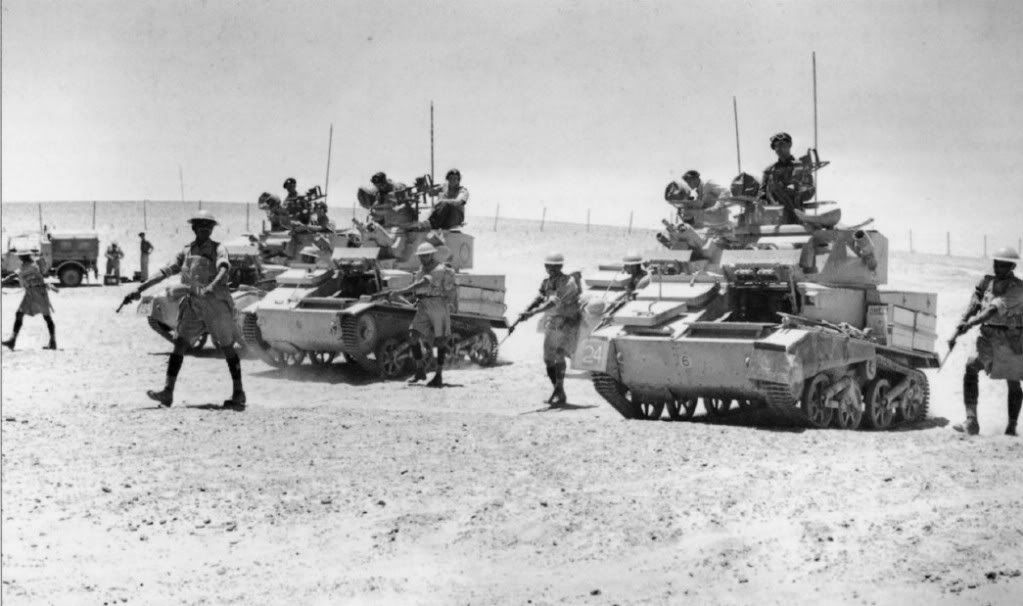
Britain's Western Desert Force inflicts an enormous defeat on the Italians in the winter of 1940/41.  Operation Compass is one of Britain's greatest victories and coupled with the Battle of Britain led to Churchill feeling over confident.

Just a brief outline of tomorrow nights game.  It is set in early spring 1941 and Rommel has dramatically taken charge of the axis armies in North Africa.  The Italian Empire is on the verge of collapse and Hitler has sent his best general to hold Tripoli in Libya against the British.  The British, through Ultra, have a copy of Rommel's instructions and know that he has been ordered to maintain a defensive posture.  Forewarned, Churchill has decided to call a halt to the triumphant British offensive and move scarce military resources to beleaguered Greece in an attempt to keep Britain fighting on the continent.


Unfortunately for Britain, Rommel seldom obeys orders.  A keen exponent of Blitzkrieg, he launches an offensive against the overstretched British with whatever mobile forces he has to hand.  He believes that the key to victory is to unbalance your enemy and then ruthlessly exploit the ensuing confusion.  He did this in world war one against the Italians, he did it in 1940 against the French and he is about to do it again in North Africa, launching the legend of the "Desert Fox".


Image result for mechili april 1941


Our game is set east of Benghazi at the important cross roads of Mechili.  Two Indian battalions and an Australian Antitank regiment have been scraped together by the HQ of 2nd Armoured Division in an attempt to counter the Axis offensive.  However, Rommel is determined to capture the HQ staff and destroy this vestige of resistance before pushing on to Tobruk and the Egyptian border.


Image result for mechili april 1941


Will the Commonwealth forces hold and resist or pull out to fight another day?  Has Rommel overstretched himself or secured another triumph?  We will see Thursday night.

Friday 17 February 2017

My recommendations - Terrain Board Tutorial


Well, here goes nothing!


I have watched this video and I think that the actual flock colours used and techniques would sit well with what we are trying to accomplish on our operational boards.


I thought to share this to see what we all think?


Jon and I had a chat about conformity and using the same flocks across all the boards so I thought this would be a good starting point to work from.


It's not the holy grail by any means, just something I stumbled on and thought it could be inspirational?


Anyway if you have time watch the vid and feedback your comments that would be great.

The sooner we can all agree on the materials means we can buy the flocks and materials mentioned and have a go.


I think the D Day board looks fantastic and if we can replicate these effects on our boards I think we would all be pretty pleased with the result.


Modern Spearhead :North Korean OOB


PDF Print E-mail

Just an example of the excellent resource material on the Modern Spearhead website


korea north
Quality: WARPAC 2 (except Border Defence Battalions, which are Third World)
Morale: Regular (except Border Defence Battalions, which are Green)
9 Border Defence Battalions, each:
Headquarters: 1 x HQ Stand, 1 x Type 31 60mm Mortar.
3 Infantry Companies, each: 2 x Infantry Stands*.
3 Marine Battalions:
(details unknown)
1 Commando Battalion:
(details unknown)
1 Motorcycle ‘Regiment’**:
Headquarters: 1 x HQ Stand & Truck.
1 Recce Platoon: 1 x Recon Motorcycle Combo LMG Stand***.
1 Armoured Recce Company: 2 x Recon BA-64B Armoured Cars
1 Motorised Recce Company: 2 x Recon SMG Infantry Stands with 1 Truck & 1 Motorcycle Stand***.
3 Tank ‘Regiments’, each**:
Headquarters: 1 x HQ T34/85.
3 ‘Battalions’, each: 3 x T-34/85.
1 Corps Artillery Regiment:
1 Howitzer Battalion: 3 x M38 122mm Howitzers & Horse-drawn limbers, FO.
1 Anti-Tank Battalion: 4 x M1944 100mm ATGs & Lorries.
(Most likely 4 Batteries of 1 Stand each).

From 1951 Add:

Corps Artillery Regiment (additional units):
1 Mortar Battalion: 3 x M43 120mm Mortars & Horse-drawn limbers, FO.
1 AA Battalion: 4 x M39 37mm AA Guns & Trucks.
3 AA Companies, each: 3 x 12.7mm AA HMG.
* Border Defence Infantry are AI 4-6" and have no AT or ATGW factors.
 ** Treat the Motorcycle & Tank “Regiments” as Battalions as per the rules. Tank “Battalions” may be attached out as if “Companies”.
*** The Recon Motorcycle LMG Stand is AI 5-6" (with no AT or ATGW), and the Mechanised Recon SMG Infantry Stands are AT 0-3" and AI 5-3” and have no ATGW factor.

Operational game tables

Table 1D
1point for the Village

Table 2D
1 point for the village, 1point for the ford
What movement restrictions are there for the small river?

Table 3A
All boards are attacked from the top.
3A will have larger woods top left and a large hill on the right
Airfield will have Grey runway with 3 No village sectors filled with airfield buildings/bunkers
each worth a point


Wednesday 15 February 2017

ACW Rules: Week Three:Charging

I will give you three seconds! Exactly three f**king seconds, to wipe that stupid grin off your face, or I will gouge out your eyeballs and skull-f**k you!


Simple Charge :One V One
The confederate brigade bottom center has elected to charge the Union Brigade at top. To do so it echelons with the center of the attacking brigade moving directly toward the nearest point of the defending brigade.
Contact! Fire is resolved first. Note if the attacking or defending brigade becomes disordered as a result of fire, that is carried into the close combat ,however a brigade becoming worn or spent as a result of this fire is not. The units effectiveness level stays the same from the moment the unit is contacted until the close combat is resolved. This includes a second round of combat if the first is a desperate struggle (draw).   In this example neither unit is disordered ,neither unit has a rear rank so has no support, both are fresh (+2), the Union unit has a 3:2 advantage on numbers (conf -1), and the Confederates are charging (+1). Its then a die roll off.

Simple Charge :Two V One
The Confederate player has decided to push a second brigade into the combat.
The unit on the bottom left has wheeled right and now charges with its center toward the nearest part of the enemy unit. It did not START its charge with two of its stand behind the front of the Union unit so is not outflanking it
Contact! Note the Confederate player does not get a second +1 modifier for Confederates charging but can now put more fire onto the Union unit and is no longer outnumbered so does not take a -1 . As there is a 1" gap between the two confederate units that charged, the unit at the bottom can fire at the defending unit also. The Union unit will be able to split its defensive fire across the two charging units BUT the union stand 3 from left cannot fire, as no target is within its 45degree arc and a brigade cannot split its fire more than twice.

SUPPORT

A rebel 7 stand unit in supported line has charged a yankee 6 stand unit in Line. The Rebel unit is counted as supported +1, the stands in both its front and rear rank can fire in the close combat and count in the fight. It is NOT a dense target.
A single 4 stand rebel brigade in LINE has charged a 6 stand yankee unit. A second 4 stand rebel brigade has moved up  behind the first also in LINE. Because it is within 1" of the front line of the clash the First rebel brigade is now supported. The stands from the supporting brigade can also fire and count toward the close combat numbers. Should casualties be taken they should be removed from the Leading Brigade First, then the Rear Brigade and then the Leading and so on. If the attacking brigade is driven back and /or disordered the supporting brigade is also driven back and/or disordered and if the worst happens and the attacker routs the supporting brigade goes to.
Even though this rebel unit is with 1" of the attacking unit it is NOT supporting although it may fire on the defending unit. To be supporting over half its stand must be directly behind the first unit and within 1" of the clash
Rebel unit in the bottom center is NOT supporting the attack of the other two
A single 4 stand Rebel unit has charged a 6 stand yankee unit. A second 8 stand Rebel unit in supported line has moved up behind the first Rebel unit. In the close combat that follows the First rebel unit is now supported (+1) but only the second rank (the first rank of the supporting brigade) may add its fire and stands into the close combat. The third rank are just cheerleading.
A Rebel 8 stand unit in supported line has charged a 6 stand Yankee unit. A second 4 stand unit in line has moved up behind it and a third 3 stand unit has moved onto its left. The 1st rebel unit counts as supported because it is in supported line formation (+1). The second rebel unit takes no part in the fire or close combat that follows. The third unit can fire on the defender but does not count as support.

Multiple Units

Mahone Brigade (4stands) has charged a 6 stand Yankee brigade. Lanes Brigade (5 stands) has also charged and contacted the same brigade. Because both Brigades have contacted the enemy the full strength of both brigades is added to the combat. However the yankee unit has a Brigade in support(+1), and the four stands in the front rank of the supporting yankee unit can fire and will be added to the close combat. The third rank takes no part in the action. To ensure success the Confederate player moves Wright up to support Mahone adding his 4 stands into the fire and close combat and Wilcox up to support Lane therefore adding his 3 stands to the fire and close combat. Note the confederate player only get a +1 modifier for support. It is not cumulative. If the Yankee unit is pushed back etc the supporting brigade is also pushed back. If the Confederates are pushed back all four rebel brigades will be pushed back.  In the event of a breakthrough all four rebel units will move forward.

Incidental and Participating Units
Only a defending unit can be Incidental. Attacking units must either be in contact, support or taking no part. An attacking unit cannot move to within 1" of an defending unit without intending to charge that turn.
Two rebel units have charged and contacted a yankee unit. All the rebel stands will take part in the close combat. However a second yankee unit is now within 1" of the front line of the assault.(it can also be contacted incidentally)  Less than 50% of its stands are to the enemies front so the second yankee brigade becomes incidental. It may fire and also ADD UP TO half its strength into the combat. It MUST add at least ONE. It does NOT count as Supporting the first
As an Incidental  it does not suffer the fate of the defending brigade but if the defender loses it must wheel or refuse stands to allow the attacker to occupy the defenders ground.
Similar situation accept now over 50% of the second unit is to the enemies front. Even though it has not been contacted it is within 1" of the front line and so is NOT INCIDENTAL but PARTICIPATING. Its full strength will count toward the close combat resolution and it will suffer the same fate as the unit that has been contacted. It does NOT count as supporting.

Artillery Batteries in Close Combat
Artillery Batteries have NO Flank. An artillery battery that is not touching a friendly infantry or dismounted cavalry stand counts as Worn when Normal in Close Combat and as Spent if it is Damaged. A limbered artillery unit must immediately attempt to fall back its full movement. Having done so the enemy unit may continue to move and if it catches the limbered artillery it is destroyed. An artillery unit that is touching a friendly infantry stand or dismounted cavalry stand is attached to that Brigade, and even if it is contacted on the end of the Line, the Infantry brigade counts as being contacted, not the Artillery and the artillery stand just becomes an extra stand in the Brigade sharing its fate.

And so ends Week 3. If you still have the guts join us for week 4. Live firing exercises

ACW Rules:Week TWO:Leaders,Bridges,Charging

You little scumbag! I've got your name! I've got your ass! You will not laugh! You will not cry! You will learn by the numbers! I will teach you!

Welcome to Week Two
Due to some of the subject matter ,this week of Boot Camp has the honorary title of Burnsides Week.

Leaders

There are four levels of command in the rules although not all may be present in a scenario or on the battlefield at the beginning of an engagement.
Left to Right: Brigade, Division, Corps, Army

Your first level is your Brigade HQ. Its an integral part of each brigade ,is represented by a HQ stand the same size as your fighting stands and has unit and morale information on the back. It can fire and fight in close combat. Once the units normal fighting stands are destroyed the HQ unit automatically skedaddles. A Brigade HQ that has an exceptional commander is annotated by a white stripe along its morale information, This gives a +1 on the movement role. 

Your second level is Division. Represented by a Command stand with 3 mounted officers. Usually commanding between one and six brigades depending on whether its Union or Confederate. It has a command radius of 18" and can move 18" per turn. A divisional commander can either be attached or unattached to a brigade UNDER HIS COMMAND . An attached divisional leader gives a +2 modifier to the brigade he is attached to but he cannot influence his other commands. If unattached the divisional commander gives a +1 modifier to All his brigades that are BOTH within range AND within line of sight. If a Divisional commander is Exceptional this will be indicated by the Scenario OOB (not on the stand) and will confer an additional +1 in the above circumstances. 

Your third level is Corps. This is represent by a larger command stand with four mounted officers. Normally commanding between one to five divisions, the Corps commander works in exactly the same way as the Divisional commander except that he can confer his modifiers to any Brigades within the Divisions that he commands. This modifier is cumulative with the divisional commander so it is possible that with both in the same place a weak brigade may be held in the line.   If a Corps commander is Exceptional this will be indicated by the Scenario OOB (not on the stand) and will confer an additional +1 in the above circumstances.

The final level is your Army C-in-C represented by a large single stand with a vignette or collection of mounted and dismounted officers and flags. He may command as few as one or as many as twelve corps. He has a command radius of 18" and his modifiers can effect all the Brigades within his army. This modifier is cumulative with the commanders below him. If a Army commander is Exceptional this will be indicated by the Scenario OOB (not on the stand) and will confer an additional +1 in the above circumstances.
Confederate Brigades and their Leaders. 3 of the Brigades(RED) are from Andersons Division and he is placed behind them conferring a +1 to each of his Brigades
The Artillery Battery although part of Andersons Division does not require to roll on the manoeuver table and so does not need a modifier
Lanes Brigade (Green) is not part of Andersons Division and cannot benefit from Andersons modifier. Assuming in this example that Lanes divisional commander is over 18" away the Corps commander A.P Hill has moved over to attach himself to Lane conferring a +2 modifier (+1 for leader,+1 for being attached). However this means that Hill cannot give his leadership modifiers to the Brigades of Andersons Division on Lanes left.
General Lee is the Army Level Commander. He is concerned for this area of the battle field and has moved across to add his support. Lee is an exceptional commander so he adds a +1 to each of his Brigades within 18" and another +1 to each of the Brigades for being Exceptional
So in effect
The three Red Brigades of Andersons Division are on +3 (+1 for divisional commander within 18",+1 for Army level commander within 18" and +1 because the Army level commander s exceptional)
The Green Brigade is on a +4 (+2 for attached Corps commander, +1 for Army commander Lee within 18" and +1 because Lee is Exceptional)
Leaders can become casualties. Any leader who is attached to a unit that suffers a unmodified attack role  of 10 in firing or close combat should be rolled for on the leader casualty table.

BRIDGES and FORDS
Burnsides Bridge (Battle of Sharpsburg) The musket smoke on the ridge behind, is a dug in Confederate brigade.

There is only one way to cross a Bridge or Ford (BF)and that is in March Column. A unit that wishes to cross a BF that is not already in march column, must have at least half its move left when it reaches the BF in whatever formation it is in i.e line, supported line (its irrelevant).
When it reaches the BF it automatically contracts into march column. If the BF is undefended the unit is placed on the other side with the rear of its stands touching the BF in whichever formation the player chooses. However if the unit is in firing range of any enemy units (short or long range) they will/may fire on it as if it were a unit in march column formation during the defensive fire phase with all the modifiers associated with that formation. If the unit becomes disordered as a result of this fire it may still form up on the other side but will be disordered as per the result. If it is forced to withdraw across the bridge it will reform in its original formation with the relevant casualties etc.  If the BF s defended by enemy units that are with 3" of the far side of the BF then the crossing Brigade must charge the defending unit in March Column, taking defensive fire as it crosses and fighting close combat charge resolution as a unit in March column. Should it win the close combat it may reform into line or double line. It may not breakthrough charge, whatever the result. A unit that reaches a BF already in march column can cross as if it was a normal movement and may continue its normal movement on the far side provided that the BF isn't defended in which case the moving brigade must charge the defending unit in order to cross as above.

A Union Brigade in Line approaches a bridge defended by a Confederate mixed unit of infantry and Artillery
Having half its movement left the Union player elects to push his luck and charge the bridge. The Union brigade automatically contracts into a March Column and crosses the Bridge charging the defending artillery stand as it does so.
The Union brigade takes close range canister fire and infantry fire. As a column and in march formation it takes multiple modifiers, loses stands and is forced back across the bridge were it reforms disordered.

On this occasion the Confederate player (probably Ian) has rolled shocking shooting and close combat dice and has lost the melee. The confederate Brigade is forced back and the Union brigade takes the ground and reforms on the hill.


In this case the Union brigade has been allowed to reform on the far side as no enemy units were within 3" of the far side of the bridge but it will take defensive fire as if it were in march column during the defensive fire phase and may still be forced back by the result.
CHARGING
I was going to cover charging in his blog but it got very long with the number of examples I wanted to shot so it now has its own article: see  Week3

Tuesday 14 February 2017

ACW Rules:Bootcamp Week One:Formations and Movement


This is my rifle, this is my gun, this is for fighting ,this is for fun!

As promised the first of the American Civil War workshops. I'll be posting a number of these before the ACW month in March and while this is aimed specifically at preparing you budding General Shermans for Joy of Six, I am investing a lot of time, effort and any spare cash I have after Mary has bought yet another handbag, toward putting on some very nice scenarios later on in the year.

So firstly, the first lesson of boot camp is Formations

LINE
A single line of stands placed side by side. Used by Infantry and the ONLY formation that dismounted cavalry may use. It may conform to terrain i.e edge of wood , hill , wall or stream. It is the ONLY formation that can refuse its flanks by UP TO 45 degrees
A unit in LINE may may move up to 12".

It may either :
Wheel ONCE UP TO 45 degrees at any point during the move, pivoting on the front outside corner of either end before moving forward again.
In the example below the Union Brigade advance forward, before starting a wheel around the hill of approx. 40degrees and then continuing straight forward.


OR the Brigade may move Oblique UP TO 45 degrees UP TO its full movement rate with all stands facing in their initial direction at the end of the move.


A Brigade in LINE may also move BY THE FLANK (sideways) at half speed. It may not wheel during this movement but it may oblique by UP TO 45degrees

SUPPORTED LINE


Two evenly distributed lines. Only the FRONT rank may fire in normal musketry however BOTH ranks will fire if the unit charges or is charged in CLOSE COMBAT. In CLOSE COMBAT all the stands are counted as engaged and the UNIT counts as being SUPPORTED so gets a +1 in the CHARGE phase. It moves in the same way as the LINE formation but cannot REFUSE A FLANK or CONFORM to TERRAIN. Used by Infantry and MOUNTED cavalry brigades.
FIELD COLUMN

Two Columns of equally distributed stands. The BRIGADE MUST be of 5 stands or more or it is deemed to be a SUPPORTED LINE. It receives a +1 when rolling on the manoeuvre table. It may change direction as often as the player likes and in firing and charging it fights like a supported line.
Units firing on a Brigade in Column get a +1 modifier. Used by Infantry and Mounted Cavalry Brigades

MARCH COLUMN

The Brigade, moving one stand behind the other in a single column. Gets a +1 modifier on the movement roll. Only infantry formation to get a road movement bonus (and only when its leading stand is on the road). Can change direction as often as it likes. In normal combat only the leading stand can fire. It may CHARGE along a road, even if the road curves but MUST be able to see the unit being charged at the beginning of the CHARGE. When in Charge contact the First two stands can fire and in the first round of combat only the first two stands can fight. It is the ONLY formation that can cross a BRIDGE or FORD (this will be covered in a later blog). Used by Infantry and Mounted Cavalry Brigades

CHANGING FORMATION
To change formation a player MUST roll on the Rally With Elan or Well Handled.
To change from

FIELD COLUMN INTO LINE OR DOUBLE LINE
Pick a stand, any stand in the column. It must remain in its current position but it may pivot in any direction to any facing. The rest of the stands are now placed on one or both flanks of the chosen stand in the required formation. This change must happen at the beginning of the move and costs half the movement rate. The unit may now move the remaining distance in its new formation. Any fire directed at the Brigade during the Defensive Fire phase gets a +1 modifier for target changing formation.

MARCH COLUMN INTO LINE OR DOUBLE LINE
The formation forms on the LEAD stand in the column. It must remain in its current position but it may pivot in any direction to any facing. The rest of the stands are now placed on one or both flanks of the chosen stand in the required formation. This change must happen at the beginning of the move and costs half the movement rate. The unit may now move the remaining distance in its new formation. Any fire directed at the Brigade during the Defensive Fire phase gets a +1 modifier for target changing formation.

LINE OR SUPPORTED LINE INTO SUPPORTED LINE OR LINE
From Supported line into Line, the rear rank stands can be placed onto one or both flanks of the front rank stands. The Brigade cannot change facing however these stands may be placed REFUSED UP TO 45degrees. This formation change takes UP ALL OF THE BRIGADES MOVEMENT. Any fire directed at the Brigade during the Defensive Fire phase gets a +1 modifier for target changing formation.
From Line into Supported Line, The Brigade CANNOT change facing. Stands are removed from one or both flanks of the Line formation and placed in the same facing behind the front rank. Equal numbers of stands MUST be placed into the rear Rank or one less if its an odd number. . This formation change takes UP ALL OF THE BRIGADES MOVEMENT. Any fire directed at the Brigade during the Defensive Fire phase gets a +1 modifier for target changing formation.

LINE INTO MARCH COLUMN
Pick any one stand in the current formation. Replace it with the Brigade HQ.  This stand may now pivot in any direction and MUST move ALL its remaining HALF movement rate. Once its finished its movement the rest of the Brigades stands fall in behind it following the route of the HQ stand.Any fire directed at the Brigade during the Defensive Fire phase gets a +1 modifier for target changing formation and any modifiers for a March column always being ENFILADED.

LINE OR SUPPORTED INTO FIELD COLUMN
Pick two adjacent stands. These two stands can now pivot in any direction. Form the rest of the Brigade in two equal columns behind these two stands. The Brigade may now move UP TO its remaining HALF movement rate. Any fire directed at the Brigade during the Defensive Fire phase gets a +1 modifier for target changing formation.

MARCH COLUMN INTO FIELD COLUMN
The two leading stands now become the two front stands in the Field Column. They may be pivoted to face in any direction and the rst of the Brigade forms in two equal columns behind them.The Brigade may now move UP TO its remaining HALF movement rate. Any fire directed at the Brigade during the Defensive Fire phase gets a +1 modifier for target changing formation.

ABOUT FACING(don't know why i've never spotted this,but its a small paragraph on page 27)
A Brigade can withdraw, straight backwards,OVER HALF and UP TO its FULL allowed movement rate , and is considered to have done an, about face ,moved away from the enemy and then ,about faced, back toward the enemy. It can also do this when Moving By The Flank or Holding its Ground. It must roll on the RALLY WITH ELAN or WELL HANDLED to do so. Any fire directed against it gets a +1 for change of formation. A unit that only moves backward UP TO half its allowed movement rate is considered to have fallen back, facing the enemy and the +1 modifier is NOT applied.

That concludes Boot Camp Week One. Week Two will include Leaders, Bridge/Ford crossing and Charging