Shock, horror - we've been deploying and calling in artillery wrongly for WW1 Spearhead.
I checked the Yahoo sight and the correct interpretation is thus;
Artillery that is integral to a regiment or is attached from a regimental heavy weapons company adds to the morale break point and can be called in by any fighting company.
Heavy and Super Heavy artillery can never be deployed on table.
Divisional artillery of less than 150mm or 8" can be attached to a regiment but can only fire as a direct fire weapon OR
It can be brigaded with a FO and attached in support - it does not add to the morale break point and because it is from division it will be called in on the divisional support chart.
The above line is very important and is the difference from WW2 Spearhead from which we are used to cherry picking divisional assets, attaching them to battalions and expecting a better chance of rolling for support. WW1 is not the same and the rolls reflect the poorer technology and more rigid lines of communication. As the rules state, in 1914 no army was able to call in indirect artillery unless you were in communication with fortress artillery or naval artillery. As the war progressed communications and technology improved to allow calling in of artillery but it was nowhere near as sophisticated as WW2.
So, we need to appreciate that artillery is called in on the chart that relates to where it is organised on the ToE. Divisional artillery can only be called in by designated FO in a regiment that is part of that division. You may assign divisional artillery to a particular regiment but it is still called in on the divisional support chart - the only benefit is that you don't get a -1 if the divisional HQ has moved.
Artillery at Corps level is called in on the general support chart - again if you do assign it to a regiment the only benefit is that you do not get a -1 if the div HQ moves.
You can assign divisional artillery to general support, and as the rules indicate, this gives greater flexibility as more units can attempt to call it in.
If you buy any artillery assets at Army level then they must be assigned to general support.
The extra artillery allocated for preliminary bombardments are only available for preliminary bombardment. The paragraph at the back of the rulebook is to emphasise that army level artillery you may have bought in for a scenario may be used in the preliminary bombardment and then must be allocated to general support.
But what about trench mortars I hear you shout (or before Russ contacts E-Bay)? Divisional mortars can be attached to the regiments regardless of size BUT they are still called in on the divisional support chart. OR they can be off table, and regardless of their limited range, can only be used against front line barbed wire or trenches.
In general, we have been looking at WW1 from a WW2 perspective. Of course we want to attach as much artillery as possible to a regiment and punch through with a single unit - but this didn't happen. WW1 is the first period of warfare in which indirect can be called in but it is limited to where it is placed in the organisation. The reality is that most artillery is preplanned and we will probably get more success with a well thought out artillery plan.
The other main use of artillery, especially for the heavy and super heavy guns is counter bombardment but that's another post..............
Showing posts with label ww1. Show all posts
Showing posts with label ww1. Show all posts
Wednesday, 18 April 2018

Wednesday, 11 April 2018


Monday, 1 January 2018
The Battle Of Dogger Bank 24th January 1915

I managed to find my missing turn indicators for General Quarters WW1 so I will be putting on the historical scenario of Dogger Bank this Thursday at the club.
The background for the battle is as follows......
On January 23rd 1915, Rear Admiral Hipper was ordered to scout the Dogger Bank region of the North Sea and attack any British light forces in the region. He sailed with the 1st and 2nd scouting groups of three battlecruisers, the large armoured cruiser Blucher and four light cruisers. Unfortunately, the order to Hipper was intercepted and decoded by the British and Vice-Admiral Beatty and his battlecruiser, light cruiser and destroyer force was ordered to rendezvous at Dogger Bank.
The British units left port only minutes after the German fleet.
At day break of 24th January the German light cruiser Kolberg sighted and exchanged fire with the British light cruiser Aurora. Hipper turned his heavy units towards the firing thinking there were only light enemy units in the area. Almost immediately upon turning, the smoke from Beatty's battlecruisers was spotted but Hipper at first thought they were battleships, which he could easily outrun. By the time he realised they were battlecruisers, the range had already dropped to 25,000 yards and the battle was on!
Fleets: The Kaiserliche Marine players start with SMS Seydlitz, SMS Moltke and SMS Derflinger battlecruisers with SMS Blucher armoured cruiser.
The Royal Navy players start with two Lion class battlecruisers (HMS Lion & HMS Princess Royal)
One Invincible class battlecruiser (HMS Indomitable), HMS New Zealand battlecruiser and one Tiger class battlecruiser
Game Length: The game will last 10 turns
Victory & Defeat: If one fleet manages to destroy the other, that side may claim outright victory. If the Kaiserliche Marine players can survive for eight turns they may claim a partial victory only if they have sunk or damaged at least as many ships as they have lost.
Wednesday, 12 October 2016
ILYA MOUROMETZ V (russian wwi bomber)
Mark gave me this bugger to paint some time ago and having stared at it a number of times through the plastic bag I have to say I didn't fancy it and it kept getting thrown back into the 'to do' box. Too many struts.
However our recent foray into WWI convinced me to let this monster out of its incarceration and attempt to put it together and paint it.
Never in the field of war gaming has so many swear words been hollered at one miniature or for that matter at an absent Shakespeare ,however I finally managed to keep the fecker together and I am quite pleased with the out come.
Unfortunately I am well aware that Russ will break this in retribution for the Gotha affair.
Now I have to paint the sodding fighter.


However our recent foray into WWI convinced me to let this monster out of its incarceration and attempt to put it together and paint it.
Never in the field of war gaming has so many swear words been hollered at one miniature or for that matter at an absent Shakespeare ,however I finally managed to keep the fecker together and I am quite pleased with the out come.
Unfortunately I am well aware that Russ will break this in retribution for the Gotha affair.
Now I have to paint the sodding fighter.


Tuesday, 11 October 2016
Verdun
Operational game for WW1 spearhead

Table D1 was left clear for a supposed quick run to the trench line
Wrong!!!!

table C1 the correct approach
blast the hell out of the landscape

table C2

table 3B untouched


table 1D and the Germans have been culled in the open


German off table artillery and air force

Allied off table assets

The fort dies


All that is left from a German division limps onto table 2D

The Germans love gas

Table 2C where the real fighting is


Marks German division passed 3 of its 4 morale rolls
Gut ya !!
Jon's French didn't and the rout to table 3 is open
Merde!!!

Table 2C still in the balance
Cheers Gents
A fine way to spend a day
Thursday, 29 September 2016
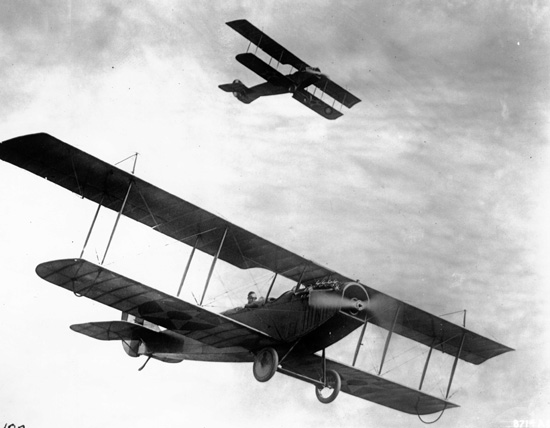
Aircraft and Balloons
Air Craft Rules for WW1 Operational Games
Aircraft attacks commence on the hour every hour.
Aircraft must be given a flight plan to their target including the tables they will cross.
Aircraft must have orders; escort, recon, attack.
Unescorted bombers are automatically destroyed by fighters.
Fighters automatically drive off other fighters or in a 2:1 dogfight drive off one and are destroyed by the second.
Fighters shoot down balloons on an unmodified 4,5,6 (minus 1 if under AA fire).

Observation Balloons
Observation balloons give a plus 1 to off table indirect fire.
They are also able to conduct counter battery fire against off table targets that have fired.
Monday, 19 September 2016
1916 WW1 German Corp

Here are the points value for a WW1 German Army Corp
Note that I did not include the Corp HQ stand or both Divisional HQ's - only regimental.
If it is deemed necessary then add another 15 points to this list.
I also omitted the 2 divisional cavalry stands as I don't have any.
Regimental HQ = 5 points
3 Infantry Batallions of 4 companies each = 60 points
3 MG = 21 points
1 Stostruppen = 7 points
Total = 96 x 7 regiments = 658 points
18 x 77mm guns = 108 points
6 x 105mm howitzer = 54 points
2 x 24cm mortar = 24 points
2 x 17cm mortar = 20 points
4 x 76mm mortar - 16 points
3 x engineers = 15 points
2 x 150 howitzer = 22 points
1 x 170mm mortar = 20 points
Total = 966 Points
Depending on who is down this week and any other preferences I will be happy to put on a General Quarters game?
I would not mind using my WW2 Russian fleet if anyone can field an opposing fleet?
Failing that there is WW1 British V Germans.
Tuesday, 6 September 2016
General haigs drinks cabinet
Saturday we set up for a WW1 game using the multiple table system.
We had done all the pre bombardment on Thursday night
The British had bombarded most of the tables for 6 days and turned the landscape into utter ruin.
The long pre bombardment had given the Germans (who were defending) an extra regiment in reserve.
The British plan was to attack with the whole corps ( yes a whole corps!!) across the whole front, with no reserves in order to get General Haig's drinks cabinet closer to Berlin
The Germans only placed troops on one forward table with the rest of the division held back at table 3 to ovoid most of the bombardment.

Table 1C
German regiment still here.
They didn't get the recall orders to a safe area like the rest of the division
pre bombardment took out a battalion (4 stands)

Table 1D

Table 2C
the real defence line

Table 2D
the strong sector with extra wire

Table 3B
The safe sector.
Most of the division was here for the pre bombardment, drinking schnapps and eating sausages.
The British only targeted this area once with one super heavy gun and missed

British assault pores thru and the German regiment falls back (That's twice now Oberst Shakespeare)
The Germans were caught and routed for Feck all!

The British moving thru 1D
those trenches look suspiciously empty, it could be a trap
( No they were empty)

The British run up against the real defence line
but pre planned gas puts a hole in the defence

The same on 2D

Fire fights, assaults, pushback and breakthroughs along the line


German reserve regiment come in to plug a gap

Desperate defence along the line


The breakthrough happened at 2D and with no reserves to hand the German line was broken
general Haig's drinks cabinet moves forward.
A well executed plan Russ
Well organised again Ian
Great game Gents, thanks for putting it on
I need more Russians
Monday, 5 September 2016
Saturday's WW1 Operational Game
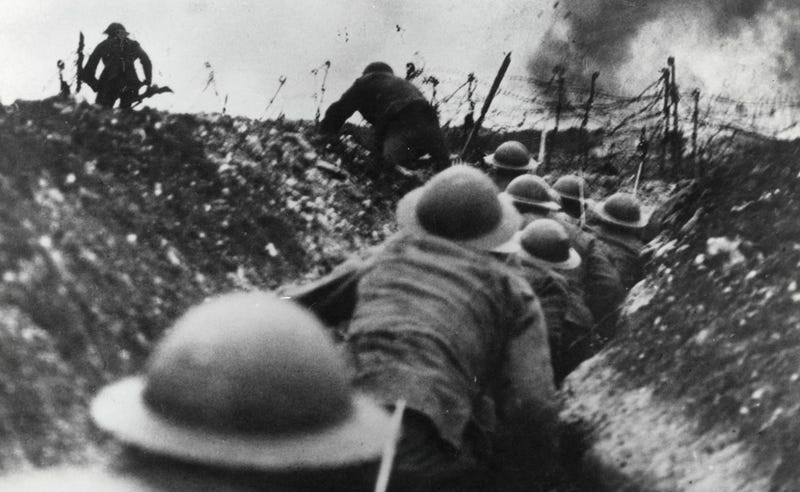
Great game on Saturday. Operational WW1 works. Mark took some pictures which I hope we will see blogged before long.
Russ went with a straight forward full Corp attack with a division advancing down each table. He had rolled four days prebombardment, and as it was the Somme I did not allow him to reduce the amount of days. As Mark would get an extra regiment for the bombardment lasting more than three days, Russ opted to take an extra two days as per the rules.
The bombardment was reasonably effective, destroying some of the front kine wire and most of the pill boxes and bunkers but as Mark kept most of his troops on the back table, the Germans suffered few casualties.
However, he had placed one regiment in the BUA on 1C. This suffered some losses before the attack commenced but as the British charged across no-mans land few casualties were inflicted by the defenders and Mark elected to retire from the town and augment his second line. Once more this tactic failed and the British were able to maintain their timetable whilst this regiment was caught and routed in the open. 1D was undefended and the Germans were reliant on their second line.
Russ had kept no reserves off table as he reasoned that the shelled ground would hold up any reinforcements and so both tables were assaulted by a ratio of 3:1. More importantly the lack of hold ups on the first line of tables meant that both divisions attacked the second line on time and in synch with their preplanned artillery. Gas attacks seriously weakened the centres of both tables and the German fire was being spread across a full corp. By attaching engineers Russ was able to wire in both divisions enabling better communication for a follow up attack on table 3. The British were making good time against the trench line when Mark counter attacked with his carefully husbanded reserve onto 2C. On this table the British began to waver but as the day waned the single defending regiment on 2D routed. Russ (after many attempts) was able to send a flank attack from this table against the counter attacking Germans on 1C which stabilised this table. In the final turn, Russ was able to assault table three from 1C and had overwhelming numbers ready and prepared on 2D. The Germans had only a battery of 105mms on table three and so by 5.00pm it was declared a British victory!
We managed 20 turns and plenty of talking on Saturday. We got a result with two players and an umpire on half the usual tables, so I would declare this a success.
I definitely think we could do a 2 x Corp attack against a 1 x Corp defence - this would give the defender more assets including army level reinforcements for a more interesting game. We can use Aircraft and Observation balloons. The balloon would give a plus one for support fire and be able to call in artillery on its own against spotted targets across all the tables. Aircraft will scout and reveal HQs or swoop down for more detailed recon and suffer possible AA.
Well done Russ and Mark for an excellently played game!
Tuesday, 30 August 2016
WW1 Operational Rules

This Saturday is our first attempt at trying a WW1 operational game. Russ has completed the trenches and barbed wire as well as providing the British and German troops and I promised to put some thought into the actual rules, so here goes;
As there are only three of us we will use half the operational map, 1C, 1D, 2C, 2D & 3B. We will use exactly the same terrain as the WW2 games - Russ can you make sure you bring your photos to enable a fast set up on Saturday.
In future games when we use the full set of tables I will change the river line to a marsh with a ridge line for WW1 battles.
As it's the 100th anniversary of the Somme the British will be attacking. This will be the first time that the British will have been fully deployed and Russ has been busy getting them ready for the "Big Push". A full corp of Pals battalions ready to knock the Hun for Six!
The Germans will deploy a full division in defence - although there may be more reinforcements if the British prolong their preliminary bombardment.
I propose Russ takes charge of the British and Mark takes charge of the Germans. Russ, you are more familiar with your troops. I will umpire or step in if Mark is baby sitting cats or surprised by a sudden wedding!
We will use the rules as outlined from Page 56; please familiarise yourselves with this before Thursday when we will conduct the preliminary bombardment.
Instead of six areas we will bombard by table, but there will be limitations in range;
100mm< = 1x table adjacent.
101mm - 149mm = 2x tables
150mm> = 3x tables.
British artillery attached to brigades will partake in the preliminary bombardment.
Each turn the Germans can move reinforcements from one table to another. Each turn the British will bombard every target type chosen on a particular table.
Mark, you will need to allocate troops secretly. Trenches, barbed wire and other defences will be indicated prior to the preliminary bombardment.
Both of you will need to plan any preplanned bombardments for when the game begins on Saturday. Again give it some thought for Thursday.
On page 59 there is an example of play that is basically a blue print for Saturday - please read it. I was going to set the game in July 1916 so we won't be using the late war additional artillery.
Russ, you will need to attack in waves as outlined in 15.2.6. Your troops will be attacking from the table edge so you can set them up off table. I will let you choose to use a brigade in line followed next turn by another or split a brigade into first line and support line. This may effect your command and control.
Command zones for Divisional commanders are anywhere upon the table on which they are situated. Dug in divisional commanders can command units on adjacent tables - obviously important for the Germans but does allow the British to dig in and expand their area of occupation (this would require engineering!). Corp commanders can control subordinates on adjacent tables or x2 tables if dug in.
EXTRA, EXTRA!
Should have added these rules in the original post;
Objective points are 1 for 1st line tables, 2 for 2nd line and 3 for third line. Russ will place an objective marker on the first line of tables, both Russ and Mark will place one each on the 2nd line and Mark will place two and Russ one on the third line.
1-4 points = defeat.
5-6 points = tactical win
8-9 points = strategic breakthrough.
Mark gets to put a continuous line of barbed wire across the first line tables. He then gets a further 4 feet that he can place anywhere.
There will be a continuous trench line across all five tables. Mark can add extra if Russ has any leftover! German artillery may be on table and dug in or in bunkers.
I hope that gives enough to think on. Please familiarise yourselves with these concepts, the rules and the troops you are commanding so we can hit the ground running on Thursday. I will go through all of this at my house on Thursday - Jon and Phil if you are free please come along.
Saturday, 27 August 2016
WW1 new trenches & wire
Here's a few photos of my newly finished wire and trenches to get you in the mood for next Saturday.
I think these will improve the overall look of our WW1 games and despite the £80 cost of the trenches think it was money well spent.


Note the top trenches will look like the bottom. They just need a coat of varnish to dull them down. The same colours have been used on both sets!


I think these will improve the overall look of our WW1 games and despite the £80 cost of the trenches think it was money well spent.


Note the top trenches will look like the bottom. They just need a coat of varnish to dull them down. The same colours have been used on both sets!


Subscribe to:
Posts (Atom)