Showing posts with label 16th century. Show all posts

Wednesday, 13 January 2021

MOGHUL ARMY

 Core Moghul army with various additional options and the terrain required to play a game - or even a campaign. 

Right and Left Flanks

C in C 

Ghazi and Camel gun option
Post 1600 Tribal foot/Musket/Skirmish option
Skirmish foot/Rockets/Artillery option
Only one unit of elephants - need the 2x armoured bow elephants to complete. 
Tartar Mercenary option
Plenty of baggage and command markers
Plenty of mobile baggage
I've made up specific terrain including jungle, villages and dirt tracks
And a walled city - I am writing up siege rules to fit with age of Hannibal and hope to put on a campaign one day along the lines of the Renaissance campaign we played many years ago. 


Wednesday, 8 November 2017

THE RELIEF OF FERRARA

Saturday November 4th dawned and we assembled at Broughton for our next "push of the envelope" operational game.  Not enough of us were available to do the desert encounter battle, so instead we made the most of the opportunity to have a go at transporting an earlier period to the operational format.  The Renaissance seemed the easiest period to attempt, and if successful, we would have a new mini-campaign system for our other pre-20th century periods.  I have to say, I think it played very well!

The original proviso was that the Duke of Ferrara, a close ally of the Pope (as played in our epic Renaissance campaign of nearly two years ago) is besieged by his aggressive neighbour, Venice.  Keen to aid his ally, the Pope has despatched an army of relief to save the city of Ferrara, and if possible, defeat the army of Venice - see previous post for the rules.

Jon, who had played the Pope in the previous campaign, assumed command of the Papal forces assisted by Russ, and likewise, Mark took charge of the Venetians with the help of Frank.

The initial plans for both sides were very well thought out, and I think for a first foray into a new period, very bold.  I do think familiarity with the tables has sped up decision making and generalship.

The Papal plan was to march quickly to the aid of Ferrara along 1D and 2D and assemble outside the walls of the city on 3B.  This would allow the army to operate with supplies from the city or attack the Venetian siege lines on 3A by marching through the city.  The Duke of Ferrara had a strong garrison that was largely poised along the walls of 3A to either pin the besieging Venetian force or sally out in support of the main Papal force.

The Duke of Ferrara, aware that a Papal army of relief is approaching , lines the ramparts of his city in readiness for a sortie against the Venetian siege lines.

The Venetians were aware of the strong garrison and had deployed a powerful force of artillery and infantry within the siege works.  However, the bulk of their army was deployed on 2B, well placed to assist the besiegers on 3A, defend against a Papal attack that would have to deploy piece meal through the difficult ground on 2C, or counter any Papal thrust along 1A and 2A.  Mark boldly detached his C in C with all his light cavalry to act as a trigger on 1B as he felt the most likely Papal attack would be along the "A" tables.  As an insurance he placed a small garrison in the fort on 1C and another detachment dug in at the bridge on 2B.  A dummy base was placed on 2C.

The Papal army was strong in Condottieri and Retainers and Russ commanded the Swiss Pike (which was of no surprise at all to Mark and Frank!).  Anticipating this, the Venetians had hired Landsknechts - 6 units! - which they hoped would lure the Swiss onto superior numbers or into poor tactical situations.

The Papal plan rolled out over the first few turns whilst the Venetians looked on and tried to gauge the main thrust of the attack.  Pleased that he had got his army unmolested to 3B, Jon quickly despatched Russ and his Swiss through Ferrara with attack orders against the Venetian baggage - no dithering there as an unbelievable swathe of sixes enabled easy passage and plenty of movement!

Swiss Pike arrive on 3A with orders to attack the Venetian baggage.

Meanwhile Mark moved his C in C from 1B to 1D to look as threatening as possible in conjunction with his dummy board on 2C as he still believed the most likely avenue of attack would be via 2C.  Unfortunately, he was insistent on referring to this board as "my C in C" and Jon, sensing an opportunity to cause chaos in the Venetian command and control despatched his heavy cavalry to engage this, as yet, undisclosed movement board.

Mark's light cavalry on the right turn tail and run as the Papal host romps onto 1C.

Mark only just managed to extricate his command from this powerful attack, literally keeping one move ahead of the Papal men at arms.  The garrison on 1C, shooting from the fort's ramparts vainly attempted to slow Jon's cavalry down but the speed of Mark's light horse saved him from annihilation.

Meanwhile, the Swiss with the close support of the Duke's garrison is attacking the Venetian siege lines.  Raked by Venetian light guns they ignore their casualties and storm into the defences.  The Venetian front line buckles and a battery of artillery routes but Mark has a second line which counter attacks and pushes the Swiss back.

Aware that the main Papal attack is on 3A, Mark has made it back to his main force on 2B and orders Frank with the majority of the Landsknechts to move to 3A.  I think that this is one of the pivotal decisions of the game; intending to keep his options open, Frank is ordered to the hill on 3A rather than attack the Swiss.  Does this allow a considered attack against the flank of the emerging Papal army or does it incur further delay whilst the Venetian C in C is busy elsewhere? - we will see.

Jon's uncommitted C in C languishes outside the walls of Ferrara on 3B as a rut of 1's and 2's prevents him changing his orders.

At the same time, Mark has ordered his dummy board on 2C to take 2D, cut off the aggressive Papal cavalry and look threatening against the Papal C in C on 3B.  With the success of the Venetian infantry against the Swiss Pike it looks like the battle has swung back to Mark and Frank.

Russ' Swiss are held and even pushed back across the siege lines.  Frank's force of Landsknechts with supports has arrived at the hill on 3A.

However, the Swiss setback is temporary, and Russ reorganised his veteran units to renew the assault, with one pike block punching through a crossbow unit and into the Venetian baggage.  Frank's Landsknechts arrive on 3A but with orders to hold the hill they are unable to intervene against the vulnerable Swiss flanks.  The Duke detaches mounted crossbow to harry this new threat and delay the Germans from intervening.

Frank's troops hover on the flanks but the Swiss are already looting the baggage  and the remaining Venetian foot are struggling to contain the onslaught.

Whist the battle develops on 3A, Jon (after 5 turns of failing to change his own orders) has managed to move his C in C through 2C, opening up supply lines and communication with his cavalry on 1B, and has emerged from the close terrain to hit Mark's C in C in the flank on 2B.  Mark struggles to extricate his command whilst sending the necessary orders to Frank to attack the Swiss.

Another shot of Frank's troops moving to the attack as the Duke of Ferrara and one Swiss  Pike  block  turn to face this new threat.

The Venetian light cavalry is no match for the armoured Papal horse and casualties begin to mount threatening to force the C in C's command on hold.  The Venetian foot on 3A have reached 50% casualties and have already dropped the aggression level of the Venetian army.  To emphasise the Swiss ascendancy, the Venetian sub-commander has met an heroic death attempting to stem the surge of pike.  Frank's Landsknecht's struggle to effectively intervene against the Swiss and the Papal heavy cavalry have succeeded in accepting new orders to take 1A and then charge down 2A into the exposed Venetian baggage as the bridge guard on 2A has been withdrawn to help in the entrenchments.

The small but effective Papal command base (on the right) arrives on 2B


The next turn, it's two heavy cavalry units smash into the Venetian light horse.  The movement board is a powerful force of Venetian foot and cavalry but Mark's C in C is too busy to send it orders.


The Papal cavalry has now crossed the river on 2A and is poised to take the undefended baggage on 3A.

After 21 turns the battle came to a close with a 11 to 7 victory for the Pope and Venetian army morale faltering.  It must be admitted that Russ and Jon rolled a lot of 6's which meant movement and orders were swift.  There was one notable exception when Jon struggled to order his C in C to attack 2B and the heavy cavalry were in danger of romping after Mark's C in C and onto the prepared positions of the main Venetian force.  However, on the whole the Papal orders were simple and direct and I think the Swiss and the Duke Ferrara required only one order change each for the whole battle.

Venetian dispositions were good and the initial plan sound.  Detaching the C in C was a calculated risk, especially towards the end of the game when bolder orders were required for the Landsknechts.  However, the initiative was always going to be with the Pope until the Venetians were sure of the main line of attack.  I wonder whether both sides took too much of a risk dividing their forces, although I would say Jon and Russ won through bolder and more decisive orders.

As an operational game it worked very well.  The sense that a battle could be fought at any number of points kept both sides careful with reserves and over commitment of forces - it did feel like a mini campaign.  All the tables were moved over and there were actions fought on three of them.  The size of the armies at equal points felt correct and the game was in the balance right until the end.  No one played badly and as Umpire I had a great game watching two teams manoeuvre their armies and "duke" it out - well done everyone!


Wednesday, 1 November 2017

Rule Amendments for Renaissance Operational Games.

Related image


Some rules amendments for Saturday's operational game.


Line of supply for both armies is from their baggage train or the city on 3A and 3B.

The besieger has x8 bases of supply permanently positioned as one of the objective points on 3A.

The relieving army has x4 bases of supply in wagons that must be attached to one of the commands.

The City also counts as a line of supply by whoever occupies it.

Loss of baggage or being out of supply results in a unit suffering a shift left for firing, melee and a -1 for morale.

Any command out of supply will drop down a level of aggression for orders e.g. attack becomes engage.  This is cumulative.  So, for each command in the army that is less than 50% strength then this drops the aggression level of the army by one level.  As does the loss of the CinC.  Thus Attack is the highest level of aggression, then Engage, then hold then Retire.  Any individual command on less than 50% can only be on Hold as the highest level of aggression.

It takes one unit, one turn to destroy a baggage unit and then it is shaken.

Movement is allowed between 3A and 3B by whoever occupies the city.

Movement is double across uncontested tables.

Hidden movement boards are used for commands that have not been spotted.

Table 3A has on objective point for the besiegers baggage, the open ground outside the city walls and the city walls.  The besieger may have any units that begin on table 3A behind earth works.  The besieged army initially holds the city walls.

Table 3B has an objective point for the outer fortifications, the bridge and the inner city walls.  All these points are initially held by the besieged army.

The rivers on Tables 2A and 2B both have bridges across them.

The relieving army can decide to deploy as many units as it likes within the city walls, the remaining troops will enter on any of Tables 1A,B,C or D.  The besieging army holds all the remaining points on the other tables and deploys accordingly once the amount of units in the garrison has been decided.

The armies will be Venice as besieging army and the Italian League as army of relief and garrison.  They will be their full army lists plus one extra D6 commander and x8 points of additional reinforcements. Reinforcements can be placed in any command.  Both armies get x1 dummy movement board.

Reinforcements can be picked from the German States, the Italian States or the Swiss Mercenaries.  Swiss Pike will not fight other Swiss Pike.  Swiss Pike will ignore all orders and attack Landsknechts if visible within 16".

Hopefully I've covered everything!

Tuesday, 24 October 2017

Retire Orders in PoW Renaissance.

Image result for mounted crossbowmen


As we are going to delve into the Italian Wars for our next operational outing on the 4th November I need to write up a fuller version of the "Retire" orders for the Renaissance PoW rules.

At present retire orders are simply, "All units except skirmishers must retire at a minimum of speed 2" towards or away from their ordered destination. (The Italics is my replacement for the movement arrow.)

As it stands,  at least half the units in a command must obey the order.  So if half your command is non-skirmish and the other half is skirmish then that's an easy option of retiring with all your non-skirmishers and fending off the enemy with your skirmishers?

Or can it be interpreted that if you retire with half your non-skirmishers you are complying with your orders as the half of the non-skirmishing units AND ALL the skirmishing units (which are fully complying with the retire orders!) fend off the enemy?

Or half of all your units regardless of whether they are non-skirmishing or skirmishing must retire - in which case the skirmisher option is being ignored?

Personally I prefer the second option as this gives light formations a great deal of flexibility.  In an operational game it also makes this formation well placed to hold and react to enemy advances on the first tables.  Detached units can have conditional orders to retire against the nearest enemy unit, allowing them to skirmish and slow down attacking forces but have the option of using their superior evades to fall back against overwhelming numbers.

We never use retire orders in a standard battle as there is seldom the room to make it relevant.  The operational game will make the "affairs of the lights" or the "petit guerre" far more relevant.  Let me know what you think.

Monday, 8 May 2017

English Civil War Action!


The Battle of Shield-field 4th Feb 1644

It was only Phil and Ozzy and myself available for a game last Thursday so I thought I would put on a game at my place and introduce Ozzy to Pow.

Newcastle in the top right and the Covenanters attacking from the bottom.  The sconce by the bridge is only partially finished and Ozzy has sent the Scots cavalry on a wide sweep on his left to attack the Royalists from the rear whilst his infantry storm across the river.  The shell holes are coal pits - Newcastle was a vital source for the growing city of London.

Ozzy took the Scots Covenanters, keen to take Newcastle for Parliament.  Phil commanded the Royalists who intended to hold the river line as long as possible whilst awaiting reinforcements.  The loss of the half built sconce at the river would be a draw whilst a Royalist loss of the field fortifications would be a defeat.  If the Scots storm the city gates, then this would be an outstanding Covenantor victory.


Phil had to roll a three D6 and get less than the number of turns before his reinforcements turned up.  Unsurprisingly, he rolled very high until turn 9!  Above, dragoons and cuirassiers hurry to save the Royalist cause.
Ozzy picked the rules up quite quickly, but a deliberate approach robbed him of the time needed to organise a coordinated attack on the main field fortifications.  Nevertheless, the Royalists on the river line were overwhelmed and the Scots infantry were still relatively fresh, having used their superior firepower and frame guns to inflict heavy casualties.  The Scots horse, however, had struggled against the Royalist infantry and their aggressive commander, and there weren't many of them left for the follow on attack.


At the close of the game, initial Scots attacks had been held by the garrison but plenty more Covenanter infantry were massing for a final push.  On the far left Phil has strung his cavalry out in support, ready to attack any shaken Scots units.

A great little game well played by both sides.  Phil's defence was tenacious but Ozzy's attack was relentless.  The final result of a draw seemed fair as both sides still had plenty of fight left.  Definitely worth putting this one on again.

Saturday, 12 March 2016

Battle of Worcester 1651


Mark was free for a game and we decided to play ECW Principles of War as we hadn't played this period in a very long time.  Won't bore you with the details other than this is the last battle of the Civil Wars in which King Charles II of Scotland attempts to avenge his fathers death by using a Scottish army to secure England against Cromwell and Parliament.  With the odds against him he is cornered at Worcester and the last Royalist Army is destroyed and Britain becomes a military dictatorship under Cromwell for the next decade.  Wikipedia and the Battlefield Trust have very good write ups on the campaign and battle.

Mark elected to go Cromwell and I attempted to keep the Royalist cause alive!


Above is the battlefield.  The River Severn cuts north up the table whilst the River Teme flows into the Severn from the west.  Cromwell has two pontoons across the Teme and Severn at their confluence.  Midway on the Teme is Powick Bridge which has been partly demolished (Incidentally, this is where the first clash of the Civil Wars began!).  The road then continues to the parish of St John where it divides towards Wales and Worcester.  Worcester is a fortified city with an intact bridge across the Severn.  King Charles is holding Worcester and a star fort to its East called Fort Royal.  Parliament troops hold the hills to the east of Worcester, Cromwells main veteran troops are massed on the hill to the south and a strong Parliamentarian force is positioned to the south of the Teme.  Between Powick and the Severn a Scots contingent is trying to prevent a crossing and a small Scots Cavalry reserve is in position at St Johns ready to reinforce either flank.


Mark decides to launch an assault with all three commands, trusting in his numerical superiority and better quality troops.  The Scots only advantage is the terrain and interior lines of communication.  I have to decide where to hold and where, if possible, I can launch an attack.  I decide to reinforce Charles with the cavalry and launch a counter attack from Worcester.


Fortunately for me, Mark hadn't appreciated that the force he had ordered to assault Fort Royal was his weakest.  He understood that the fall of the fort would result in an army morale check for the Scots and he hoped that this would assist his assaults to the south.  He hadn't expected a counter attack from the weak Scottish army!


With his superior artillery he was able to repulse the Scottish dragoons weakly holding the crossing.  Determined to exploit this success, a veteran brigade of infantry stormed across the pontoons.  Without confidence (my dice had been predictably shocking) I flung a Scots brigade against it and hoped that my superior pike ratio might tip the balance - it did - and as Mark rolled a twenty I couldn't help rub it in with a Phil-like victory jig!  Mark tried to recover by throwing his cuirassiers across the bridge but miraculously the weakened Scots grimly saw them off.

Mark had not expected this set back and instead of supporting Cromwells attack from his southern force he had ordered them to use their artillery to drive away the flimsy Scots defence around Powick Bridge and then use planks to storm across.  He had hoped that this would stretch the thin Scottish line and help with a quick collapse in  this sector.  However, a battery of Scots light artillery delayed the advance and the stout defence of the pontoon had enabled the local Scottish commander to redeploy his meagre force to repel this next attack.


Meanwhile, the defence of the river had enabled Charles to attack in the north.  Mark had quickly launched assaults against Fort Royal and I barely held the position (again shocking dice!).  However, as the garrison of Worcester emerged with Charles at their head they were able to hold the Parliamentarian attack, and then as the cavalry reinforced the King, flanks were charged and within a few moves the whole Parliamentarian force had routed!  The Royalists had won and history had been reversed.

Mark had relied on an aggressive plan when perhaps holding the force in the north on defence would have been prudent.  He had been unlucky in his attacks across the Severn and although the assault across the Teme looked feasible, the battle would not be won in the 16 turns we decided the game should last.  Also, another objective was the closing of all roads to Worcester, and with the Welsh road and the Stratford road open the Royalists had secured another two objectives.

My army had been weakened in the fight outside Worcester and I didn't fancy heading south to attack Cromwell's still impressive army.  Therefore, I think the King would probably retreat in the night along one of the open roads.

This was a great fight with some very hard decisions for both sides.  I think this would play well with more players and I will put it on again for all of us.

Friday, 14 November 2014

Italian Wars Army Underway


For some time I have felt under the eye of Russ who painted quite a few landsknechts for me a year ago. About that time Russ managed to paint up an entire Swiss army of the late 14th century/early 15th century on a wet afternoon whilst watching the east enders omnibus. Being a mere painting mortal it has taken me somewhat longer to catch up.


"What news from Birkenhead?"

"Build me an army worthy of Russ!"


Well, the above is a picture of my first 4 units of landsknechts.  Not quite a horde yet but I am looking forward to painting the Gens D'Armes that Mark dropped off the other night and getting some more Burgundian v Swiss battles fought whilst building my French Army for the Italian Wars.


"I'm sorry but that wasn't worth shaving my eyebrows for!"


Monday, 30 December 2013

Japanese Battle Formations in the Sengoku Period


Japanese battle formations were instigated once the samurai army drew near to its enemy (i.e. from order of march to order of battle) and dependent on the terrain on which conflict would take place and also the expected formation the enemy would itself be in.  Many formations were counters to other formations (e.g. the Keyhole and other similar formations were used to counter the Arrowhead). 

In addition, the daimyo would aim to change the formation mid-battle in order to secure an advantage or to counter a move by the enemy.

Note that the terrain over which the Japanese fought was rarely a large, empty field!  They fought over strategic positions like bridges, castles, mountain passes and the like.  At that time Japan had few roads and much of the terrian was mountainous (or at least hilly) and heavily wooded.  Most formations therefore kept the daimyo at the rear or centre of the formation with significant strength at all sides (flank, rear and vanguard) unless they knew the territory well or knew that their rear was protected.

Hoshi formation
As you can see from the above illustration, the Daimyo is centre rear.  At the front, arqubusiers are densely packed to blast a hole for the troops behind (usually samurai and ashigaru yari) to burst through.  However, the formation keeps a strong screen to the rear and the flanks can similarly be protected from an unexpected attack.

As such, most Japanese formations tended to be 'deeper' than 'wider' - although there were some exceptions such as Lying Dragon (used when defending a hillside)

Before moving into formation, the daimyo would typically be seated inside a maku (a semi-enclosed space) on a folding camp stool and generally communicate his orders through subordinate generals - these would then be transmitted down the chain of command.

The simplest formations were mainly based on ancient Chinese models - the simplest of all was the nanasonae (Seven Units) - three vanguard units, two flanking units, the daimyo with the main body and a rear guard.  All of the formations had some elements in common - the daimyo at centre rear and a vanguard of missile troops (formed and skirmish) protected by ashigaru yari and samurai (who tended to form the flanks as well).  The baggage train would be well defended.

Units would communicate using highly mobile Courier Guards - usually but not exclusively mounted.  

Moving into different formations required a highly trained army and the more complex formations were prevalent more towards the latter stages of the Sengoku period (as professional ashigaru rather than levy peasants were employed).

The hachijin - the 8 most important traditional Chinese battle formations - were associated with Tang Emperor Taizong who reigned from AD626 to AD649 and were themselves probably derived from the writings of Chinese strategist Wu Zi (born around 400BC).  It seems incredible that the Japanese formed their battle tactics on the writings of around 1,100 years ago (a bit like fighting WW2 based on the tactics of the Norman Conquests) - and where the main troop types (crossbowmen and chariots) were not even used. However, early Japanese armies fought according to the writings of Sun Tzu and Takeda Shingen had a quote from the Art of War emblazoned on his battle flag.

Most battle formations became adaptations of the hachijin and so were variations of hochi, kakuyoku, gyorin, engetsu, choda, hoen, koyaku and ganko) and it is these we will talk about first


1. Hoshi (arrowhead)--This was a formation for a fierce charge. A dense screen of arquebusiers headed the vanguard samurai and softened up the enemy ranks for them. This formation was made for a fierce attack so the flanks were more lightly protected.  The formation literally took the form of an arrowhead - a wedge facing the enemy.  It was used by the Takeda when using their famed cavalry and most famously used by Shimazu Yoshihiro who, when he realised he was surrounded at the Battle of Sekigahara, placed himself at the head of 80 men in a hoshi formation to break out. 


2. Kakuyoku (crane's wing).  This was a defensive arrangement which allowed for rapid deployment into an offensive movement to surround an attacking enemy.  The vanguard absorbed the enemy advance using missile weapons and skirmishers while the main strength (the outstretched and reverse-curved 'wings') spread out to envelope the enemy.  It was used by Takeda Shingen at the 4th Battle of Kawanakajima in 1561 to receive what he thought was the fleeing Uesegi army. 


3. Gyorin (fish scales).  This would be adopted if your army was outnumbered.  It was essentially a blunted hoshi - a less risky version for an army that couldn't risk everything in a rapid charge.  A strong centre is supplemented by overlapping units but there was more ability to protect the flanks.  

4. Engetsu (crescent moon). This was a highly defensive formation named for the assymetric shape the troops form around their general.  This was the ideal formation for a last stand - but also if attacked with a gyorin formation.  

5. Choda (long snake).  Although the name implies a long, thin formation it was actually quite wide so an enemy advance against either flank can be held in check.  The middle troops (behind the front line) provide support to either front or rear.  Meanwhile the vanguard is held centrally to break out into an attack.  It was a great counter to an enveloping kakuyoku.

6. Hoen (a square and a circle) aka Saku (keyhole).  The best formation for countering a hoshi attack.  Six ranks of arquebusiers and 2 of bows angled to receive the hoshi attack.The troops in the centre formed a square and circle (the keyhole shape) - best shaped to absorb the charge proper.

7. Koyaku (yoke). Named after the wooden yoke (kubiki) used on an ox cart this was considered a good defense against most attacks - especially the "cranes wing" and "arrowhead" attacks. The vanguard would hold the enemy long enough to know their intentions. The commander could then react with the most suitable formation.  As such it provided strength at the vanguard but also flexibility to adapt.

8. Ganko (birds in flight). This was a very flexible and deep arrangement of troops that could be changed as the situation developed. Arquebuses screened the front and rear, but, could move if needed to a flank if the enemy altered their attack.  The arrangement of many ranks deep could absorb a fierce charge (as happened at the Battle of Anegawa in 1570).  Essentially a defensive formation but as an attacking model it worked well against a keyhole.

Many more formations were added later and appeared sporadically during the Sengoku period.  Some are only described in text so guessing the actual formation itself is not easy.

9. Koto (tiger's tail - or more specifically treading on a tigers' tail.  The formation takes its name from a poem about being very daring and was seen as a good defensive formation when facing an enemy of equal strength.  It was a deep formation which provided flexibility as well.

10. Garyo (reclining dragon).  The formation to adopt when defending a hillside.  The divisions are able to move easily to new positions when there is a need to change formation. Skirmishing troops were deep to the front and all round protection was provided.

11. Taimo (great gamble).  This was used to assess the enemy strength on the flanks.  Once the weakness was found, the centre force is used to penetrate it.  Again, considerable skirmish firepower was at the front and the forces were arrayed to rush into any gap that formed.

12. Koran (dancing tiger).  The formation to adopt if your army is about to be attacked on both flanks.  The leading division strikes the enemy's 'head' then the rear divisions move to take the enemy in the rear. Bows and arquebuses formed the head of the tiger (with support) and other divisions would move out and around as the tigers head withdrew.

13. Kenran (dancing sword).  Similar to koran but with greater strength to the rear, increasing its defensive value for a general that fears attacks from all sides.

14. Shogi-gashira (captain of chess).  The formation for pursuing a retreating or retiring enemy.  The central units form  a shape similar to the playing pieces in shogi (Japanese chess) and advance upon the enemy.  Meanwhile the flanks, middle and rear press forward and expand left and right to allow an envelopment.

15. Matsukawa (bark of the pine tree).  An unusual formation as it places cavalry, missile troops and spears in the middle of the formation (cavalry on the outside with foot samurai behind them.  The main benefit was greater mobility and protection from all sides.  The cavalry could easily wheel to vanguard or rear - but by keeping the shooting troops inside it meant that this was vulnerable to shooting.

16, Kuruma gakari (winding wheel). This formation formed in a circle. While moving on the enemy it maintained this composure. When the point of attack was decided units were detached from the circle. Once the unit grew weary, another would be rotated in its place. Fresh units would continue to be sent upon the target until a breakthrough was achieved. This Formation was used by Uesugi Kenshin to counter Shingen's "cranes wing" at Fourth Kawanakajima.  It is an idealised representation of a tactical move that replaces tired units with fresh ones without breaking momentum.

17. Wachigai (interlaced circles).  The formation takes its name from the shape presented by the front and rear of the formation.  It was apparently of most use when outnumbered and fighting in woodland.

18. Sei ganko choku (variation on ganko).  Representing an elaborate ganko, it combined depth and flexibility.  Arquebusiers were found in more strength to the centre and rear and samurai and yari ashigaru spaced to adapt to an attack from any side.

19. Betsute naoshi (different direction).  Recommended for one's reserve troops if the enemy is drawing near - especially in the case of a disadvantage in height (i.e. the enemy is above you).  There is a considerable defensive element - especially around the daimyo / general.

20. Ryukei (flowing current).  Used in a fighting retreat, the inclined flanking units provided excellent cover from enemy harassment.

21. Unryo (cloud dragon).  Adopted when the enemy had the advantage in terrain (such as steep or difficult places) but not in numbers.

22. Hicho (flying bird).  Similar to unryo in appearance but adopted when the enemy has the advantage in terrain AND numbers.

The following formations have no diagrams as guidance so their shape and size (and the units used) can only be guessed at.

23. Suki no seki (vanguard's plough).  A combination of gyorin and kakuyoku - therefore essentially defensive.

24. Choun (cloud of birds).  Described as being like the gathering and dispersal of birds or the changing appearance of clouds when an army takes position on a hill.  A defensive formation which suggests quick movement by units (hence adapatability)

25. Kanchi (sink into the ground).  Essentially a defensive formation where the troops provided mutual protection.  Used by a unit at the battle of Hibikino which thereby avoided certain death.

26. Hidaka (high sun).  Adopted when a large Korean army cut the road along which the Mori clan were travelling. Has to be assumed as being an attacking formation and one that was effective against a static defence.

27. Hyori (principle of law).  Used at the battle of Aoino. 

28. Ryu (dragon).  

29. Ryu no maru (dragon in a circle).  Sounds like a variation of engetsu (or possibly karuma gakari) and appears in an account of the 4th battle of Kawanakajima.  The Takeda surprise attack force arrived at the summit of Saijosan.  The Uesegi position was deserted and they could hear the sound of battle coming from the plain in the north.  The attack force therefore rushed down the paths to support the main body but Uesegi Kenshin had left a body of 1,000 troops to guard the river crossing in the ryu no maru formation.  The Takeda did eventually with through but at a high cost.  Assume it is a defensive position for a narrow area.

30. Hangetsu (3 day old moon).  Used at the battle of Konodai.  Similar to engetsu as it is used specifically to neutralise a hoshi attack.

31. Minotenari (winnowing fan).  Defensive formation enhanced with bamboo bundles which provides a protective screen for arquebusiers.


Despite the samurai being well drilled, we cannot expect armies to easily move from one of the formations to another of the 31 easily (if at all).  Some of the shapes of formations were radically different and there is a risk in moving troops when an enemy is close (or in actual contact).  Some movements were more important than others and so better rehearsed.  Formations whose style and constitution (such as ganko and unryo) would be relatively easy to do.  Going from a kakuyoku to a hoshi would be much more difficult (impossible if in contact with the enemy) but not beyond the remit of a well drilled army and a good commander.  


Signalling and identification in Sengoku Period

Signalling and identification was crucial to the Japanese art of warfare in the Sengoku (Warring States) period (the period of almost perpetual war from 1450 to 1615).  
As armies increased in size, especially during the Warring States period, opponents often had trouble identifying each other and commanders could not recognize important samurai amid the crush of bodies. 
Signals became an effective means of controlling troops from a distance during battles, since only coordinated efforts could be successful. Strategies included the use of items such as flags, drums, and conch shells, as well as deployment of fire signals and messengers. 
For instance, many samurai and ashigaru affixed a sashimono, or personal banner, on the back of their armor. The family crest (mon) of the army commander was usually painted on the field of the sashimono, which later developed into the more visible vertical banner called a nobori carried by standard bearers into battle. 
Similarly, recognizing the potential of messengers, daimyos invested in preparing elite corps of messengers. A commander relied upon his messaging system to convey orders to other generals and ensure timely compliance with directives. These messengers were specially identified by cloaks or distinctive sashimono. For example, Toyotomi Hideyoshi had 29 messengers, all of whom were fitted with a golden sashimono. Nobunaga provided his messengers with a horo, a fabric bag similar to a cloak attached to the back of the armor, in either red or black.

Messenger with horo
During the Warring States period, as the military became more professionalized and battles were plentiful, specialized signaling and other means of identifying entire companies as well as specific figures were instituted. To ensure quick identification of opposing forces at a distance or ready identification of a military leader in poor weather, high-ranking figures had elaborate helmets and other distinguishing characteristics that made them readily recognizable. 
Nobori, uma-jirushi and sashimono

At the dawning of this era of many feuding daimyo, the tradition of affixing a sashimono was abandoned, perhaps because such devices could hinder the progress of an elite warrior. Regardless, high-ranking samurai had attendants (standard-bearers) who were charged with carrying the large vertical flag known as a nobori identifying the entire company or unit.
Personalized armor or helmet elements functioned like a crest which might be etched into or painted on European armor to indicate one’s allegiance to a particular ruler. However, overall, Japanese use of banners and flags contrasted with European styles. Apparently, free-flying banners, as commonly seen in recreations of European battles, were not favored in Japan. The most typical banner style of the 15th century and after, the nobori, was a long, vertical piece of fabric that hung from the arm of a pole, which could be easily seen from both sides. Essentially these were larger versions of sashimono made more visible as well as less personal, a change that underscores the increasing grandeur of well orchestrated combat at the end of the Warring States period.
Other types of flags and banners served diverse purposes. Signal flags (as well as fires) could be employed in directing unit movements. Another banner used for identification was the uma-jirushi, or horse insignia, which was worn by the standard-bearer of a daimyo and used to determine whether a leading figure had lost his mount.


In peacetime, banners and flags served to distinguish rank and status of samurai in service to the Tokugawa shogunate. Under the reorganization of the feudal system, samurai rank was equated with banner size. For example, samurai with an income of 1,300 koku were entitled to bear a small flag, while those possessing more than 6,000 koku of annual income could display a large flag. Thus, an entourage approaching the Tokugawa castle in Edo could be identified from a distance. Such banners required three soldiers to serve as bearers, more than the single figure that had accompanied the sashimono of high-ranking retainers in the medieval period. However, due to the dearth of battles, such flags were displayed primarily during processions of daimyo to and from the capital, and represented no hindrance to the typically slow and ceremonious progress of such entourages.

Monday, 16 December 2013

Japanese 16th Century (PoW and other rules).

Prompted by Mark's call to bring the true nature of  Japanese warfare in this period to life I'm working on a number of aspects - including battle formations and the use of heroes.

The rules shown below are for PoW but equally can be applied to DBR or another rules set (based on DBA) which will give Japanese battles a true flavour of their own.

Honour Points
For any action that the player deems 'honourable' such as a unit charging in against overwhelming odds, heroic actions (see below), sublime trickery or killing sub-commanders / daimyos - the player gains Honour Points.  Therefore it can mean that the battle can be lost but the honour gained means a moral victory (often just as important in those times).  The referee can judge which is most important but it may be in the player's interests to gain honour where they can and even if losing aim to win the respect of all.


Formations
I've developed a range of cards (see below) which players can select at critical times of the battle.  Most have some form of restriction on them and so are best used before getting to grips with the enemy or in critical situations (e.g. when attacking an enemy on a hill, when in danger of getting flanked etc.).

In order to change formation, this requires an order change from the C in C (the daimyo) and is acted upon as per normal order rules.

However, if a player wants to risk it, they can send a message instantly (given critical situations it may not be possible for a messenger to get to the commander in time) so I'm working up simple rules for the provision of orders through other means (i.e. flag / drum / conch).

Depending on distance from the daimyo and if the sub-commander is involved in combat or not (i.e. leading from the front) an order is received instantaneously (rather than having to wait 1 turn) BUT still requires pips to act upon it AND there is a danger of misrepresentation (i.e. the order hasn't been received properly).

Here I thought the best option is to pick out a formation change at random and apply it to the sub-commanders's units.  If the restrictions prevent him from complying with the new formation, he doesn't get the bonus(es) and simply carries on with the original order.  The daimyo can try to get his sub-commander to comply with the new order each turn until successful.  Note that an army may choose an entirely wrong option for their next formation - such are the fortunes of war!


Example of a Formation Card

YOKE

Order : Hold (i.e. sub-commander must be on Hold to use this formation)

Restrictions : 
* The army must fight on Hold orders for at least 2 turns before accepting an Attack order.
* The army MUST go on Attack order only (i.e. not Engage)

Bonus :
Can play an Attack formation card immediately (i.e. do not have to wait for the usual turn for an order to take effect) AND the sub-commander gets +3 pips for the turn the card is played.

Historic use : to counteract Crane's Wing and similar formations.  The army pins the enemy giving the commander time to choose the most effective attacking strategy then goes for all-out attack.

In play, the player must fight on Hold for 2 turns (at least) - preferably behind pavises or stockades.  At the start of their next Turn they can play their new formation card and act upon it at once (the extra pips help to give the attack impetus).


Seppuku
Tied in with this is the option (Russ would like this) where the daimyo can deem a sub-commander to be incompetent or lacking in samurai courage and order him to commit seppuku and replacing him with a (hopefully) more able replacement.  

This can be invoked by any player at any time but the sub-commander MUST either have engaged in combat and lost 20% of his command OR rolled 1 pip consecutively 3 or more times (which would look like hanging back from the fray).  

The seppuku order is like any other but must be sent by messenger ONLY.  The commander can only be replaced if he is not engaged in combat (sneaky opponents may choose to attack a unit the sub-commander is attached to to prevent a poor general being replaced - but then run the risk of killing the same commander in battle).

As the loss of the sub-commander is planned the replacement takes place immediately and the replacement sub-commander is diced for at this point.  So it looks like a win-win for the player - get rid of a poor commander and replace him with a better one!  Well, yes and no.

Losing a clan leader in this way can have a positive or negative effect on the troops in the field.  When the leader is replaced, have a morale roll for all units within 8" WITHOUT the usual leader bonus.  A failure sees them go Shaken (or worse!).  However, a pass is determined as having a significant boost to morale - all such units will get 1 strength point back.


Pick an order.  Any order.  That's your order.

Two examples - one when on Hold, one when on Engage or Attack

Heroes
A third option will be that each samurai and sohei unit (cavalry and foot) will have a Hero attached to them. These will be denoted by an individual figure on a small base only when called on (otherwise they will be in the main body of the unit).  They will appear on the army strength sheet.

The idea is that they can perform heroic actions but ONLY if facing other samurai / sohei units (no samurai would waste the opportunity for personal glory and honour taking on ashigaru!).  

These are only possible therefore if it is the players' bound, and the hero's unit is within 4" of a sub-commander or a samurai / sohei unit.  A heroic action takes 1 pip and all gain at least 1 Honour Point

The options are :

Engage an enemy champion (challenge the sub-commander OR enemy samurai hero to a duel).  The duel does not need to be accepted but if it isn't, any enemy unit within 4" must make a morale roll and the usual implications apply.  A refusal also reduces the Honour Point by 1 (wheras the challenging hero gains an Honour Point)

Rearguard : If the unit is under Retire orders or has Retired Shaken then the player can use his hero to hold up the opponent to give enough time to save the situation.  If successful (a roll on 2d6) any attacking force within 6" will halt to watch the lone hero.  If unsuccessful the enemy simply roll over him. But attempting a rearguard will gain 1 HP if attempted.  The samurai will therefore hold up the opponent until he is unsuccessful (-2 on the dice each turn).  There are bonuses if holding a bridge / ford or similar.

Glorious charge : the samurai charges forward and attempts to hack through the opposing front line to open a path for his comrades.  If successful any unengaged unit within 6" can charge that unit without needing pips and with a +2 charge bonus.  If he fails (2d6 roll) he is simply cut down and killed.  Only a successful Glorious Charge results in honour points - but add +1 if the opposing unit is Shaken.

Take a famous head : the hero attempts to take out the opposing units hero or sub-commander attached to any unit within 6" of the hero's unit.  If successful he takes the head - the sub-commander or hero dying in the process.  This also means that the sub-commanders' command has no leader and so cannot do anything for the next turn. 

If unsuccessful, the hero himself dies and is removed.  


Honourable death : if the army itself has been defeated (i.e. victory conditions met or the army has lost 50% of units) then any remaining heros can attack any enemy unit in an effort to deflect the shame of defeat.  If successful, he takes 1 strength off the unit attacked and forces a morale check.  He then withdraws to commit seppuku (gaining honour for his clan in the process).  If unsuccessful, he dies anonymously on the battlefield.  

In the event that an attempt is neither successful nor unsuccessful (which is possible) then it is deemed that what they wanted to achieve was not possible that turn.  The player can opt to attempt it next turn or circumstances may dictate that another action - or no action at all - is required.


Saturday, 14 December 2013

Painting Baccus Scottish Pike

As part of next Years project to field both armies for the battle of Flodden I have the task at hand to paint up over 1500 figures. I thought that I would do a step by step painting guide together with a brief review of the figures, so here goes...


The figures

Before I purchased the figures I called Pete at Baccus just to make sure that I was getting the right models, the pike are depicted on his website as part of a mixed unit as they belong to the ECW range and are shown with musket's.


Out the packet.......
 I have mixed opinions on Baccus figures. My plus points are that they come in strips and for a pike army this is a big help. My Swiss army which is all Heroics & Ros took an age to individually base every model and was a real pain to get the figures based. Another plus is the quality of the castings.

There is very little flash or mould lines on these figures, recent purchases from Heroics & Ros have been poor in this respect and I can't help think that some of the moulds need replacing.

My only real negative point with Baccus is the cavalry, they are generally out of proportion and look like ponies with dwarves riding them. Pete Berry's more recent ranges show more promise as he has addressed this issue to some degree as the casts are better proportioned. Heroics & Ros on the other hand have some very nice cavalry and I think that even today they stand up as top dog over Baccus.


Anyway on to the next step priming....


I use Vallejo black surface primer shown above applied with an airbrush.
The primer is excellent and I can prime indoors now as the primer is non toxic and doesn't really leave any strong smells.

These primers also come in a wide range of colours from grey and white through to some browns and greens. I do have some of the other colours but for me after much experimenting black wins hands down for 6mm and that's purely down to the painting style I have.


Primed and flesh applied


These are all the colours I need for these figures and include "highlight" shades.
I use Vallejo model colour / Model air and the excellent P3 range of acrylic paints.


Flesh from the front

Next I apply the base colour for the uniform, in this case it's a grey (P3 Bastion Grey)
The paint is applied by leaving black primer showing to create the shadows. 6mm painting is all about applying techniques, I never look at individual figures but at the finished unit. From 3 foot away they look great from up close, yes you will find fault but who cares!


Next up is the hair, I use Vallejo light brown for this


After hair its time to paint the pikes, this takes a bit longer as you need to be a little more careful with the brush. (colour is P3 rucksack brown)


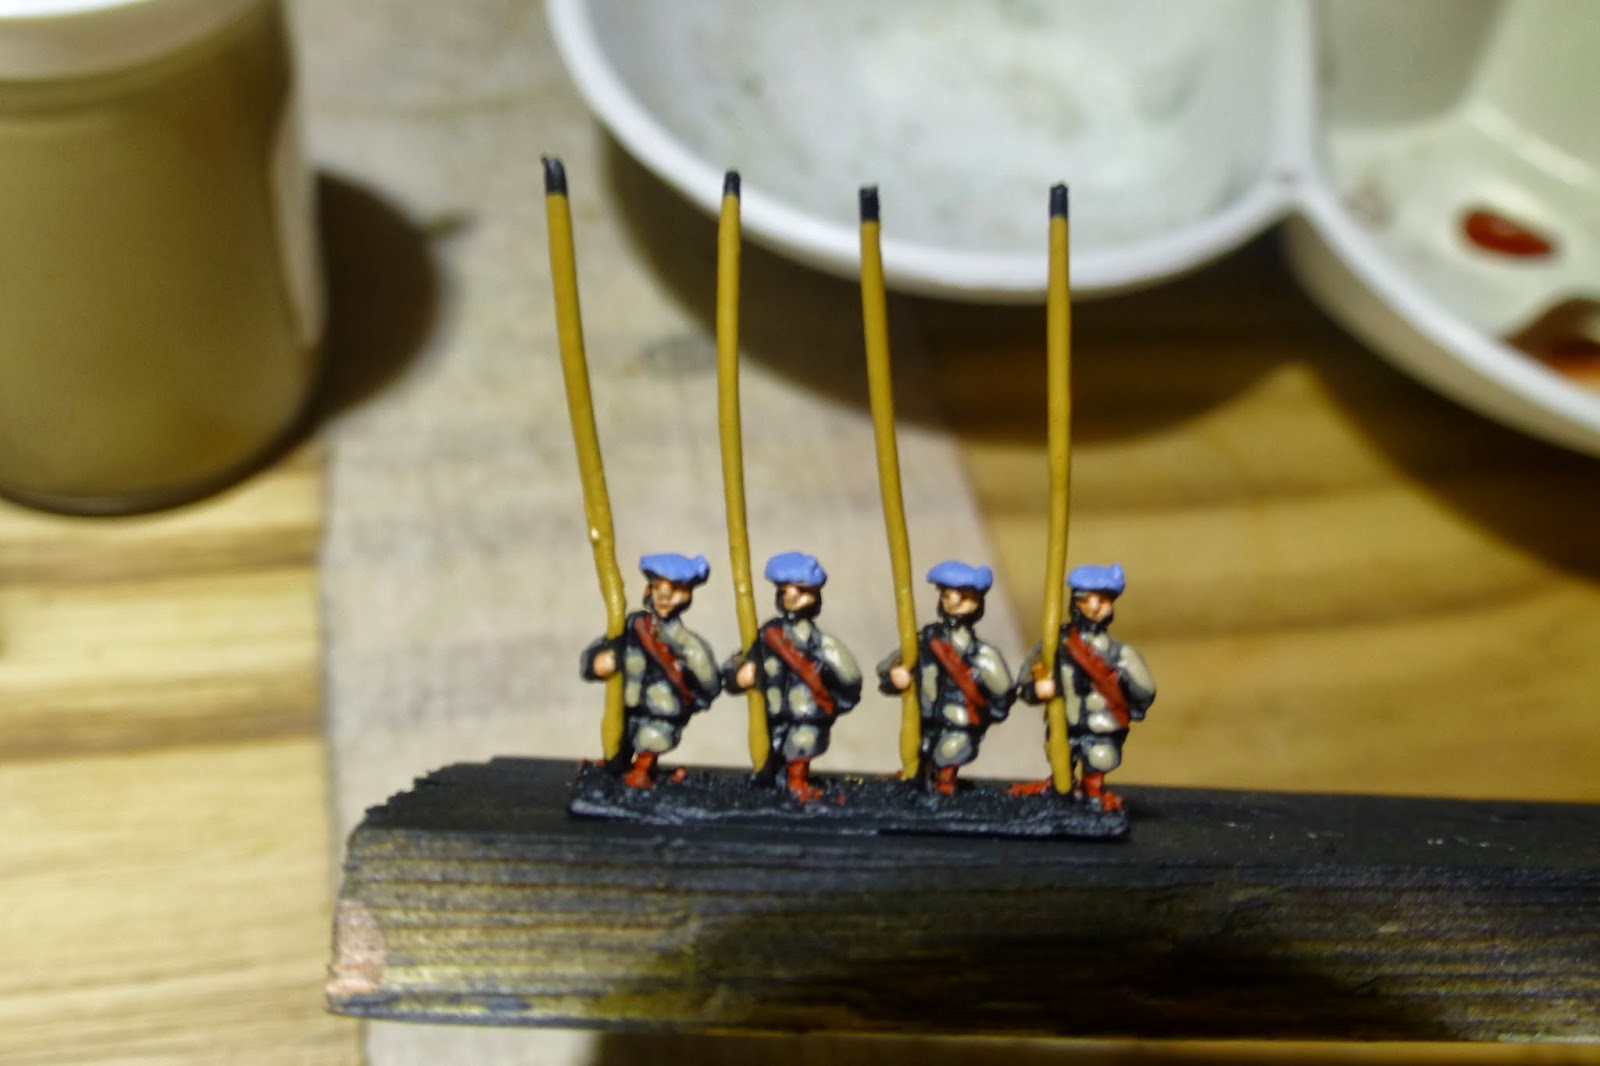
Vallejo have a handy colour for Scottish hats "grey blue" which does the job nicely here for these pike men.


After the hats I paint in the shoulder straps & boots using model air colour brown. This is really designed as an airbrush paint being thinned down straight from the pot but the pigment is very good so gives a nice rich contrast to the figures. Again this is worth spending a little more time on to get a clean finish with the brush.


Once the straps are done I wash the flesh only using Vallejo dark rust wash thinned down
 Add enough water to still create depth in the wash but not too much so as to make it too transparent
 Wash applied, you can see the effect below. There is more detail on the faces of Baccus figures than Heroics & Ros so the detail needs to be shown. The wash does the job nicely...
Notice the highlight applied below to this strip...


 The next job is to apply a highlight to the base colour on the uniform. For this I have used a P3 Khaki paint which gives a good contrast between the grey base initially applied earlier.
 The highlight is applied sparingly over the base coat, it does not take very long to do and I think a worth while job because you need to make the figures stand out on the table.
Some say it is pointless highlighting 6mm, I strongly disagree.
The secret here is not to overdo it and highlight everything on the model. Just pick out the largest areas or parts on the model that are going to stand out.

With the highlights done it is time to paint in the white neckerchiefs, I just added this in to break up the uniform using white. At this stage I also paint in the pike tips and swords on the rear using P3 cold steel.


Lastly I tidy up the base and paint this using Vallejo burnt umber

 Finished models!


Overall an acceptable job and I am pleased with the results.
I don't want to be spending too much time on these pike as there are a lot to paint!


I'll give these 24 hours before airbrushing 2 coats of Vallejo satin varnish.
The models will then be ready to base and I will cover this next time.

There will be 56 models on a single base and it is only then the figures really come to life!

Russ