Showing posts with label Battle Reports. Show all posts

Friday, 7 September 2018

Battle Of Edge Hill

On the 23rd October 1642 the first battle of the English Civil war took place between the two villages of Kineton and Radway in south Warwickshire in open fields.

Ian and I played it at his house today on a 6ft a x 4ft table


It has been some time since we fought an ECW battled and I thought it would be a good idea to play this one again as I remember it being a very good game last time in 2011.


I had played the Parliamentarian forces last time so elected to take the Royalist side.


Ian had set both armies up historically so I was pretty much happy to go with the flow and not mess around with the initial deployments.


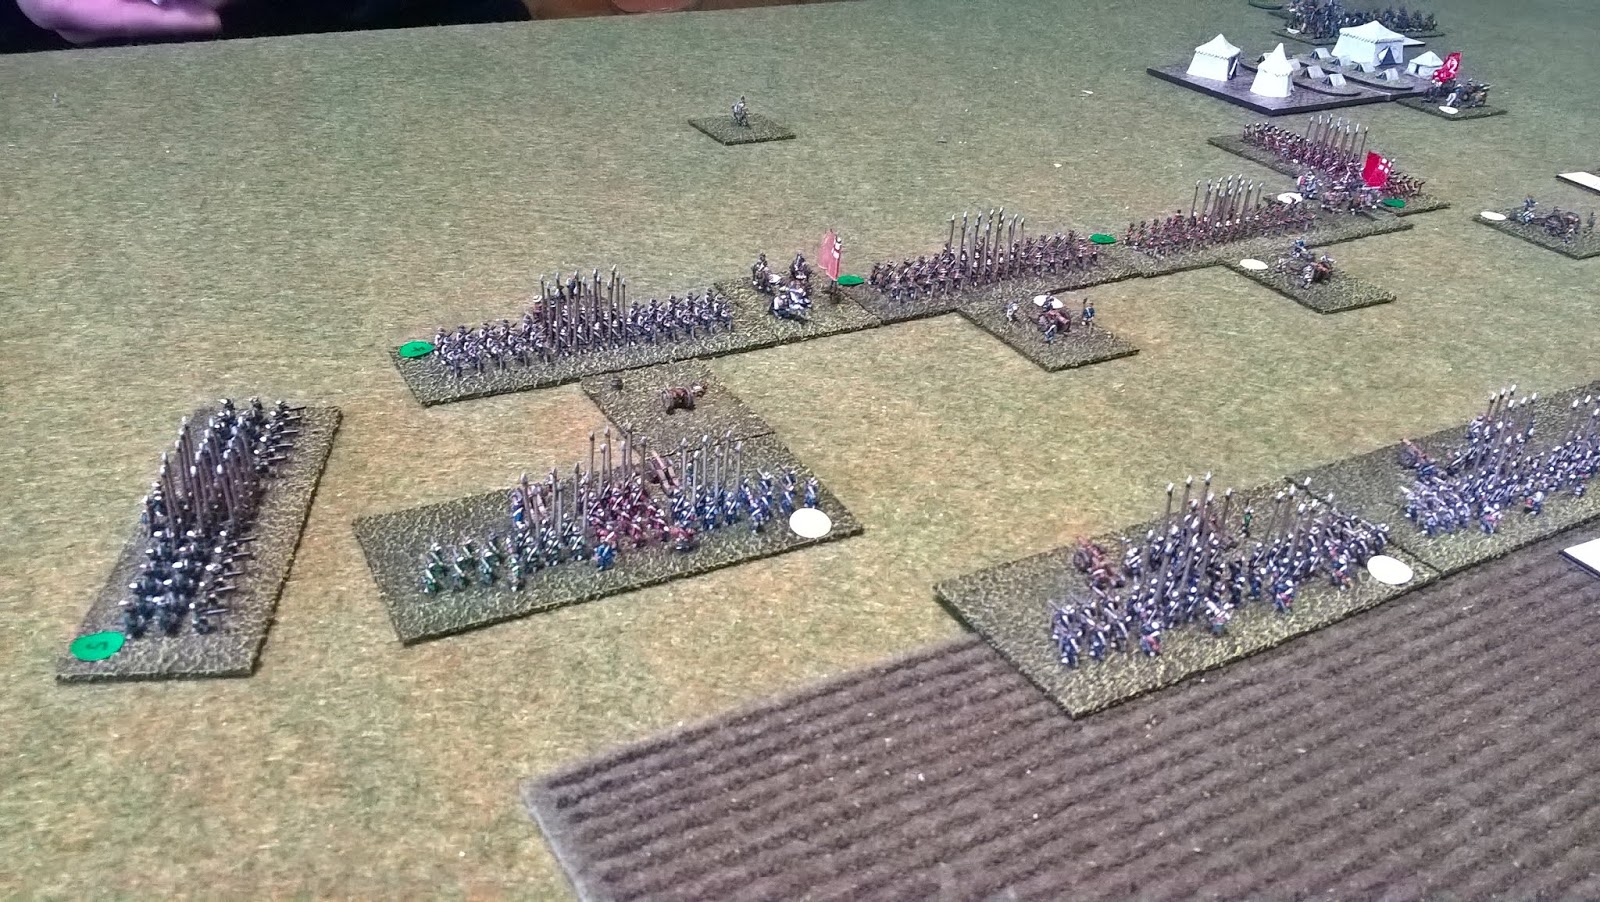
Pre battle photos.... 


Ian deploys his dragoons in the fields  - a standard cunning trick from the master


Photo from above.... Prince Ruperts cavalry are setup on the right flank with the centre command of Royalist infantry poised to advance in the middle ground


Windy miller has just popped to the shops...


Royalist pike & shot units awaiting their orders....


Turn 1 and we are away. I felt that the setup meant no fancy stuff so my initial orders were all attack. Rupert on the right was ordered to charge the parliamentarian cavalry over on the other side of the table. My superior numbers and troops meant I was odds on before any dice were thrown.


Centre command slowly advances at 4" per turn


After turn 1 - Ian holds the position. My entire army has advanced


Rupert's cavalry were all class 5 elite so moved at max speed 10". On turn two I had managed to charge into the parliamentarian cavalry with devastating effect. Ian rolled very well on his shooting phase prior to the initial charge and inflicted 3 casualties across my line but after passing every morale test I was not stopping here!

The next turn saw me plough into the cavalry and Ian's second volley was almost negated by the charge modifier by gallopers so did not cause any casualties on my units.

I rolled on the 100 table inflicting 7 casualties. Needless to say Ian's line disintegrated and holes appeared.


Over in the centre my infantry cross the open fields of Warwickshire... uncomfortably close those guns.


Over on the left flank where technically I had a clear advantage things did not go to plan.

I only managed to charge in 50% of the units as Ian had protected his flanks using his infantry


Shaken...not stirred was the result


3 turns in and the battlefield is developing


After smashing my way through Ian's left cavalry command my biggest problem now was trying to control class 5 elite cavalry who simply just went off and did their own thing. After I hit and caused retire results I had to pursue and then went shaken as there were no new targets to contact.


Ruperts command..... all over the place but historically correct as they went off looting during the actual battle. By problem here was that I could simply not re organise an attack because the baggage was luring my units in


Tunr 5 and I am getting closer to reaching the infantry in the centre... The guns are now in effect and have already started to soften me up


Over on the left Ian changes an order and sends in some infantry to help finish off my weak attack


Charged by pikes!


Not ideal for me. Ian maximises his forces to ensure the best possible outcome but the result is mixed and I manged to hold on.


Over in the centre I was starting to feel the pressure as I quickly realised my infantry were not going to break through without some cavalry support to hit Ian's flanks. Two of my units were shaken from cannon fire so could not advance!


End of turn 5 close but not close enough...


Ruperts forces in chaos but there is nothing left of the Parliament horses over here.


Ian charged my commander and killed him to the man so I has no command points to issue on the left.


In the centre I managed to get one unit in but it got thumped. The majority of my other units was shaken again.


On turn 7 Rupert manages to re organise his cavalry. It was too little too late though


I was lucky enough to roll a 6 on the left and re order my newly appointed general to attack Ian's infantry in the flank in a last gasp attempt to break his army and send it on hold.


In they go.. come on lads don't let me down

in the centre it's getting desperate for the Royalists now.


Rupert is on his way over to rescue the left flank but he missed the bus by a mile


Last turn and after charging in on the left Ian needed to make a morale roll.

For some very strange reason neither of us has rolled a single "20" all day which I think must be a first for POW and that devil dice of Ian's, however after tempting fate Ian delivered the 20 I was looking for but it made no difference as he had won the melee so was just shaken


Much blood had been split on both sides but the Royalist attack faltered and my centre was close to collapse.


Final turn..... Ian had held on to claim a solid win for parliament but we both agreed that earlier on when Rupert's attack smashed through on the right things looked decidedly dodgy but the cavalry on the left which was meant to win was ineffective so my infantry were left to try and punch through in the centre on their own. I think even I thought this was a little optimistic in the end.


King Charles enjoys a well earned rest after a brutal defeat....


Kineton Church....


Royalist Pike & Shot.... Ready for battle


Well played to Ian and an enjoyable day. Even though we had not played the rules for some time we were pretty quick to pick things up as we left them last time. POW Renaissance are a solid set of rules which have stood the test of time.

The result felt historically "right" and I think the rules are clever enough to simulate the period nicely.

Would like to play out the other battles of the war too at some point. 


Sunday, 19 March 2017

1941 Eastern Front Operational Game AAR


Another eagerly anticipated operation game, only this time it was the turn of the Russians to defend against the German hordes. Could the Russian's with there armoured train and heavily defended lines stand up to the assault?


With the introduction of C in C's on both sides the game took on a new twist. Frank was sport enough to run operations on our side with Phil and I defending against Mark and Jon. Ozy took command of the German attack.


For once I decided to play across on the other C & D tables, so it was a different game for me as the tables posed very different challenges to what I have been used to in previous operational games.


Opening Turns... Jon begins his attack on table 1C. It's all very canny and Jon's battalion stops in the woods near to the garrisoned town...


Russian local garrison dug in to the town awaits the attack....


Over on table 1 D Jon organises more German battalions....


It was now clear what Jon was up to. Ozy had been sending a lot order changes across and the German's flank marched a battalion over from 1D to 1C to basically outflank my garrisoned town.
I had moved the recon for the train up and tried to call in the rockets but despite getting the call I was off target every strike.


Over on the left side if 1C Jon advances another battalion down the table edge. Avoiding the railway was something he was keen to do for some reason.....


Attacked from two sides! what followed was a very hard fought battle which seemed to last the whole morning.


My garrisoned units started taking pot shots at Jon's infantry with a little success. Jon decided to push and close assaulted the town and I made this difficult for him by just being lucky on the dice. Each attacked was repelled and in one attack Jon lost 5 or 6 stands against my 3.

He marched another battalion over and in the end managed to rout me and secure the table.

This took us to lunch time....


Jon manages to secure the contested town on 1C.


After a 30 min lunch break it was back to it.


Table 3B and the railway bridge.... What was lurking in here.....


With table s 1 C and D under German control Jon pressed forward onto 2C but left 2D alone. Ozy wanted to find out what was on there so sent over a recon spotter plane. I had to deploy both my battalions and then Jon moved across.


Table 2C Russian dug in troops


Jon sends in the armour into the woods


This 88mm Flak gun was lurking in the woodline, best keep away from that!


Here comes more trouble - another battalion marches on to 2C this tim on the top right. I was getting the feeling I was about to be outflanked again but....


KV2 to the rescue! I had two of these at my disposal and they frustrated Jon to hell. With an armour value of 7 and a decent AT of 5 AI 5 they were on a +2 versus most of Jon's Panzer's.


I never even expected this lot to turn up on 2C, my KV2 took out three of these before they snook off into the trees.


More Germans arrive on 2D!


Jon outflanked my entrenched position in the woods and then attacked from the front so I was pretty much in the shit. These motorcycle's were on me like a flash and the close assaults were brutally fought


Hanging in there, just! the hairy bikers approach.


Switching action and over to 3A and the Germans send in the Paratroops to try and secure the airfield!


 Phil holds the river on table 2A


Jon pushes the attack onwards. Table 2D had lost the battalion holding the woods, there was just too much stuff coming in. There is still hope for the Russians though as I had another battalion with a KV2 in the woods over on the left. This was stopping Jon from taking the bridge and securing the 2 points on the table so he had to clear it!


Nicely painted Russian buildings on 3B


The town and bridge on 3B - the most peaceful table in the game!


Back on 2C and the tension was mounting. Time was ticking on and despite the immense pressure of the German attack I had managed to hold on to thable 2C. My armoured train returned from the munitions yard with fresh rockets but again I was unable to make use of them so decided to start firing open sights and what a difference that made!


Armoured train on 2C - rockets and 76mm turrets start to make some headway by killing several German tanks and infantry.


Jon had marched over the far left side on 2C and I had to stop him as he was hell bent on flank marching across to Phil's 2B table with a recon battalion. I placed a defence and dug in by the woods.

It was a very effective line and with the help of my 45mm AT guns and infantry gun I routed what was to be the only battalion that Jon lost on the day!


Back on 2D and I launched a counter attack out the woods in desperation. Frank had been trying to change my orders for six turns but could not roll a 6. This proved foolish and I soon had to retreat into the woods. The KV2 was picking off Jon's armour and in the end he decided enough was enough and couter attacked me with armoured engineers. I lost the tank in the end by rolling a bloody 1 in the close combat. My other KV2 was foolishly thrown away on 2C when I close assaulted infantry amd rolled another 1. despite the +2 I am beginning to learn that it's probably better to shoot than over run!


Frank releases his tank reserve to try and take back some ground. Mark had over committed by all accounts and had lost a lot of stuff trying to fight Phil on the river. Mark helped us by building a pontoon bridge. Phil suggested counter attacking to try and take back some points so Frank makes the charge!


Table 2D has fallen! Jon takes the last remaining point


My last chance on 2C - Germans swarm across. I just have one battalion left with the train.

Frank could not beat Mark and it was grid locked across on 2A and 2B. The paras had been routed off table by Frank on 3A so we held on to the 3 points there. It all came down to some desperate stuff on the last turn from Jon.

My armoured train had to stay on 2C otherwise the point was lost. I charged it forward only to be whacked by AT guns and bazooka's. The very last turn I rolled the train back into woods. Ozy launched a Stuka attack and once got through despite my 37mm AA driving off the other one.

Another car was lost and I just had the engine left on the track. Jon had two infantry stands in the woods withing Bazooka range. He needed a 6 to take the train out, rolled tow dice and got a 6 and a 3. The train blew up and the Germans managed to secure a technical victory with 9 points to 8.


Jon moves onto 3B on the last turn of the game


Frank's cavalry arrive on 3B


The final position on 2A - Frank's tanks are trying desperately to cross the bridge and repel Mark's unsupported attack.


Another great operation game and thanks to all for making this happen. Jon and I fought a very hard battle all day and it was an intense fight. I was pleased to have done as well as I had and a stubborn defence of the town sector on 1C made things hard for the Germans.

The armoured train was a novel addition to the game and I think it played a vital role for the Russians. Not sure exactly what had happened over on the other table side as I was glued to the action on my side but it looked like Mark was given an order to hold something but ended up on a table he should not of been on. It looked like he was up against it over on the river line.

Phil seemed happy enough sitting behind the river with his hat on all day and did a solid job in defence.

The game could of gone either way and it was not until the last few turns that the point started to come back to the Germans.


I think Frank and Ozy did a great job as C in C's. There was a lot of pressure of them both and the order changes from Ozy were well executed and dynamic. Jon was flank marching and out manoeuvring me all over the place and I felt the Germans were used to their strength in this game.

Frank did a top job using his reserves and air power to great effect.

I think it was a fair result and despite what felt like a slog fest at times was overall a very good game.


Next time it's the desert.........