Saturday 29 April 2017

A Very Brief Overview of the North African Campaign

A Very Brief Overview of the North African Campaign

Image result for north african campaign map
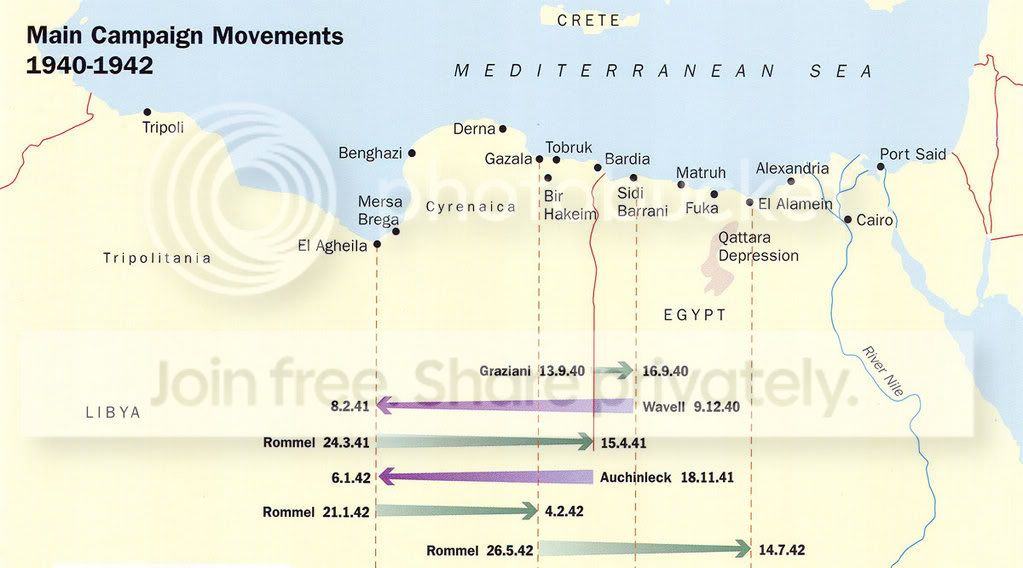
A pretty good diagram of all the offensives made in the desert campaign.  The only one missing is Montgomery's offensive in October 1942 at Alamein which resulted in the capture of Tripoli in January 1943 and the link up with the Allied army in Tunisia.


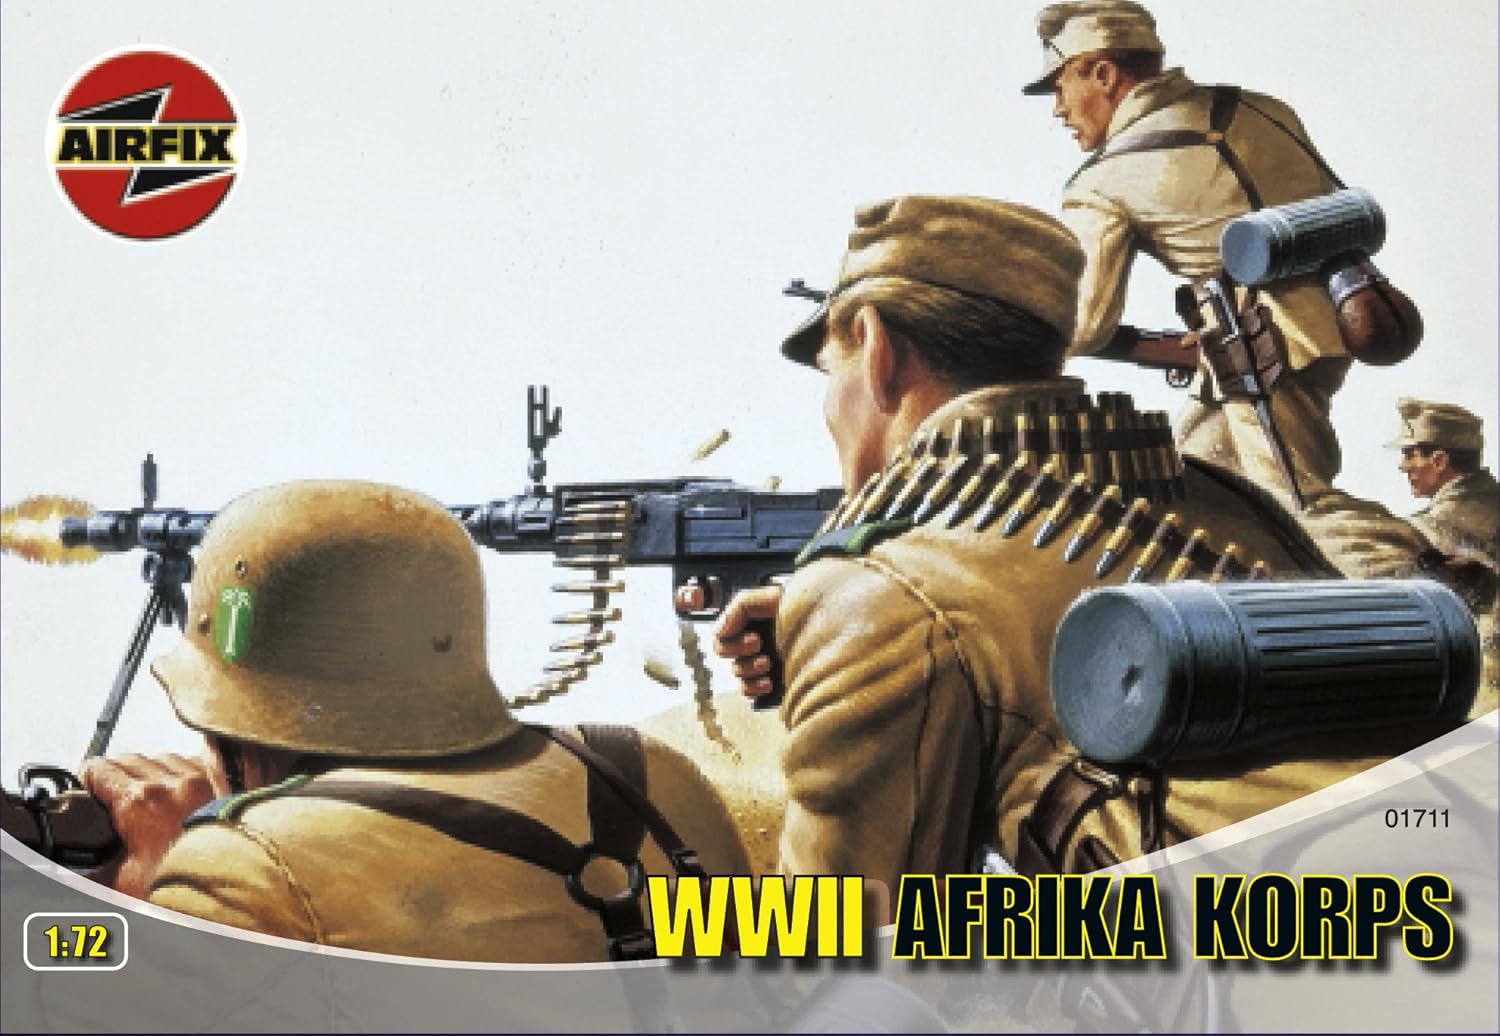
As part of the preparation for our first Desert Operational Game on 25th June I thought it would be useful to introduce the period, terrain, armies and rules over the next few weeks.  I read through Ozzy's copy of Flames of War and was inspired by the concise history of the WW2 campaigns in their rule book to do a version of my own.  So, here goes.....

There were three main combatants, all with their own strategic objectives.

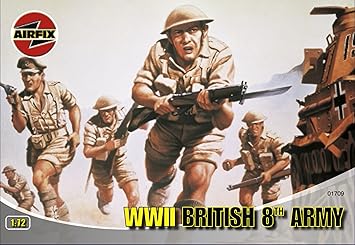
The British Empire and Commonwealth.


The Mediterranean was the main strategic highway for the British Empire, connecting the industrial homeland via the Suez Canal to markets and possessions in India, the Far East and Australasia.  Oil supplies were important from the Middle East but not as vital as those that came from the Caribbean and Venezuela.  However, these oil supplies would have been of immense importance to the Axis powers and the capture of Egypt and the Middle East could have outflanked the Russian front and brought Turkey into the war on the Axis side.  In addition, after the retreat from Dunkirk, this was the only theatre in which the British army faced the Axis powers; for Churchill success in the desert was vital to British prestige and morale.

Italy


Mussolini saw the Mediterranean area as Italy's sphere of influence.  Domination of this geopolitical area would elevate his fascist empire to great power status.  Germany's defeat of France had removed one rival, only Britain stood in his way.

Germany


Hitler and the army did not see the Mediterranean as vital to winning the war.  However, Hitler could not afford to let his only ally and fellow dictator be defeated by Britain and was prepared to prop up the Italians  by sending Rommel and the Afrika Korp.  Strategically, the Mediterranean was a buffer zone protecting the southern flank of his attack on Russia from British intervention.

The Theatre of Operations


So as you can see, all three participants had very different interests at stake in the desert which influenced the forces involved and the support that would be sent.  The area involved was barren, with no natural resources, few civilians and very little infrastructure; set against the technology of the 1940s they may as well have been fighting on an alien planet.

Britain had the most tenuous lines of supply as Axis airfields in Italy, Sicily and Crete dominated the Mediterranean, and therefore had to send ships via Cape Town or aircraft through the centre of Africa.  However, the Royal Navy and its large merchant marine enabled these lines of supply to be maintained and the United States was very active in its support even before entering the war.

The Axis powers had the shortest lines of supply, but British bases in Gibraltar, Alexandria and especially Malta made these short routes across the Mediterranean very dangerous.  In addition, oil was supplied from Rumania and the Italian merchant marine was even under attack by the Russians in the Black sea.

All offensives were thus reliant on shipments of supplies.  Whoever built up the most first, launched an attack which coincides with the dates on the map above.  However, these attacks would fizzle out once the supply lines through the desert got too long and your enemy was pushed back closer to their base points.  Thus, many historians refer to a pendulum effect as the fighting ebbed and flowed across the desert.

The British base in Alexandria, Egypt was 1892 kms from the main Axis base at Tripoli in Libya. Benghazi and Tobruk were the only half decent port facilities between these two points.  The Italians never had the industrial resources to enable them to supply a large enough mechanised army in this terrain.  Rommel came close to achieving a success in the summer of 1942 through tactical genius and captured supplies.  Montgomery is often criticised for his cautious and deliberate offensives but he was the only desert commander to maintain an advance with stretched supply lines over the full 1892 kms in just over two months!

Thursday 27 April 2017

Pina Colada, Anyone?

If you should ever find yourself reading the biography of any of the more capable American Civil War commanders from either side of the conflict you will usually find that they have one thing in common. Mexico. Most fought as junior officers in the U.S invasion of Mexico in 1847.  

The Mexican–American War,  lasted from 1846 to 1848. It followed in the wake of the 1845 U.S. annexation of Texas, which Mexico considered part of its territory in spite of its de facto secession in the 1836 Texas Revolution.(Remember the Alamo)
After its independence in 1821 and brief experiment with monarchy, Mexico became a republic in 1824. It was characterized by considerable instability, leaving it ill-prepared for conflict when war broke out in 1846. Native American raids in Mexico's sparsely settled north in the decades preceding the war prompted the Mexican government to sponsor migration from the U.S. to the Mexican province of Texas to create a buffer. However, Texans from both countries revolted against the Mexican government in the 1836 Texas Revolution, creating a republic not recognized by Mexico, which still claimed it as part of its national territory. In 1845, Texas agreed to an offer of annexation by the U.S. Congress, and became the 28th state on December 29 that year.
In 1845, James Polk, the newly-elected U.S. president, made a proposition to the Mexican government to purchase the disputed lands between the Nueces River and the Rio Grande. When that offer was rejected, American forces commanded by Major General Zachary Taylor were moved into the disputed territory. They were then attacked by Mexican forces, who killed 12 U.S. soldiers and took 52 as prisoners. These same Mexican troops later laid siege to an American fort along the Rio Grande. This led to the war and the eventual loss of much of Mexico's northern territory.
U.S. forces quickly occupied Santa Fe de Nuevo México and Alta California Territory, and then invaded parts of Central Mexico (modern-day North eastern Mexico and Northwest Mexico); meanwhile, the Pacific Squadron conducted a blockade, and took control of several garrisons on the Pacific coast farther south in Baja California Territory. The U.S. army, under the command of Major General Winfield Scott, captured the capital, Mexico City, marching from the port of Veracruz. It is this operation that has been the subject of both film and war gaming. Both sides were plagued by illness, desertion and lack of army cohesion.


This little gem was on ebay for £11.00. I say was because its now in the post on its way to me and combined with the Fire and Fury Regimental Rules and some Baccus 6mm figures will make for a fascinating campaign game.
.

Monday 24 April 2017

What to do, what to do?

At the moment there is but one immediate goal on my horizon as far as wargaming goes and that is Joy of Six and the Bull Run battle .However for many years I have been envious of the many eras and figures that you guys have collected , and with more cash available for my wargaming these days and my ever increasing enthusiasm for Fire and Fury, I have been looking for something a little different to run alongside my obsession with the American Civil War. My Modern Spearhead German stuff is more or less a done thing with a few vehicles on order to replace missing or damaged ones and the standard NATO paint job is pretty uninspiring , so the question was ,what to do?,what to do?
'Rusty ' has recently renewed his interest in Age of Eagles the napoleonic version of fire and fury, written not by the same author, but with his blessing, by a retired U.S army colonel called Wilbur Gray or Colonel Bill as he refers to himself in his emails. Anyway as usual I'm rambling, short story is I ordered Age of Eagles with the intention of building a Baccus army to fight Russ' French  and give me something to paint other than the Blue and the Grey.
 Colonel Bill it turns out is a very nice chap and he sent me an email saying that as I have ordered a hard copy of Age of Eagles I can have a free PDF copy of one of the Age of Eagle Modules called Age of Valour. There was a choice of about eight and one caught my eye almost straight away. Several years ago I got hooked on the Blackwood saga written by Douglas Reeman ,a story about 150 years of a fictional Royal Marine family from the days of African conquest to the 1st world war. The first novel was called Badge of Glory and the story culminated with the Royal Marine Battalions participation in the Crimea.


The Crimean War (May 1853 March 1856) was technically fought over access to Christian shrines in Ottoman controlled Jerusalem. In reality, the Sultan’s affording Catholic France
control of the Church of the Nativity was merely a convenient pretext to justify long desired Russian expansion at the expense of a beleaguered Ottoman Empire. France and Britain saw thru the charade and immediately supported the Porte with money and two large armies beside. In response the Czar evacuated Turkish territory seized along the Danube, but the Allies pressed on to the Crimea, determined to teach Nicolas I a well-deserved lesson by torching the Russian Black Sea Fleet. The Russians accommodated the Allies by scuttling the fleet themselves, but Britain, stout of heart if thick of head, continued south with the French to capture the port of Sevastopol. The campaign that followed was a military circus, one part sublime bravery by the common soldier, garnished with unbelievable ineptitude on the part of his generals, the Light Brigade’s little tiff at Balaklava now synonymous with military suicide. Though few remember, the war was also fought in the Danube provinces of the Porte as well as the Caucasus, where the Turks, ably led by Mushir Omar Pasha, scored several important victories against the Russians. Alas for the Czar, Allied incompetence could not negate technology, particularly Minie and Enfield rifles. With Austrian neutrality in doubt (Vienna conveniently forgot Moscow’s aid suppressing the 1848 Hungarian revolt), the Russians signed the Treaty of Paris ending hostilities on 30 March 1856. Only the French army emerged with heads held high, in part due to its final commander, the exquisitely rude, but tenacious Marshal Aimable Pelissier. 


As you have probably surmised by now I chose the Crimea module which arrived in my email this morning and I am not disappointed. Within are troop specifications for the British, French , Turk and Russian forces plus maps and Fire and Fury ( Age of Empire) OOBs for the battles at Alma, Inkermann , Traktir Bridge and the storming of the Malakov redoubts .
So that's it. My wargaming for the next few years is laid out before me. North America , its historical battles and a future operational game of ACW shall be my muse. NATO, Napoleonics and the Crimea shall be my Mistresses . Let the good times roll.

Wednesday 19 April 2017

The appeal of wargaming the North Africa Campaign


Or what is it that keeps me going on this project!


I've been working on my units and terrain for the WW2 North African campaign for a year now and I am very nearly ready to put on an operational game.

Image result for north africa ww2
MkVI Vickers tanks in typical desert terrain.  Unique camouflage and eccentric military vehicles sums up some of the appeal.

I wondered what it was that first got me interested in this aspect of military history and why I wanted to wargame it.  I suppose it began with the first wargames book I ever came across whilst browsing the school library; John Sandars "Introduction to Wargaming".  I couldn't believe that adults actually wargamed and that books were being written on the subject.  Up to then I had forced my brother and other friends into playing "soldiers" with plastic figures and marbles but this book opened my eyes to a far more sophisticated and "grown-up" past-time.  John Sandars was an expert on the 8th Army and the book was filled with his conversions of Airfix figures and models for both sides of the campaign.


Image result for john sandars wargame
Look at all those charts, measure sticks and templates!

I began to search out history books of the desert campaign, richly illustrated with Crusader tanks racing across the desert, the dreaded 88mm dominating the open battlefields, huge minefields protected by wire and an unencumbered wasteland just asking to be fought over by a weird variety of vehicles, tanks and aircraft.  There was Rommel "the Desert Fox" on one side and Monty on the other.  And to top it off, the Airfix 8th army and Deutsche Afrika Korp figures were some of the best they ever made.


Image result for airfix 8th army

Image result for airfix 8th army
The eternal enemies of many of my first battles. 

After University and my first proper foray into wargaming on the Eastern Front using Esci 1/72 models and 20mm metal figures I really wanted to wargame large historical battles.  I had already shifted from 15mm Seven Years War to 6mm Heroics and Ros in order to complete armies within my lifetime so I was keen to to do a theatre in WW2 in which I could recreate all the combatants in their full formations with a variety of equipment and organisations that gave differing strengths but with an opportunity for either side to win.

Image result for north africa ww2
Epic battles in an epic landscape.


The desert campaign had it all and with the arrival of the Spearhead rules in 1997 I had a system that recreated the doctrinal differences that would allow an outnumbered Afrika Korp along with the badly equipped Italians to take on the might of the British Commonwealth and Empire.

Our operational games have further inspired me to tidy up and complete my desert armies and I am really looking forward to the next phase in my fascination with this period.

Sunday 16 April 2017

Blog Nostalgia


On rainy Sunday's it is sometimes a nice time to look at some games we played on the blog.

I was trawling through the numerous battle reports and I stumbled on a game we played 3 Years ago using the sword and spear rules.

I must of suggested using them with Marks War Of The Roses figures. After reading the AAR It struck me that 3 Years had passed since this game took place.

A sobering thought but it only felt like yesterday!


The game before was Mark's Poleaxe 2 - yes 2014!

In November 2014 we played the fabulous Malaya campaign using the VAS rules, probably the last time we used those rules bar WW1 dreadnoughts.


Last time we used Phil's Samurai stuff was 2015 and before that 2013 using POWR


It is strange how time passes by and how quickly those Thursday or Saturday games fade into memory.

The beauty of the blog is very much true to what Jon said in that it is a timeless record of our games and Projects.

It makes it all that more important to always record what we did and when so on lazy Sundays like today when you look back at all the great games we have played over the years you can put a smile on your face.

Oh for nostalgia....


18th century battle between Russians and Austrians.

Imperial Austrians and the Czarina's Russians battle it out in Eastern Europe.

Russ, Mark and myself had decided to give the 18th century a visit and dust down the PoW rules, which I don't think we have played for some time.  We rolled for sides and I ended up on my own! I have several armies for the period but Russ and Mark opted for the mighty Russian army with its stalwart infantry and heavy artillery.  They intended to use its power in defence as the cavalry component is light and under strength.  They chose to fight the Austrian army, a good all round force with the option of a Croat light infantry division.


The battlefield at the end of the day.  The two hills in the far corner were my defensive objective points along with the road exit to the south of the hills.  The Russians were defending the town , road exit and large hill on the near side of the table.
The great aspect of this game is the initial set up of the battlefield.  The Russians were defending and so moved the terrain to suit them.  As attacker I had choice of which table edge to move on from.  Mark had rolled for a densely terrained table so I gave the Russians the side with the least objective points in the hope of spreading their defensive forces.


My main focus for my attack was the town.  I was worried that if I did not press Russ here he would be free to move against my objective points.  I did not expect to fully take the town but dispute it and win on points.  Russ put up a stout defence and used the wood to delay my full deployment keeping my forces away from the town for the whole battle.
Both sides struggled to spot each others deployment for a considerable time and with only 14 turns I was in a rush to get my infantry across the left flank of the Russians and dispute the town before Mark could attack my base line or aid Russ.  The Russians inability to spot all my commands kept them guessing where my main attack would be until half way through the game.

My right wing cavalry occupies the Russian line of supply at the end of the game.  Croats use the marsh to harass Russ' right flank and Marks observation corp.  Off shot to the top my reserve left flank cavalry is poised to attack the hill if Mark risks moving his infantry to retake the road.
My left wing cavalry had been screening the town as my infantry advanced and had taken some casualties from Russ' artillery.  Mark had decided to re-position his supporting cavalry towards the Russian centre and I thought it opportune to attack this force in case it was used to hit my flank.  The fight in the centre was touch and go but ended in a decisive win for the Austrians as the Russian cavalry was routed and I was able to take their line of supply.

Russ was busy withstanding my main assault and Mark was unwilling to counter attack my cavalry and risk losing the hill to my fresh right wing cavalry.  As a result I was lucky to secure a victory with an opportune attack!

A great game, well played by everyone and now leaving me wanting to play more!  Ottomans, French, the Prussians of Frederick the Great, a British Allied army and even the much maligned and slightly incompetent Reichs Army are ready to take the field.

Tuesday 11 April 2017

Operational Game, german thoughts


No one would have believed in the early years of the 1940’ies that Russian affairs where being watched by intelligences that inhabited the growing 3rd Reich. No one could have dreamed we were being scrutinized as someone with a microscope studies creature that swarm and multiply in a drop of water. Few Russians even considered the possibility of war with Germany and yet, across the Polish border minds immeasurably superior to theirs regarded this land with envious eyes, and slowly and surely they drew their plans against them.


Que music

 Image result for operation barbarossa

German plans

The plan was simple in effect, the majority of a panzer division under Jon’s command  would assault down tables C and D with the possible objective of isolating table 1C reducing their supply before eliminating the forces there.

The armored train was a worry  as most German anti-tank values were too low to guarantee a hit, coupled with the Katushka rocket ability  made it a force to be recond with.

If 2C could be suppressed then the recon battalion was poised to strike down the right hand side and cross over to 2B behind the river.

Our CandC would feed units into the advance to keep the pressure on whilst maintaining a reserve.

Tables A and B commanded by mark were the push and hold.

He had 3 battalions of infantry , 2 battalions of panzer 38’s and an engineering battalion . The original plan was to take A1 and B1 and then demonstrate at tables A2 and B2  collecting the points on the near side of the river and possibly drawing reserves to the A and B tables away from the main thrust.

The Germans had from army reserves a battalion of Falchemjager  to use, and the plan was to wait until 3 pm before deploying onto 3A to suppress the airfield and put any Russians on A and b tables out of supply, this coupled with the recon battalion appearing behind the river at 2B and the forces at A and B going over to the offensive with the engineers constructing a bridge to keep the Falchemjager in supply.

What enfolded was very close to the plot from the film “A bridge too far”.

A dug in Russian battalion on table A sucked in 2 German battalions who should have had no problems clearing the area except for a devastating air attack that destroyed 1 battalion and by the time the Russian were cleared the other battalion  was a wasted asset.

3 pm came and  the Germans could not get over the river to support the paratroopers who were annihilated by the Russian reserves. The Recon battalion couldn’t get thru and the engineers laid the bridge but only provided the Russians a means to cross the river.

Air capabilities were managed by the CandC and decisions would be made on requests by front line commanders.

Due to the devastating effects of the Russian bombers suppressing the forward airfield was the right plan.

In hind sight the push and hold plan could have been achieved with fewer troops and the falchemjager used for a different mission.

In conclusion the German plan succeeded but paid a heavy price for the small gains.
Well played Jon, Ozz
Yet another fab game gents, C and C positions worked and added another layer to the overall experience

Friday 7 April 2017

Bull Run Update

I'm about 40% of the way to completing the table for Joy of six and as requested it's probably time for a few photos. I've started at the Stone Bridge/Manassas end of the table (where Ian's Union forces entered the table during the xmas game).. The pictures show boards that are either finished,need a little touching up or are at plastering or flocking stage. All the hot wire cutting has been done so I know the lay of the land. I need to paint the wooden bridge and the ends of the rivers need sanding where the resin has expanded so that the boards sit flush and after some research I have discovered that North American river grass is green so I'm going to change that and I'm going to flock the board edges so that if there are any small gaps between boards hopefully they won't be as obvious.

Mary doesn't think the photos do the boards justice ,especially the water effect but here goes.

Black areas are either undercoat for roads, rivers or woods

Union left flank entry point looking from the middle of the Bull Run river toward the confederate positions (Henry Hill is the white unpainted polystyrene at top right), the stone bridge is round the bend in the river behind the woods. I am going to replace the yellow river grass with green since every picture I have found is that colour.  (Yes Mark, those are stormtroopers still in there boxes in the display cabinet). The wooden bridge in the centre needs painting.

The Stone Bridge crossing the Bull Run. The river needs sanding at the end as the resin leaked slightly from the dam I placed at the end during setting, but once that's done the two boards should sit flush and the gap disappear . Youngs Branch the smaller water course that runs through the centre of the battlefield can just been seen through the trees at middle left .The board in the center just need the roads and river preparing and then i will add the water effects to it. The crossroads that the figures are approaching has been created with plaster of paris, painted black, then sprinkled with small ballast to give it texture. It will then be painted with two shades of brown and a light dusting of dirty white. 

Youngs Branch. Unfortunately my camera hasn't done this justice as the river is shallower than the Bull Run and you can therefore see the river bed

The Confederate entry point. Manassas (the Federal objective is behind you. Henry Hill ,scene of the worst of the fighting is directly ahead through the trees. The Stone Bridge is to your right.

View from the Confederate positions . Henry Hill is to your left and the Stone bridge is on the other side of the trees to your front

This pretty much shows how each board is developed. I'm getting better with each board and revisiting the first ones each time I learn something new.

A slightly better shot of the Branch, but still lots of light reflecting from the surface so you don't really get the full effect. You will just have to see it in the flesh

No table is complete until some boots have marched across it and these guys are about to get their feet wet. See how the felt fields blend so nicely into the flock. I also need some single trees basing on 15mm diameter stands so that they sit better on the tables. The bigger stands are okay for large woods but many of the wooded areas are quite small.

Next section of the Branch ready for painting ,dry brushing and then the addition of river bed, vegetation and water. In the centre of the picture is a piece of raised river bed that will become another of the fords. Again ,I also need some single trees basing on 15mm diameter stands so that they sit better on the tables. The bigger stands are okay for large woods but many of the wooded areas are quite small.

Early stage of board development. Painted undercoat for fields, woods and roads. The roads have been created by laying down strips of Plaster of Paris which can be laid across contours. The edges have been folded over to create a verge.

Basic stage. This is Henry Hill. Ready for PVA to stick hills down, application of Plaster of Paris to create the smooth contours and roads. The board to the top left is drying after application of green flock and dark shades and light highlights .Next stage is to flock the areas that are wooded and then finish the roads.

You can only just see it in the picture but the parallel pen lines that run from the sticker at bottom left to the bottom right are where the Bull Run re-emerges at the rear of the Federal positions and runs almost two thirds of the way across the back of the table. This is the reason that the Federal forces attempting to outflank the confederates had to go on such an extended march.