Tuesday, 28 June 2016

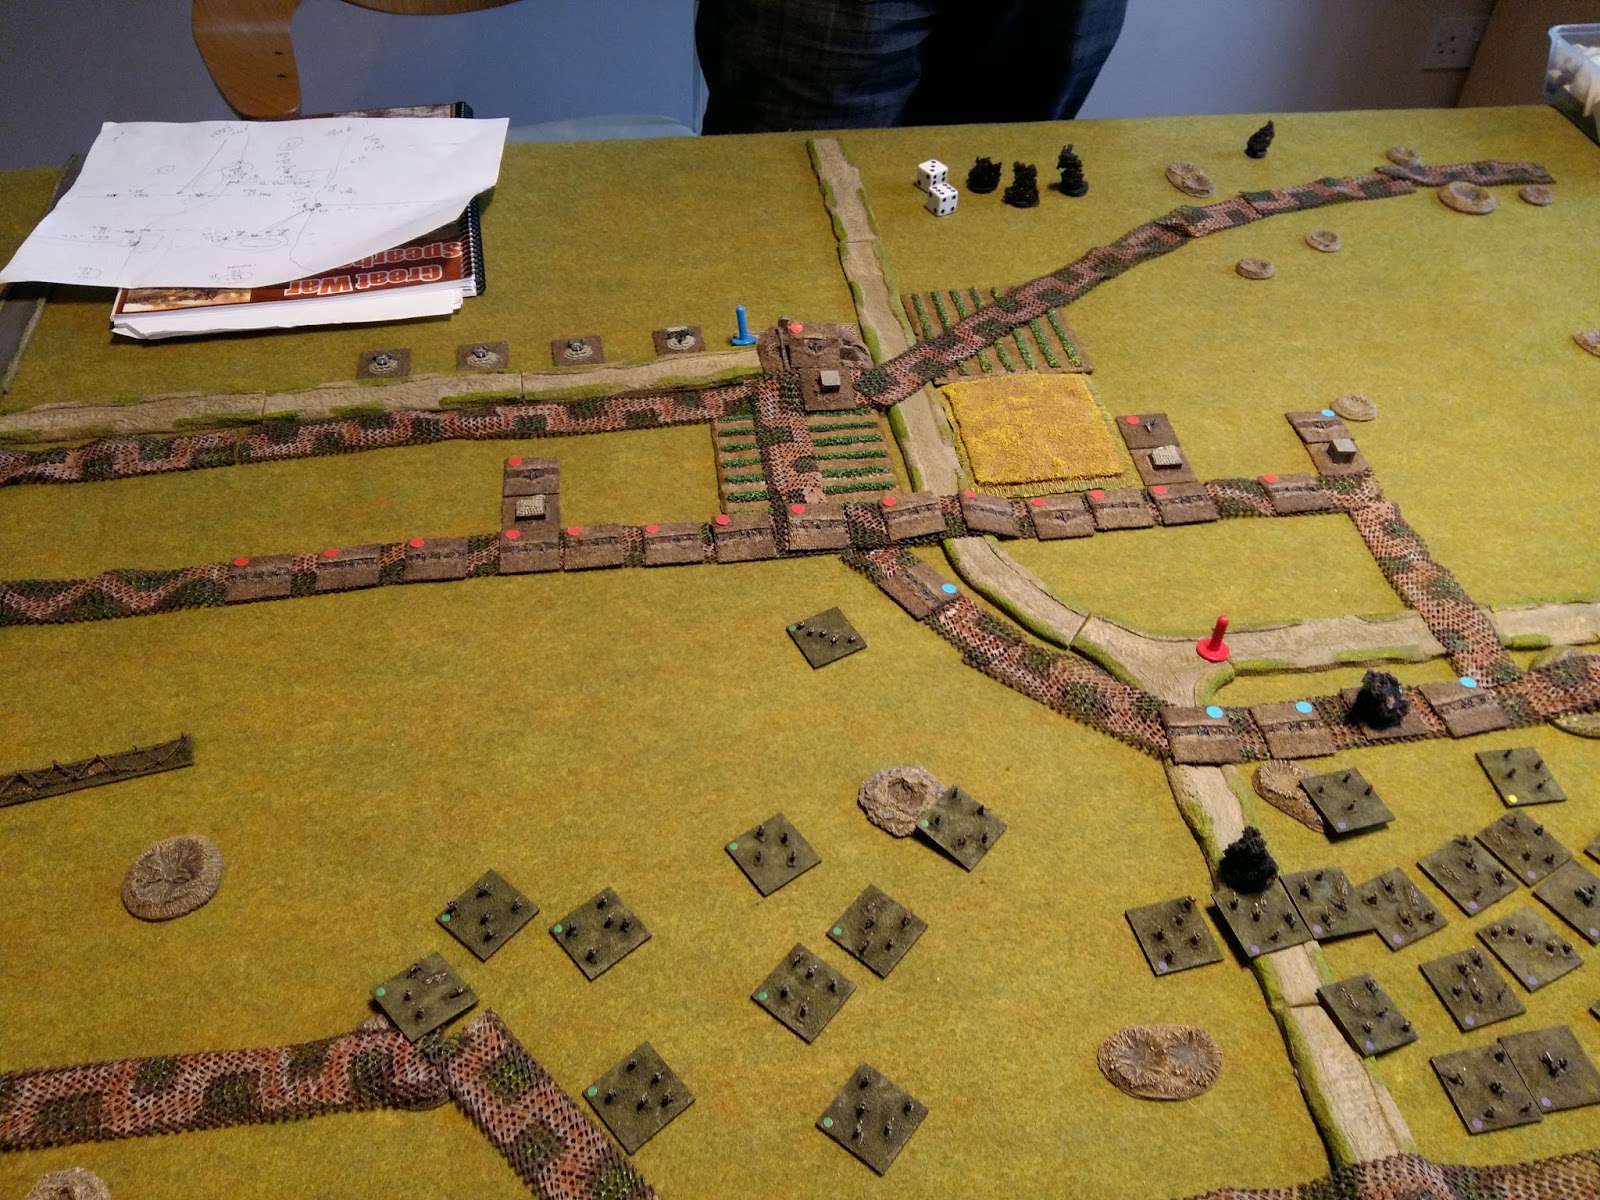
Novi 1799

Thursday night game
rules - Fast play Grande armee
Novi 1799 Northern Italy
Russian and Austrian alliance against the French
 French upon the hill with the Austrians in the fore ground and the Russians coming on via the road


 French hold Novi but retire from Pasturana
Austrians Probe


French repulse Austrian attack on Pasturana but Austrians try and take Villafranca and turn French left


 Russians finally wading in to try and take Novi, which they did and then lost

in the end the French held the allies out of the towns and slopes but their casualties were high.


Friday, 24 June 2016

Switzerland 6 The rest of the world 0


It was time once again to summon the armies or the Swiss and French in a bitter conflict over at Ian's house today for a POW renaissance game.


The stakes were high, the Swiss came into this being unbeaten after their last five battles only narrowly victors in the previous encounter and coming a close second against Mark's Burgundian army. Could Ian and the French finally stop the "machine"?


We rolled and the French where on the attack so I got to place the terrain....


I was careful to ensure that whatever side the French decided to come on from I would not be at a loss. I had 5 ft of stream to play with and some woods plus a few areas of fields and a BUA.


Ian elected to attack from the North table side which suited me fine. Before we wrote orders and I deployed my army it was time to decide if I was going with the Milanese option. I dropped this in favour of a full Swiss army of pike split into 3 commands.


Here is the first turn about to commence..... My C in C has the centre command whilst on the left & right I chose to attach my commanders to pike units.....


Ian and the French make their first moves..... I made mine and had written attack orders to take the hill with my left and centre commands, whilst the right was to take the crossroads.

I quickly sent an order change to this command and sent them off to attack Ian's main command by the woods...


On to the next turn..... Ian has managed to take the hill and you can see that a unit of retainers has charged my 2 pike units. This was a compulsary move as the cavalry are class 4 hand combat troops so behave like elite units and have to charge unless you spend 2 pips to hold them.


The retainers take a kicking against 3 pike units and suffer 6 casualties. they retire shaken.


Over on the hill on turn 3 Ian sends in his Gendarmes but they end up shaken. The elite French units had to charge and this was not working out well as the Swiss literally munched through them causing horrendous casualties whilst not taking much damage themselves.


This pike unit pursued forward and I knew that in the next turn would be attacked on all fronts.

The downside of Elite troops would shortly be my nemesis!


Over in the centre I was very quick to close on Ian's command and he was unable to bring his heavy guns into play quick enough. I knew I would get in but would have to take a volley of grapeshot on the way in.....


Ian's weakest command and I knew it which is why I pressed for the attack. The woods proved impassible to cavalry so I had a good anchor point to work on with this command.


Over on the left Ian get's mobile with his cavalry. My pike are vulnerable when shaken on the flank.

Ian was keen to exploit anything he could at this stage as several French units had retired with heavy losses. The Swiss looked menacing at this stage and we decided to break for lunch at this point.


Back after the break...... Principles of war has an uncanny knack of slapping you in the face. I have this theory that in most games, winning or losing at some stage of the battle the demons rise up and play havoc causing chaos on the table.


Before we had lunch this battle was looking like a walk over for the Swiss. Ian was in a very bad position because he was only able to attack piece meal which we know from experience against he Swiss is fatal and it showed. I was hitting with 5- 6 casualties per melee V 1 or 2 back. The pike had started to dominate like never before and it became scary. Ian kept his head up and played on even though the French had lost two units already by now.


As a general would do Ian took his chances after lunch, hats off.


He attacked where he could, things were desperate now, this was looking like a walkover for the Swiss but with some luck and well timed opportunist attacks Ian hit a winning streak


Flank attack after flank attack came in and I failed morale test after morale test, needing only to roll less than 17 and 18 on the D20 but failing by 1!

The pike are ordinary in these circumstances and by turn 6 I had lost 4 pike units in succession.

What a come back by Ian! He had managed to even things out with 4 units each lost.

Our armies had suffered that much that we both were now on hold due to lost units. It would now be a matter of resolve, brilliant generalship and skill to win this battle....


Ian threw everything he had at me and at one point had sandwiched my C in C between two cavalry units. I needed to roll less than 5 to survive. I rolled a 4! The French would of won here as my C in C was attached to the unit and would of surrendered to the French causing an instant victory.

My dice saved me when really Ian should of won.


Ian also had 6 chances to kill either my generals / C in C but never managed to roll higher than 3 on the D6 each time. I can't believe how I got off with this, shocking stuff!


We reached turn 9 out of 18 and somehow I managed to get in another counter attack which saw off another unit of Gendarmes. Over in the centre I lost my general and the pike unit he was with but it was not enough and the French main command started to melt away quickly.


At the end of the turn Ian declared that his army was now on retreat from the table after a crushing round of combat.


The day was done and the Swiss stole victory once again from Ian's French army.


This was a great game and could of easily gone in favour of the French. Ian was on a roll after lunch and I was deeply worried that a combination of great play by Ian and some shit dice rolling by me would spell the end and the first loss for my Swiss army.


It never happened in the end and the Swiss claimed their 6th consecutive win.

The battle was a real boxing match with both sides dealing brutal blows to each other.

Ian's heavy guns performed poorly and I do wonder if this was a factor in my victory.

The Swiss move so fast they are on you before you know it. I was on the attack from go 1 as it's my go to tactic with this army. Get them in fast and make it count....


Another POW roller-coaster ride with massive swings on each side during the battle.


The game was played in good spirit and in good company which is what it' all about.


We both enjoyed the game, the outcome was second guest.

Thanks Ian.


Who is next for the Swiss to take on?

Thursday, 16 June 2016

Saturday's World War 1 Game

Saturday saw the welcome return to Great War Spearhead II. It has been a long time since we played a WW1 game and as part of the build up to our operational game later this Year I was keen to re familiarise ourselves with the rules and concepts of play.


I also got to use my new German army which is now almost finished bar a few stands of this and that.


I attacked with a full corps and assets whilst Mark defended with a Division of three regiments.


German forces awaiting deployment. The other regiment is still in the box.


Marks defences laid out.....


I opted for a 5 day pre bombardment as I had learned from previous games with Ian that clearing the wire with your field artillery was hit and miss so I wanted to try and remove as many sections of wire as I could and inflict as much damage on the French defences with my heavy guns...


My attack went rather well and for the part I was mostly unopposed coming over the wire. Mark had retreated out of the from sectors probably as a result of the barrage of artillery.


The French did receive a free regiment as I went past 3 days on the pre bombardment.

Mark lost this early in to the game but I had a potential problem with a FO and some brigaded field guns which MArk was starting to thump me with. My stosstruppen managed to contact the FO and kill it which silenced the guns.


I opted to use some pre planned gas attacks which ended up killing more of my troops than Marks


I managed to secure two out of three objectives with minimal losses, something which is rare !


Over on the other table side I launched a second wave with another Division of three regiments.

The wire held them up for a turn but they were soon across and over


All quiet on the western front....


Where are all those French?


I just had to take this last objective.....

But soon came under heavy fire from the entrenched defending regiments of French.


Over on the right I opted not to open up with my firing as this would allow the French to call in a lot of nasty artillery. I was going to close assault to clear the trenches.


Mark needed to leave early so Ian took over.....


We only played on for another hour or so but the result was pretty clear in that the Germans had just enough numbers left to push and take the last objective but only just!

It was an interesting game and I did not expect the result. Usually the attacker takes a beating big time but for some reason this was not the case.

A few machine guns and more on table guns would of slaughtered me on the wire but I guess the pre bombardment was effective enough in deterring the French from doing this.


Great game, looking forward to another soon.

Tuesday, 14 June 2016

Torpedo Attack Rules Clarified - General Quarters

To avoid any arguments about torpedo attacks (yes they are a common theme)

I wanted to clarify the General Quarters Torpedo attack rules as they are written in the book so I read the few pages earlier and decided to post the procedure here before our game this week.


Firstly....

On your ship SDS data there may be a number in brackets, there may be two divided by a horizontal line.

One number means your ship has the ability to fire out of Port & Starboard. The number confirms how many tubes are available to fire.

If you are lucky enough to have a horizontal line and two numbers then you get to fire out of each side with the amount of tubes confirmed by the number in brackets.

If the numbers shown on the SDS have a circle around them this means that you are only carrying "light" torpedoes. These are less effective with range and damage.


So far so good?


Secondly.....

Target acquisition


AFTER all gunnery combat has been resolved players then elect to launch torpedo attacks with eligible ships and targets.


To acquire a valid target use the broadside measurement card. You can only launch against a target that is does not bear within 30 degrees of bow or stern of your ship.

You don't need to measure any distance at this point.

Once you have determined you are within firing arc then place a marker next to the side of the firing ship. It's possible to have a marker on both sides of your ship.

Write down the number of torpedoes you are firing from each side of your ship on a piece of paper or indicate it on your SDS sheet.

You now need to guess on the movement of your target ship in the next turn.

Just select M if you believe the target will maintain it's course

Select P or S if you think the target will turn to it's port or starboard.


Next turn after all ships have been moved if you are lucky enough to of guessed correct then you need to measure from your torpedo marker to the front funnel of the target ship after it has moved.

Standard range is 24"

Range for light torpedoes is 16"


Consult the mine / torpedo hit chart adjusting for range and target speed. Roll a dice and read the result which is the number of hits scored after all adjustments.


Roll a D6 per hit and consult damage chart. If the target ship being fired at is rated a B* or CA* then DOUBLE the hull damage


If any rolls result in a "miss" then the attacking player rolls a D6 for each ship that is within 4" of the intended target, nearest first. on a roll of 1 or 2 the attacking player resolves the torpedo attack against the new target (friendly or enemy) repeating the steps above.


I hope this crystal clear as I want to be able to resolve torpedo attacks quickly with little disruption to the game.


Any questions........ let me know!


Operational Battle of the Bulge


Mark's last post and recent conversations got me thinking about how to turn the operational game into a representation of the Battle of the Bulge.

Remembering a great campaign game Jon and I played some years ago on the computer I thought that a simple way to alter the game was to turn each table into a cross roads or bridge point upon which either side could move from table to table.  The number of crossroads/bridge crossings would be equal to the points cost of that table.  Any unit that could not trace a line of supply along a road network to their reserve tables would be forced onto defend orders and suffer a -1 in firing.

The US would have the advantage of holding all the tables to begin with and would need to shepherd their resources as quickly as possible to stem German advances, creating choke points and possibly cutting off German probes.  The Germans may want to advance as quickly as possible to secure these key objectives, but dare they leave isolated US units in their rear, able to counter attack, like in our last game.

The town table on 1C could be Bastogne with roads leading out to all those adjacent tables - again could the Germans afford to leave it alone for more valuable tables or do they risk excessive casualties and time delay to secure their rear areas.  The river would be the Meuse, the last defensible barrier before Antwerp and the crucial supplies maintaining the whole Allied Western front.

Using the points system the Americans could be allowed to field any units they wish, as there was a hodge-podge of different outfits holding the Bulge.  Would the US player spend big points on elite Paras to hold Bastogne, or opt for more Green troops.  Can they afford not to have a unit of engineers building road blocks and laying mines.  Will the German players make the most of their superb late war equipment in the restricted terrain and use Brandenburg Kommandoes to misdirect US reinforcements.

However, we would need the winter terrain for this game and development of winter rules to impede movement and make the road network so important.

Just some ideas for a future game!

Points

I have been adding up points for my armies to future one day games
and come up with the following so far
 
41/42 panzer division
2 tank battalions
4 infantry battalions
1 recon battalion
1 motorcycle battalion
1 anti tank battalion
1 engineer battalion
1 artillery regiment
 
Points
1300 at regular
 
44 panzer division
2 tank battalions
3 infantry battalions
1 armoured infantry battalion
1 recon battalion
1 anti tank battalion
1 engineer battalion
1 artillery regiment
1 AA battalion
 
Points
2000 at regular
 
US 43/45 Infantry division
1 tank battalions
9 infantry battalions
1 recon troop
1 tank destroyer battalion
1 engineer battalion
1 artillery regiment
1 AA battalion
 
Points
1700 at regular
 
The German panzer divisions don't come with a lot of infantry and are expensive  as regular are 1.2 x the cost
 
Transport vehicles have been added to all troops and  the cost included
 
The games so far have been about 2000 to 2500 points for the attacker and half for the defender


Monday, 13 June 2016

Operational WW1 notes


Excellent game on Saturday.  Russ put together a well planned offensive with his 1916 German Corp that seemed to push away Mark and mine's French defence.  Even though Russ risked an extension of his pre-bombardment and allowed an extra French regiment to reinforce the front we still didn't have enough to stop the Teutonic horde - but I'll let Russ blog a proper report with pictures.

I just wanted to list some of the points we agreed on to make WW1 fit our operational one day game.

FOOs in towns and on level one hills can spot anything in the open on that table.  Level two hills allow spotting onto adjacent tables.

Pre-bombardment  will be against entire tables instead of sectors.

77mms and higher can bombard onto adjacent tables.  150mm can bombard onto adjacent two tables. 210mm can bombard three tables.  305mm can bombard four tables.

I am tempted to do away with ammunition except for preplanned bombardments.  Simpler but too deadly?  I think the difficulty of calling it in simulates ammo problems - let me know what you think?

Dug in permanently wired HQs increase their command range.  Divs can send orders to adjacent tables.  Corp HQs to two adjacent tables.  This allows the defender, using one corp to defend all ten tables tables.  In addition units can be placed outside command range but they cannot receive a change of orders.

All attacker HQs are always placed and any defender HQs placed on a contested or arial reconned table.  Once any unit has fired or has been spotted then the whole of that unit is deployed.  This speeds up play and allows some hidden deployment.  It does mean the defender has some flexibility in their set up as they deploy units to their own advantage - but it is quicker.

Tables are shell holed after three days of pre-bombardment.

We need laminated plans of each table upon which the defender can indicate what defences and units they are committing and then we can do the pre-bombardment before the Saturday game.

I need to protocol OOBs, deployments on laminated tables and pre-planned bombardments to allow as much to to done prior to the Saturday game.  As there is so much pre-planning in WW1 we may need two Thursdays to get it all done but as a result I definitely think we will get the actual battle played on the Saturday.

Any more thoughts let me know.  At the moment we are looking at either the first weekend in August or September - please confirm which you prefer.