Tuesday, 23 December 2014
Great War Spearhead Scenario booklet
A scenario booklet has been released for GWSII covering the first few months of the war. These will be in open terrain with no trenches which I have found can be useful for 1918 and the eastern front. I think they do intend to release more scenario books in the future.
View on www.lulu.com http://www.lulu.com/spotlight/GWSHII
Saturday, 20 December 2014
Battle mats
http://www.wargamevault.com/product/138627/Battle-mat-053-Sea-plain?filters=40104_0_40008_0

Basically, an image that can then be printed onto fabric etc. to create a detailed battle mat. Lots of types to choose from. Perhaps we need to speak to Len?
Malaya 1941. After Action Report.
Seventy minutes before the attack on Pearl Harbour, the Japanese launched their invasion of British Malaya and Siam. As part of their extremely ambitious plans to dominate the Pacific within six months and set up a Japanese hegemony across Asia, they took three massive risks:
1. That they could surprise the entire US Pacific fleet in Hawaii and destroy it.
2. That their aircraft based in Taiwan could surprise and destroy all the US airbases in the Philippines.
3. That they could launch an amphibious invasion of Siam and Malaysia without naval superiority in Capital Ships in the South China Sea.
Our campaign was an attempt to see how risky no.3 would be in the event that the British could deploy an aircraft carrier with Force Z, which was the historical intention, but Indomitable failed to arrive as it had hit a reef in the Caribbean (Imagine the howls if I had made Jon and Russ roll for that eventuality!).
Historically, the Japanese easily destroyed Force Z through superior air power and the unimpeded invasion romped through Malaysia and took their intended objective Singapore well ahead of their timetable.
Our campaign concentrated on the crucial first few days of the invasion and played out somewhat differently as the following rewritten history shows.
Early hours of December 8th
The Japanese 56th infantry regiment, under the command of Col. Yoshio Nasu, arrives off the coast of Kota Bharu. Reinforced with an artillery regiment and a company of engineers, the whole force is embarked on three transports. They are supported by Vice Admiral Jisaburo Ozawa's 7th Cruiser Squadron, a powerful force of 5x Cruisers, 1x Light Cruiser and 14x Destroyers. The squadron is split into a support and screening force and the landing commences under a naval bombardment of the beach defences. It is imperative that this airfield is taken intact to protect the more important landings further north at Singora and Patani, to enable Japanese aircraft to support the invasion of Malaya and to increase protection of convoys from Indo-China. German intelligence has also informed the Japanese that there may be a radar installation at the airfield, a scientific apparatus that the Japanese would dearly like to capture.
Kota Bharu is a far flung RAF base on the border with Siam that constitutes the outer defence ring of Malaya and Singapore. The previous day, Hudson recon aircraft from Kota had identified Japanese convoys in the Gulf of Siam heading to a number of destinations in Siam and possibly to Malaya. The British command in Singapore, headed by General Percival is dithering over what to do. Existing plans call for a prompt occupation of Siam but the British ambassador in Bangkok has gone native and is imploring Percival to hold back on attacking a friendly neutral.
Meanwhile, the garrison at Kota Bharu, the 8th Indian Brigade, has been put on full alert under their competent commander Brigadier Keyes. However, he has had to spread his three battalions over an extensive area of coastal inlets and beaches, and there is only one unit, the 3/17th Dogra, thinly emplaced along the beaches in front of Kota Bharu airfield. Japanese reconnaissance had identified this sector as the most direct route to the airfield and the pre-bombardment is designed to knock out defences on the beach and then creep forward of the main advance and punch the 1st Battalion of the 56th onto the airfield. Nasu, confident in the night fighting capabilities of his men, has claimed that he will take the airfield by the morning and reopen it within 24 hours!
By luck the Japanese have chosen the weakest held area of the beach for their landing. Under a full moon the pill boxes are quickly destroyed and the barbed wire entanglements are blasted. However, as the assault infantry storm ashore they run into dense minefields thickly strewn on the beach. Chaos and confusion abounds as units get mixed up on the beach and casualties mount; if the landings had been in a more strongly defended sector the 1/56th would undoubtedly have been wiped out. Nasu and his command post intends to land in the morning with the second wave, and inexplicably, the engineers equipped to clear beach obstacles have been placed in the third wave! Nevertheless, the few Dogras who are in the vicinity pour fire onto the beachhead and lose some of their number to the creeping barrage that now advances without the Japanese infantry. Keyes orders up reinforcements and plans to launch a counter attack in the morning. Driving through the night, the 2/10th Baluchs from the south and the 1/13th Frontier Force Rifles from the west. The 8th Brigade is a reinforced unit and a further 2 battalions are available further to the south but at the moment Keyes is unsure whether further Japanese landings are intended at other locations.
December 8th -morning
As the sun rises, the 1/56th seems in desperate trouble. Casualties are mounting and the RAF are now able to operate against the beach head and the supporting naval vessels. AA from the Japanese cruisers and destroyers successfully repulse torpedo attacks by RAAF Hudsons, but Buffaloes straff landing barges and infantry struggling to get free of the minefields. Keyes begins to organise his arriving reinforcements, and plans a counter attack to retake the beach line and destroy the Japanese amid the minefields.
At Singapore, Percival is pondering reports on the Japanese invasion. Trained in the mindset of the Great War, he is reluctant to make hasty attacks that achieve nothing but high casualties. The 11th Indian Division, poised at Jitra, is awaiting orders to march into Siam and contest the Japanese landings at Singora and Patani. At the same time the bulk of the invading Japanese 25th Army under Lt Gen Tomoyuki Yamashita is securing several key positions across Siam. Suddenly arriving at Bangkok in the early hours he has forced the Siamese government to accept Japanese military assistance and has demanded that all Siamese army and police units hand in their weapons to the Japanese. Yamashita is a taciturn, no-nonsense general still in disgrace for being implicated in a failed coup some years ago. He was surprised to be given this prestigious appointment but he is widely acknowledged to be one of Japan's leading generals. However, the Emperor has still refused to grant him an audience and Yamashita is under a great deal of personal pressure to succeed in his appointment and earn the Emperor's forgiveness.
However, the commander of Force Z, Admiral Sir Tom "Thumb" Phillips is determined to engage the Japanese straight away. Force Z has only arrived in Singapore a few days earlier in an attempt to deter Japanese aggression. Clearly this has failed and Admiral Phillips has received orders directly from Whitehall which merely state "Commence hostilities". Imbued with the traditional aggression of the Royal Navy, Sir Tom has sailed north to Kuantan under CAP from Singapore. As a precaution he has also sent off some of his escorting destroyers on a wide sweep towards the Anambas Islands.
At the same time Admiral Ozawa has ordered a detachment of destroyers south to act as an advanced picket in case Force Z takes this direct route. Inspite of several spotter aircraft in the area, including air recon units flying from RAF Kuantan and the advanced destroyers of both navies, Force Z advances on Kota Bharu undetected and without detecting the awaiting Japanese. Further out to the east the Japanese have placed a submarine cordon in the vicinity of the Anambas Islands but these fail to spot anything. The Royal Navy destroyers report a possible sighting of a periscope but generally confirm no Japanese activity in the area.
December 8th - afternoon.
At Kota Bharu, Brigadier Keyes has organised his counterattack and the 1/13th FFR advances from north of the airfield into the jungle with the objective of taking the shore line and sealing off the gap which the Japanese have begun to exploit. The 1/56th has cleared the beach but has suffered 50% casualties from mines and air attacks. Col. Nasu has arrived with the second wave and has now begun to take charge of the disorder at the beach head. In addition, Japanese air support has arrived from bases in Indo-China and the RAF has lost control of the skies above Kota.
The 1/56th is surprised by the counter-attack but quickly adopts defensive positions. The whole regiment has had years of experience fighting the Chinese and has been under intensive training in Taiwan prior to the landing. The 1/13th FFR is a regular unit but most British units have had no relevant training in jungle fighting and the Japanese quickly dominate the combat.
An 18 pdr battery supporting the British attack is destroyed by Japanese aircraft and bombers inflict damage on facilities at the airfield which hamper further attempts by the RAAF hudsons and buffaloes to influence the battle. The Japanese airforce has made an important impact at Kota but this means that it has no assets free to search for Force Z which is sailing north in daylight undetected.
By late afternoon, the 1/13th FFR are in full retreat having suffered heavy casualties. The Japanese have been relatively unscathed but the advance on the airfield has been significantly delayed. Brigadier Keyes, disappointed in the failed counter attack, reorganizes his available forces, ordering the Baluchs to hold the airfield and the Dogras to fall back from their beach defences and hold the southern approaches to the airfield. Col. Nasu is determined to resume the advance and orders the depleted 1/56th to resume its advance towards the airfield and screen the 2/56th which is now moving off from the beaches. Without engineers it too has lost casualties in the minefields and has had to leave its MGs on the landing beaches to offer AA protection against the RAAF attacks. Nasu has had to report that it may be a further 24 hours before the airfield is secure!
Admiral Phillips has also received reports indicating that the defence of Kota has been successful during the morning. He reasons that an attack on the Japanese landing fleet at Kota in daylight by Force Z would lead to heavy losses amongst his ships and therefore takes his command further east, out into the China Sea to maintain the element of surprise. In this position he can then use his advantage in radar to either attack Kota at night or push further on into the Gulf of Siam and seek out Japanese convoys. Whilst the Japanese airforce supports the fighting at Kota, it is left to a small detachment of two Japanese destroyers to cover the vastness of this region of sea and they fail to spot Force Z. Admiral Ozawa is aware from Japanese agents in Singapore that Force Z has sailed but he is relying on his destroyer scouts to spot the British before they can engage his main force. Aware of the dangerous situation of Col. Nasu's troops he orders most of his remaining destoyers to keep close in to support the landing whilst the cruisers take up a screening position in anticipation of an attack by the Royal Navy.
December 8th/9th - night.
As night falls on Kota Bharu, Col. Nasu is determined to take the airfield at all costs. The commander of 1/56th, ashamed that his unit has failed in its task and aware of the shame he will bring upon the regiment launches a banzai attack on the airfield perimeter. The few remnants of the battalion charge across the open airfield and are killed to a man by the defending Indians. The 2/56th uses the cover of the charge to establish a firing line towards the north and west of the airfield whilst the 3/56th struggles to move up from the beaches and envelop the airfield from the south. There is much confusion amongst the attacking Japanese as individual units get lost in the darkness but eventually their superior training and elan begin to dominate the fighting. Brigadier Keyes troops put up a stout defence among the stores and buildings and at one point, the Brigadier with his HQ command counterattacks and stabilises a vital point of the defence. However, as dawn breaks the defenders are overwhelmed and Brigadier Keyes is forced to withdraw into the Jungle with everyman looking to himself. Unable to make an ordered withdrawal onto his remaining two battalions that are now in position two miles to the west of Kota, a crucial opportunity for a counter attack at dawn is missed. Nasu, relieved that he has finally taken the airfield radios confirmation to General Yamashita.
This is the only good news that Yamashita has received so far. During the night a vital convoy of stores and vehicles has been destroyed in the Gulf of Siam by Force Z. The six transports with only two destroyers as escort were detected by the radar on Repulse and Prince of Wales. The two Japanese escorts spotted the Royal Navy screen of three destroyers and immediately moved to intercept them. However, it is doubtful if they ever knew what hit them as Repulse and Prince of Wales "Matapaned" them. The undefended convoy was quickly despatched and Admiral Phillips forbade the search for survivors as he was determined to maintain the initiative and risk an attack against the main landing beaches at Singora and Patani.
December 9th - morning.
As morning dawns Col. Nasu is able to see the full devastation of the battlefield. Intense fighting and hasty demolitions by the defenders have rendered the airfield unusable and Nasu signals Yamashita that it will be 24 hours before Kota can be operational. However, he is told to consolidate his position as Yamashita is unable to promise when follow on supplies and men will arrive to reinforce Kota.
During the morning, Yamashita is having a heated meeting with the Imperial Navy's representative. He is demanding an urgent improvement in his logistics but the navy is unable to promise the necessary supplies whilst Force Z is operating across 25th Army's line of supply. At this moment news arrives of a devastating attack on the main landing beaches of Singora. Indomitable's full air complement has attacked at will all supply points and troop concentrations in the vicinity whilst Prince of Wales has engaged targets of opportunity on the shore line including valuable transport craft. In a blind fury, Yamashita leaves the conference and the shamed navy representatives to get a full report on the attack.
Meanwhile, Repulse has been tasked with covering the bombardment and during the morning it is spotted and engaged by Imperial Army aircraft operating from Indo-China. Unable to operate from captured airfields and delayed by its support of the attack at Kota it is only now that it deploys its full strength in the hunt for Force Z.
General Percival, unsure as to whether Kota Bharu is still under British control or if the Japanese will make more landings further south, decides to risk a reconnaissance in force across the Siamese border. Half way between 11th Indian Divisions positions at Jitra and the Singora/Patani landing beaches is a precipitous stretch of road known as "the shelf". This is a natural bottleneck, that both the Japanese and the British must control if they are to launch further attacks and 11th Indian Division is tasked with taking it.
During the morning, Force Y, under the American Rear Admiral Palliser, comprising the cruiser Exeter and the Dutch light cruiser Java with six United States destroyers signals its intention to rendezvous with Force Z. It has been ordered up from the Philippines by the Joint Chiefs of Staff, as they believe Admiral Phillips has the greatest opportunity to blunt the Japanese juggernaut in its multiple attacks across the Pacific.
December 9th - afternoon.
However, as advanced elements of 11th Indian Division lumber towards "the shelf", recon units from 25th Army have already secured the vital position. Yamashita had already foreseen the importance of this stretch of road and had used every available piece of transport to push forward his recon on the afternoon of the 8th. The Japanese had driven through the night and had spent the morning of the 9th constructing defences. It was therefore with some surprise that the 11th Indian bumped into these defences and was forced to halt as they had no heavy weapon support. This was reported back to Percival, and as he had just received confirmation that Kota Bharu had fallen to the Japanese, he authorised 11th Indian to fall back onto the original Jitra defences, fearful that they would otherwise be outflanked from the east.
At Kota Bharu the Japanese were desperately trying to make the airfield defensible and were in no condition to follow up their victory. The high rate of casualties and the lack of reinforcements had led Col. Nasu to plead for more supplies but Yamashita has simply ordered him to hold the airfield as a priority. Brigadier Keyes, meanwhile, is still struggling to find his remaining troops and Percival has ordered his second in command to hold his current position until the situation is clarified.
Meanwhile, Admiral Phillips, buoyed by the success of his surprise attack on Singora and Patani, orders Force Z south to attack the Japanese at Kota. Communication with Singapore is confused but he informs Percival of his intentions hoping that the army can coordinate a counter attack with the appearance of his fleet. Unfortunately, Keyes is still lost and Percival considers the remnants of 8th Indian Brigade too weak to retake Kota whilst preventing any further advance by Col. Nose's Japanese. Force Y, steaming through the Anambas Islands is ordered to rendezvous with Force Z at Kota.
By mid afternoon Force Z and Y have arrived off Kota in two groups. Indomitable and Prince of Wales hove in close to the coast escorted by Exeter and Java and four destroyers whilst the remaining destroyers are pushed out to sea to act as a screen. Admiral Ozawa, under enormous pressure, is desperately attempting to locate the Allies. The Japanese airforce has maintained contact with Repulse since the morning signaling its location and heading to the Japanese Navy, and as it steams south to link up with the rest of Force Z, Ozawa orders all his ships on a wide sweep towards Kota.
Indomitable launches its full complement of albacores against Kota Bharu and Prince of Wales bombards concentrations on the shore line and around the airfield. Whilst reports of the attack come through to Ozawa his fleet begins to engage the destroyer pickets. In an intense action, the Japanese cruiser Mikuma is crippled by torpedo attack but in return the Royal Navy destroyers Jupiter, Electra, Express, Thanet, Tenedos and the US Edwards are sunk by superior cruiser fire and long lance torpedoes.
Nevertheless, the Allied destroyers keep the Japanese away from the main battle line which has devastated the Japanese 56th Infantry Regiment holding the airfield. A further six platoons and a battery of mountain artillery as well as precious stores and ammunition are destroyed by the combined bombardment and air attack. Col. Nose signals Yamashita that he is not confident that the airfield can be defended if the British launch a ground attack. Yamashita simply orders Nose to hold on regardless. However, no British counter attack materialises.
Simultaneously, Japanese airforce attacks intensify. Zero fighters have established air dominance above Force Z and Y by the afternoon, sweeping aside Indomitable's CAP. Protection from the RAF fails to materialise as no requests were received from Admiral Phillips and Singapore command was unaware of the exact location of Force Z. As dusk falls concentrated formations of Nell and Betty bombers and torpedo attack aircraft launch themselves against Admiral Phillips force. Exeter is sunk and Indomitable and Repulse suffer extensive damage and are only saved from further attack by nightfall.
December 9th/10th - night.
Admiral Phillips, requests an instant report on the condition of his ships. Indomitable and Repulse, although damaged, remain operational. The Fleet Air Arm contingent has suffered casualties but they reckon they can still defend the fleet. Reassured by this information and still determined to take the fight to the Japanese he orders a daring move north to attack Singora and Patani again. Leaving the destroyer screen to keep the Japanese fleet busy off Kota, Force Z arrives off Singora and Patani in the early hours of the 10th. Firing on any concentration of lights and using the coordinates of the previous days bombardment, the damage caused is less intensive. However, the attack causes panic among the rear echelon troops who were still trying to reorganise the landed stores. Again, there are no Japanese ships to contest the attack as Ozawa reasoned that Force Z would more likely head for home or, less likely, try and attack convoys in the Gulf of Siam. Yamashita is beside himself with rage as he realises his whole attack on Malaya is at risk as he is not able to secure enough supplies and vehicles to push on from "the shelf".
The Allied naval screen fights on at Kota as the Japanese maintain contact through their superior night fighting techniques. A Japanese destroyer, Hirayuki, is sunk by torpedoes before the remaining Allied destroyers, Encounter and Vampire, are destroyed by the coordinated use of searchlights and gunnery.
December 10th - morning.
As news of the second uncontested attack on Singora Patani spreads, there is consternation at all command levels of the Japanese military. The naval attache attached to Yamshita's command is left in no doubt that the Navy will take the full blame for the shambolic support of 25th Army's landing. The Navy was now passing the blame onto the Japanese Airforce which had failed to locate and sink Force Z. Meanwhile, there was indecision over where Force Z would strike next but Ozawa decided that the Gulf of Siam would be the most likely destination but splits his forces into two in case Admiral Phillips decides to run south along the Malayan coast. Again, he has been outguessed by the Allies as Admiral Phillips decides to attack Singora and Patani again, but with the addition of Indomitables aircraft.
No Japanese ships are in the vicinity but the Japanese Airforce has been tasked with defending the main landing grounds. As the airstrike commences and Repulse bombards shore facilities, Japanese zeroes sweep away all of Force Z's CAP and then maul the returning Fulmars and Albacores. By late morning, high concentrations of Nell and Betty Bombers locate Prince of Wales which is some way off from the main force acting as flank guard. By mid-day, in spite of support from destroyer escorts, she is crippled and stationary in the water.
Admiral Phillips gamble has worked and 25th Army is in disarray, unable to move off from the beach head or set up effective air defences but his ships have now suffered extensive damage. Yamashita is informed that some Siamese paramilitary forces have refused to hand over their weapons and Siamese government officials are failing to cooperate with the occupying Japanese as news of the Allied successes have reached Bangkok. Unknown to Yamashita, the Siamese government has attempted to contact the British through the Swedish representative to ascertain the Allies intentions.
However, General Percival has failed to capitalise on the Japanese difficulties and Churchill has personally demanded when Malaya command will launch an attack against the Japanese landing grounds. Under pressure, Percival resurrects Operation Matador, Britain's pre-war plan to invade Siam and requests 11th Indian Division to confirm when it can assume the offensive.
December 10th - afternoon.
Ozawa's command, reinforced during the night by the battle cruisers Kongo and Haruno has been steaming from the Gulf of Siam southwest on an intercept course with Force Z. He is assisted by a constant stream of reports from the Japanese Airforce, which maintains constant contact. Admiral Phillips remaining capital ships have suffered damage to their engines and he realises that night is all that will save him from air attack and the encroaching Japanese ships. He orders Prince of Wales to be scuttled and the escorting destroyers take on as many of the survivors as possible.
Repeated air attacks dog Phillips attempts to pull away from the pursuing Japanese Navy. Java is torpedoed as it tries to protect Indomitable, but in return the heavy cruiser Suzaya is blown out of the water as Repulse turns on her pursuers. However, by mid afternoon Kongo steams over the horizon and instantly targets Repulse.
Weakened by the constant combat of the past few days, Repulse is finished off by Kongo's concentrated firepower. However, Indomitable has launched the last of her Albacores which are able to exact revenge by crippling Kongo. Yet, as a further two heavy cruisers and six destroyers speed past the damaged Kongo, Indomitable is crippled by their combined firepower. Admiral Phillips elects to remain on the doomed aircraft carrier as the surviving crew abandon ship. As the sun sets on the burning and sinking remains of Force Z, Brewster Buffaloes from Singapore, tasked with protecting Admiral Phillips, finally arrive to witness its destruction.
Conclusion
Well, there you are, a rewritten version of an historical event. Jon and Russ played the British very aggressively, and Mark and Phil had a much more difficult situation to play than the Japanese actually faced. I think you all played a very good game and it was very enjoyable to umpire. I think the Japanese were unlucky not to spot Force Z on the first day, in which case the campaign may have been over very quickly. However, with the immediacy of a table top game to play at Kota Bharu, I think the Japanese made a mistake not deploying their aircraft on reconaissance searches on day one. The air support on the beaches was useful but not decisive and allowed Force Z the initiative which they kept right until the end of the game. However, that is with hindsight and I do not think it was apparent whist we were playing the game, and it is with hindsight that we too often regard military history.
The points were 25 to the Japanese and 26 to the British as opposed to the historical result of 20 to the Japanese and 1 to the British!
I do wonder whether this relative British success would have made any difference to the real outcome. Percival and the British army showed little imagination in the defence of Malaya and Singapore and I attempted to portray this with the poor attempts to exploit the weak position of the Japanese 25th Army. Maybe we might try and wargame this aspect in the future but allow the results of our naval campaign to influence the opening moves.
Thanks again for every ones contribution and I would welcome all feedback on the game and the after action report.
1. That they could surprise the entire US Pacific fleet in Hawaii and destroy it.
2. That their aircraft based in Taiwan could surprise and destroy all the US airbases in the Philippines.
3. That they could launch an amphibious invasion of Siam and Malaysia without naval superiority in Capital Ships in the South China Sea.
Our campaign was an attempt to see how risky no.3 would be in the event that the British could deploy an aircraft carrier with Force Z, which was the historical intention, but Indomitable failed to arrive as it had hit a reef in the Caribbean (Imagine the howls if I had made Jon and Russ roll for that eventuality!).
 |
| The historical campaign |
Historically, the Japanese easily destroyed Force Z through superior air power and the unimpeded invasion romped through Malaysia and took their intended objective Singapore well ahead of their timetable.
Our campaign concentrated on the crucial first few days of the invasion and played out somewhat differently as the following rewritten history shows.
Early hours of December 8th
The Japanese 56th infantry regiment, under the command of Col. Yoshio Nasu, arrives off the coast of Kota Bharu. Reinforced with an artillery regiment and a company of engineers, the whole force is embarked on three transports. They are supported by Vice Admiral Jisaburo Ozawa's 7th Cruiser Squadron, a powerful force of 5x Cruisers, 1x Light Cruiser and 14x Destroyers. The squadron is split into a support and screening force and the landing commences under a naval bombardment of the beach defences. It is imperative that this airfield is taken intact to protect the more important landings further north at Singora and Patani, to enable Japanese aircraft to support the invasion of Malaya and to increase protection of convoys from Indo-China. German intelligence has also informed the Japanese that there may be a radar installation at the airfield, a scientific apparatus that the Japanese would dearly like to capture.
 |
| Initial positions at Kota Bharu |
Kota Bharu is a far flung RAF base on the border with Siam that constitutes the outer defence ring of Malaya and Singapore. The previous day, Hudson recon aircraft from Kota had identified Japanese convoys in the Gulf of Siam heading to a number of destinations in Siam and possibly to Malaya. The British command in Singapore, headed by General Percival is dithering over what to do. Existing plans call for a prompt occupation of Siam but the British ambassador in Bangkok has gone native and is imploring Percival to hold back on attacking a friendly neutral.
 |
| General Percival. |
 |
| The lead units of 1/56th wade ashore. The camouflage will be no protection against mines! |
By luck the Japanese have chosen the weakest held area of the beach for their landing. Under a full moon the pill boxes are quickly destroyed and the barbed wire entanglements are blasted. However, as the assault infantry storm ashore they run into dense minefields thickly strewn on the beach. Chaos and confusion abounds as units get mixed up on the beach and casualties mount; if the landings had been in a more strongly defended sector the 1/56th would undoubtedly have been wiped out. Nasu and his command post intends to land in the morning with the second wave, and inexplicably, the engineers equipped to clear beach obstacles have been placed in the third wave! Nevertheless, the few Dogras who are in the vicinity pour fire onto the beachhead and lose some of their number to the creeping barrage that now advances without the Japanese infantry. Keyes orders up reinforcements and plans to launch a counter attack in the morning. Driving through the night, the 2/10th Baluchs from the south and the 1/13th Frontier Force Rifles from the west. The 8th Brigade is a reinforced unit and a further 2 battalions are available further to the south but at the moment Keyes is unsure whether further Japanese landings are intended at other locations.
December 8th -morning
As the sun rises, the 1/56th seems in desperate trouble. Casualties are mounting and the RAF are now able to operate against the beach head and the supporting naval vessels. AA from the Japanese cruisers and destroyers successfully repulse torpedo attacks by RAAF Hudsons, but Buffaloes straff landing barges and infantry struggling to get free of the minefields. Keyes begins to organise his arriving reinforcements, and plans a counter attack to retake the beach line and destroy the Japanese amid the minefields.
At Singapore, Percival is pondering reports on the Japanese invasion. Trained in the mindset of the Great War, he is reluctant to make hasty attacks that achieve nothing but high casualties. The 11th Indian Division, poised at Jitra, is awaiting orders to march into Siam and contest the Japanese landings at Singora and Patani. At the same time the bulk of the invading Japanese 25th Army under Lt Gen Tomoyuki Yamashita is securing several key positions across Siam. Suddenly arriving at Bangkok in the early hours he has forced the Siamese government to accept Japanese military assistance and has demanded that all Siamese army and police units hand in their weapons to the Japanese. Yamashita is a taciturn, no-nonsense general still in disgrace for being implicated in a failed coup some years ago. He was surprised to be given this prestigious appointment but he is widely acknowledged to be one of Japan's leading generals. However, the Emperor has still refused to grant him an audience and Yamashita is under a great deal of personal pressure to succeed in his appointment and earn the Emperor's forgiveness.
| General Yamashita |
 |
| Admiral Phillips on the right. |
December 8th - afternoon.
At Kota Bharu, Brigadier Keyes has organised his counterattack and the 1/13th FFR advances from north of the airfield into the jungle with the objective of taking the shore line and sealing off the gap which the Japanese have begun to exploit. The 1/56th has cleared the beach but has suffered 50% casualties from mines and air attacks. Col. Nasu has arrived with the second wave and has now begun to take charge of the disorder at the beach head. In addition, Japanese air support has arrived from bases in Indo-China and the RAF has lost control of the skies above Kota.
 |
| The 1/13th FFR advances from the road and into the jungle. |
The 1/56th is surprised by the counter-attack but quickly adopts defensive positions. The whole regiment has had years of experience fighting the Chinese and has been under intensive training in Taiwan prior to the landing. The 1/13th FFR is a regular unit but most British units have had no relevant training in jungle fighting and the Japanese quickly dominate the combat.
 |
| Remnants of the 1/56th repel the British counter-attack. |
 |
| Nell bombers attack the airfield. Meanwhile Force Z is not under attack. |
By late afternoon, the 1/13th FFR are in full retreat having suffered heavy casualties. The Japanese have been relatively unscathed but the advance on the airfield has been significantly delayed. Brigadier Keyes, disappointed in the failed counter attack, reorganizes his available forces, ordering the Baluchs to hold the airfield and the Dogras to fall back from their beach defences and hold the southern approaches to the airfield. Col. Nasu is determined to resume the advance and orders the depleted 1/56th to resume its advance towards the airfield and screen the 2/56th which is now moving off from the beaches. Without engineers it too has lost casualties in the minefields and has had to leave its MGs on the landing beaches to offer AA protection against the RAAF attacks. Nasu has had to report that it may be a further 24 hours before the airfield is secure!
Admiral Phillips has also received reports indicating that the defence of Kota has been successful during the morning. He reasons that an attack on the Japanese landing fleet at Kota in daylight by Force Z would lead to heavy losses amongst his ships and therefore takes his command further east, out into the China Sea to maintain the element of surprise. In this position he can then use his advantage in radar to either attack Kota at night or push further on into the Gulf of Siam and seek out Japanese convoys. Whilst the Japanese airforce supports the fighting at Kota, it is left to a small detachment of two Japanese destroyers to cover the vastness of this region of sea and they fail to spot Force Z. Admiral Ozawa is aware from Japanese agents in Singapore that Force Z has sailed but he is relying on his destroyer scouts to spot the British before they can engage his main force. Aware of the dangerous situation of Col. Nasu's troops he orders most of his remaining destoyers to keep close in to support the landing whilst the cruisers take up a screening position in anticipation of an attack by the Royal Navy.
December 8th/9th - night.
As night falls on Kota Bharu, Col. Nasu is determined to take the airfield at all costs. The commander of 1/56th, ashamed that his unit has failed in its task and aware of the shame he will bring upon the regiment launches a banzai attack on the airfield perimeter. The few remnants of the battalion charge across the open airfield and are killed to a man by the defending Indians. The 2/56th uses the cover of the charge to establish a firing line towards the north and west of the airfield whilst the 3/56th struggles to move up from the beaches and envelop the airfield from the south. There is much confusion amongst the attacking Japanese as individual units get lost in the darkness but eventually their superior training and elan begin to dominate the fighting. Brigadier Keyes troops put up a stout defence among the stores and buildings and at one point, the Brigadier with his HQ command counterattacks and stabilises a vital point of the defence. However, as dawn breaks the defenders are overwhelmed and Brigadier Keyes is forced to withdraw into the Jungle with everyman looking to himself. Unable to make an ordered withdrawal onto his remaining two battalions that are now in position two miles to the west of Kota, a crucial opportunity for a counter attack at dawn is missed. Nasu, relieved that he has finally taken the airfield radios confirmation to General Yamashita.
 |
| Col. Nasu personally coordinates supporting artillery fire as the final attack takes the airfield. |
This is the only good news that Yamashita has received so far. During the night a vital convoy of stores and vehicles has been destroyed in the Gulf of Siam by Force Z. The six transports with only two destroyers as escort were detected by the radar on Repulse and Prince of Wales. The two Japanese escorts spotted the Royal Navy screen of three destroyers and immediately moved to intercept them. However, it is doubtful if they ever knew what hit them as Repulse and Prince of Wales "Matapaned" them. The undefended convoy was quickly despatched and Admiral Phillips forbade the search for survivors as he was determined to maintain the initiative and risk an attack against the main landing beaches at Singora and Patani.
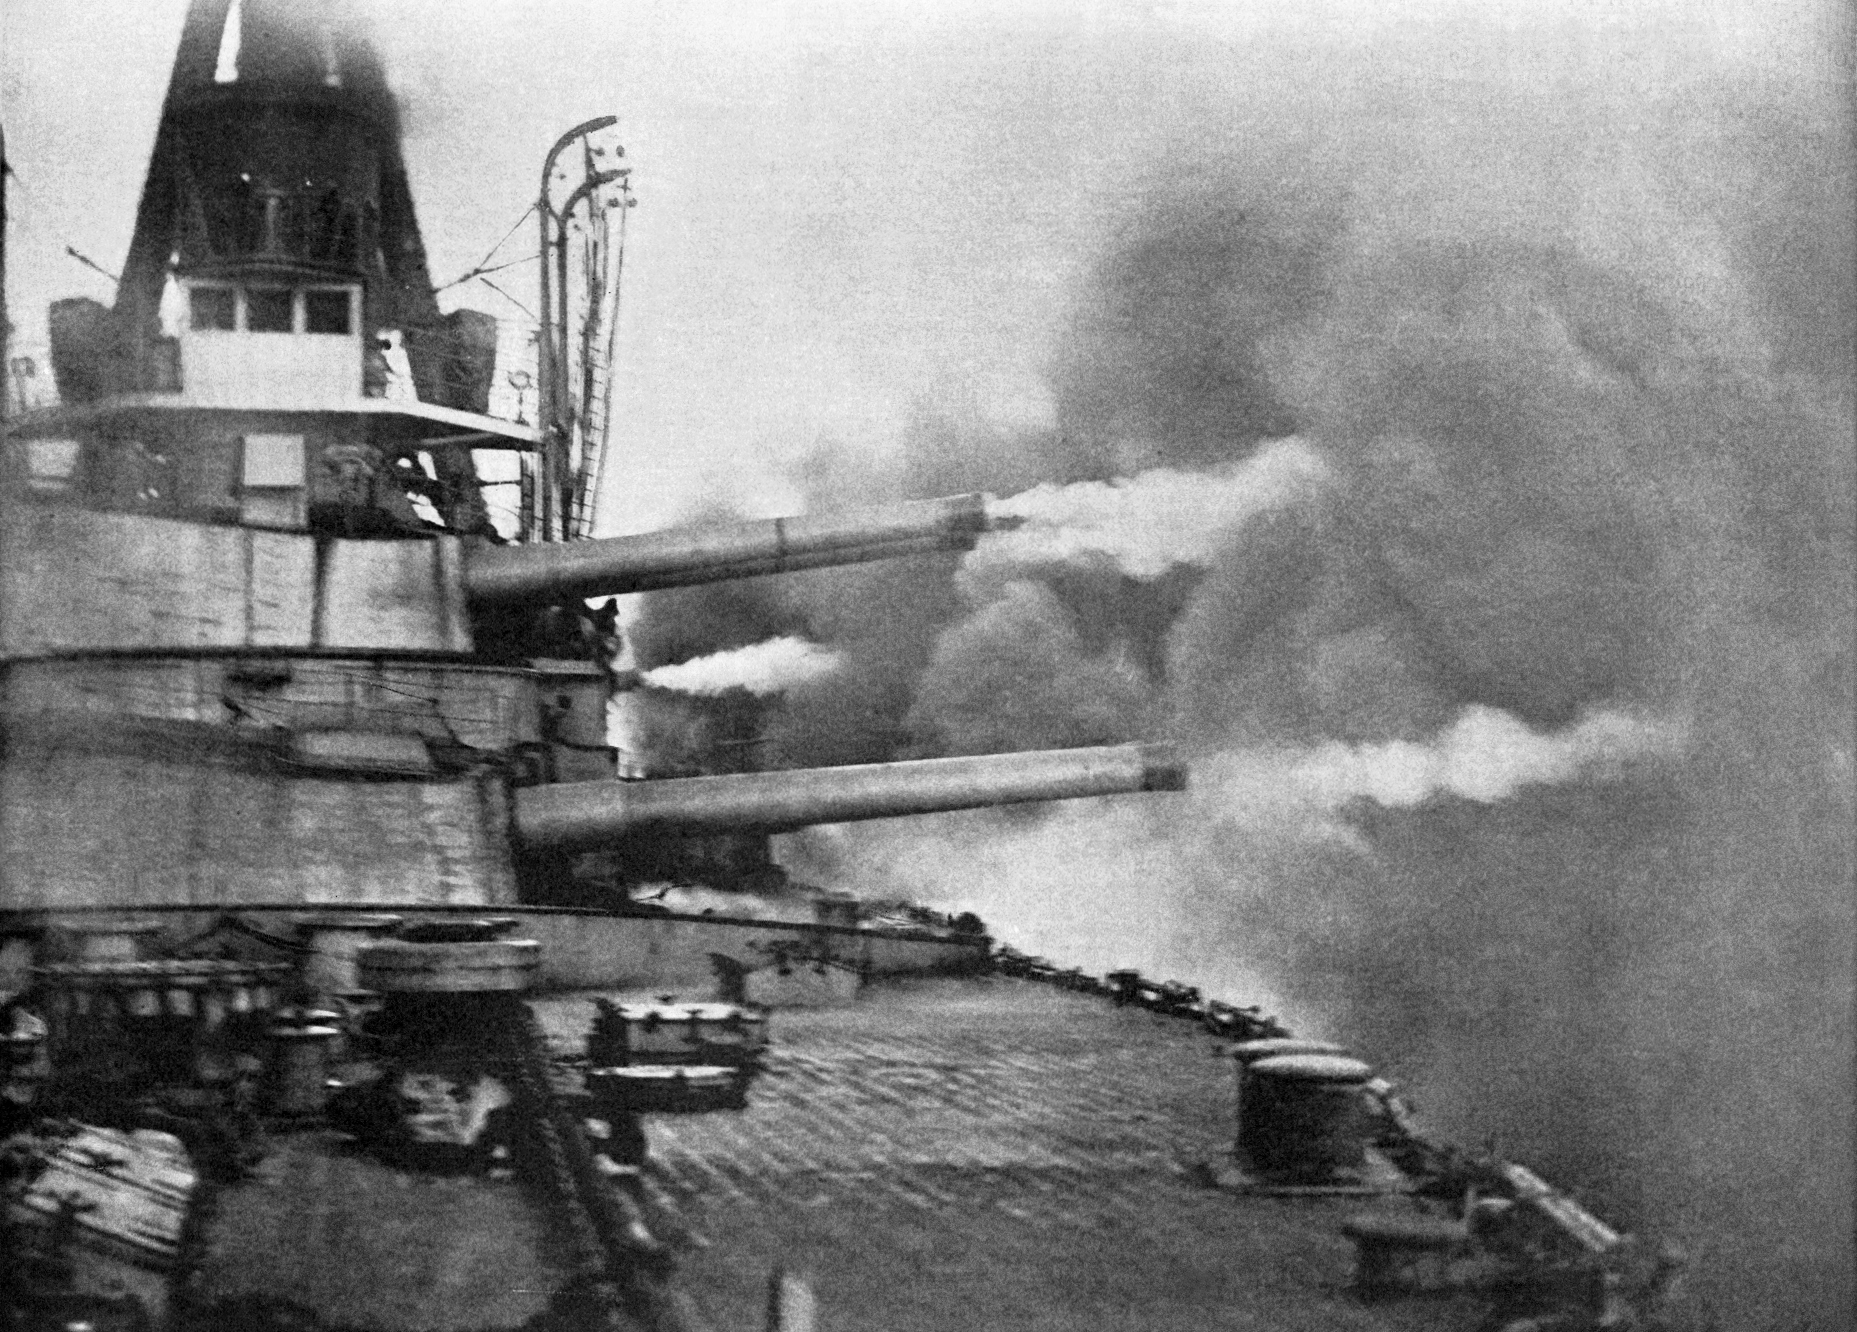 |
| Repulse opens up under radar control
as the two Japanese destroyers unknowingly engage Force Z
|
 |
| Hirishumi, the lead destroyer, is obliterated by the full broadside of Repulse. |
December 9th - morning.
As morning dawns Col. Nasu is able to see the full devastation of the battlefield. Intense fighting and hasty demolitions by the defenders have rendered the airfield unusable and Nasu signals Yamashita that it will be 24 hours before Kota can be operational. However, he is told to consolidate his position as Yamashita is unable to promise when follow on supplies and men will arrive to reinforce Kota.
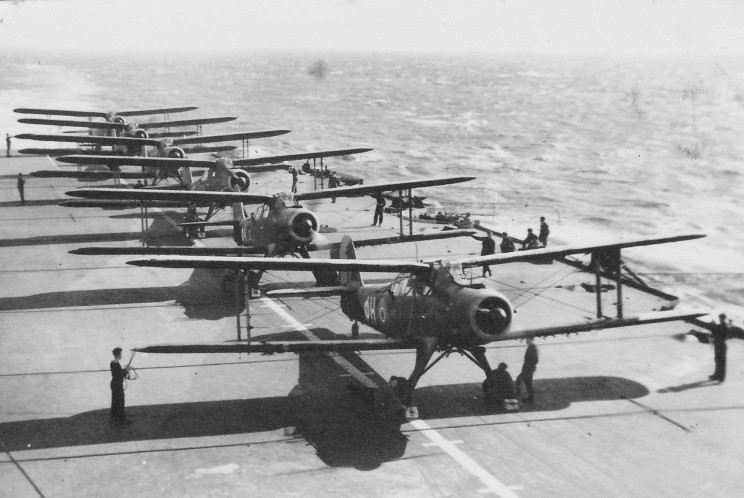 |
| Indomitable's albacores prepare for take off. |
During the morning, Yamashita is having a heated meeting with the Imperial Navy's representative. He is demanding an urgent improvement in his logistics but the navy is unable to promise the necessary supplies whilst Force Z is operating across 25th Army's line of supply. At this moment news arrives of a devastating attack on the main landing beaches of Singora. Indomitable's full air complement has attacked at will all supply points and troop concentrations in the vicinity whilst Prince of Wales has engaged targets of opportunity on the shore line including valuable transport craft. In a blind fury, Yamashita leaves the conference and the shamed navy representatives to get a full report on the attack.
| Yamashita storms out of the conference. |
General Percival, unsure as to whether Kota Bharu is still under British control or if the Japanese will make more landings further south, decides to risk a reconnaissance in force across the Siamese border. Half way between 11th Indian Divisions positions at Jitra and the Singora/Patani landing beaches is a precipitous stretch of road known as "the shelf". This is a natural bottleneck, that both the Japanese and the British must control if they are to launch further attacks and 11th Indian Division is tasked with taking it.
During the morning, Force Y, under the American Rear Admiral Palliser, comprising the cruiser Exeter and the Dutch light cruiser Java with six United States destroyers signals its intention to rendezvous with Force Z. It has been ordered up from the Philippines by the Joint Chiefs of Staff, as they believe Admiral Phillips has the greatest opportunity to blunt the Japanese juggernaut in its multiple attacks across the Pacific.
December 9th - afternoon.
However, as advanced elements of 11th Indian Division lumber towards "the shelf", recon units from 25th Army have already secured the vital position. Yamashita had already foreseen the importance of this stretch of road and had used every available piece of transport to push forward his recon on the afternoon of the 8th. The Japanese had driven through the night and had spent the morning of the 9th constructing defences. It was therefore with some surprise that the 11th Indian bumped into these defences and was forced to halt as they had no heavy weapon support. This was reported back to Percival, and as he had just received confirmation that Kota Bharu had fallen to the Japanese, he authorised 11th Indian to fall back onto the original Jitra defences, fearful that they would otherwise be outflanked from the east.
 |
| Japanese recon race towards "the shelf" |
Meanwhile, Admiral Phillips, buoyed by the success of his surprise attack on Singora and Patani, orders Force Z south to attack the Japanese at Kota. Communication with Singapore is confused but he informs Percival of his intentions hoping that the army can coordinate a counter attack with the appearance of his fleet. Unfortunately, Keyes is still lost and Percival considers the remnants of 8th Indian Brigade too weak to retake Kota whilst preventing any further advance by Col. Nose's Japanese. Force Y, steaming through the Anambas Islands is ordered to rendezvous with Force Z at Kota.
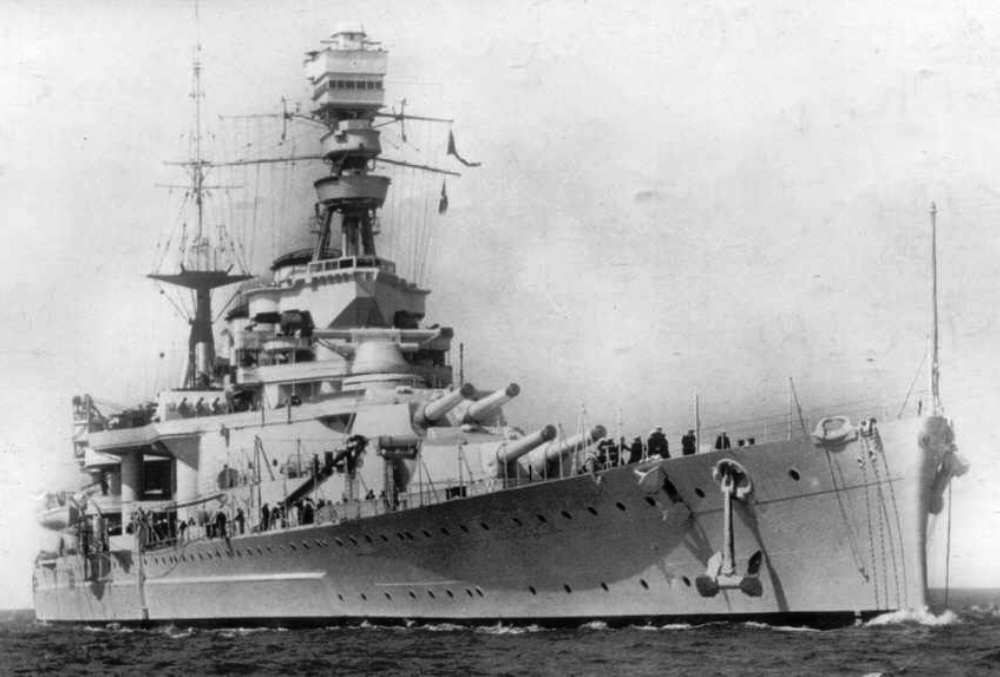 |
| Prince of Wales leads force Z of Kota Bharu |
By mid afternoon Force Z and Y have arrived off Kota in two groups. Indomitable and Prince of Wales hove in close to the coast escorted by Exeter and Java and four destroyers whilst the remaining destroyers are pushed out to sea to act as a screen. Admiral Ozawa, under enormous pressure, is desperately attempting to locate the Allies. The Japanese airforce has maintained contact with Repulse since the morning signaling its location and heading to the Japanese Navy, and as it steams south to link up with the rest of Force Z, Ozawa orders all his ships on a wide sweep towards Kota.
.jpg) |
| Ozawi, aboard Chokai, leads his fleet against the Allies. |
Indomitable launches its full complement of albacores against Kota Bharu and Prince of Wales bombards concentrations on the shore line and around the airfield. Whilst reports of the attack come through to Ozawa his fleet begins to engage the destroyer pickets. In an intense action, the Japanese cruiser Mikuma is crippled by torpedo attack but in return the Royal Navy destroyers Jupiter, Electra, Express, Thanet, Tenedos and the US Edwards are sunk by superior cruiser fire and long lance torpedoes.
 |
| Mikuma crippled after a torpedo attack. |
Nevertheless, the Allied destroyers keep the Japanese away from the main battle line which has devastated the Japanese 56th Infantry Regiment holding the airfield. A further six platoons and a battery of mountain artillery as well as precious stores and ammunition are destroyed by the combined bombardment and air attack. Col. Nose signals Yamashita that he is not confident that the airfield can be defended if the British launch a ground attack. Yamashita simply orders Nose to hold on regardless. However, no British counter attack materialises.
Simultaneously, Japanese airforce attacks intensify. Zero fighters have established air dominance above Force Z and Y by the afternoon, sweeping aside Indomitable's CAP. Protection from the RAF fails to materialise as no requests were received from Admiral Phillips and Singapore command was unaware of the exact location of Force Z. As dusk falls concentrated formations of Nell and Betty bombers and torpedo attack aircraft launch themselves against Admiral Phillips force. Exeter is sunk and Indomitable and Repulse suffer extensive damage and are only saved from further attack by nightfall.
December 9th/10th - night.
Admiral Phillips, requests an instant report on the condition of his ships. Indomitable and Repulse, although damaged, remain operational. The Fleet Air Arm contingent has suffered casualties but they reckon they can still defend the fleet. Reassured by this information and still determined to take the fight to the Japanese he orders a daring move north to attack Singora and Patani again. Leaving the destroyer screen to keep the Japanese fleet busy off Kota, Force Z arrives off Singora and Patani in the early hours of the 10th. Firing on any concentration of lights and using the coordinates of the previous days bombardment, the damage caused is less intensive. However, the attack causes panic among the rear echelon troops who were still trying to reorganise the landed stores. Again, there are no Japanese ships to contest the attack as Ozawa reasoned that Force Z would more likely head for home or, less likely, try and attack convoys in the Gulf of Siam. Yamashita is beside himself with rage as he realises his whole attack on Malaya is at risk as he is not able to secure enough supplies and vehicles to push on from "the shelf".
The Allied naval screen fights on at Kota as the Japanese maintain contact through their superior night fighting techniques. A Japanese destroyer, Hirayuki, is sunk by torpedoes before the remaining Allied destroyers, Encounter and Vampire, are destroyed by the coordinated use of searchlights and gunnery.
December 10th - morning.
As news of the second uncontested attack on Singora Patani spreads, there is consternation at all command levels of the Japanese military. The naval attache attached to Yamshita's command is left in no doubt that the Navy will take the full blame for the shambolic support of 25th Army's landing. The Navy was now passing the blame onto the Japanese Airforce which had failed to locate and sink Force Z. Meanwhile, there was indecision over where Force Z would strike next but Ozawa decided that the Gulf of Siam would be the most likely destination but splits his forces into two in case Admiral Phillips decides to run south along the Malayan coast. Again, he has been outguessed by the Allies as Admiral Phillips decides to attack Singora and Patani again, but with the addition of Indomitables aircraft.
.jpg) |
| Repulse bombards shore facilities. |
No Japanese ships are in the vicinity but the Japanese Airforce has been tasked with defending the main landing grounds. As the airstrike commences and Repulse bombards shore facilities, Japanese zeroes sweep away all of Force Z's CAP and then maul the returning Fulmars and Albacores. By late morning, high concentrations of Nell and Betty Bombers locate Prince of Wales which is some way off from the main force acting as flank guard. By mid-day, in spite of support from destroyer escorts, she is crippled and stationary in the water.
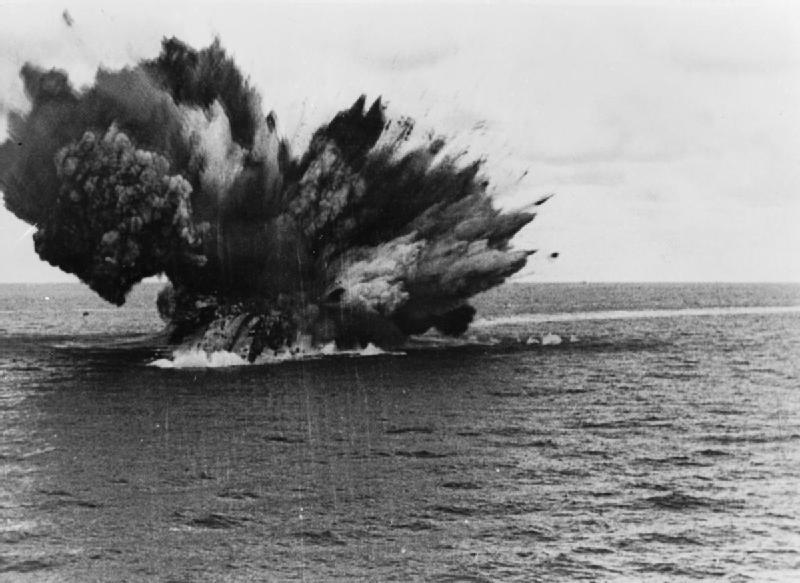
 |
| Prince of Wales on fire after being hit by high level bombing. |
 |
| Yamashita inspects the damage at Singora accompanied by a shame faced naval representative. |
December 10th - afternoon.
Ozawa's command, reinforced during the night by the battle cruisers Kongo and Haruno has been steaming from the Gulf of Siam southwest on an intercept course with Force Z. He is assisted by a constant stream of reports from the Japanese Airforce, which maintains constant contact. Admiral Phillips remaining capital ships have suffered damage to their engines and he realises that night is all that will save him from air attack and the encroaching Japanese ships. He orders Prince of Wales to be scuttled and the escorting destroyers take on as many of the survivors as possible.
Repeated air attacks dog Phillips attempts to pull away from the pursuing Japanese Navy. Java is torpedoed as it tries to protect Indomitable, but in return the heavy cruiser Suzaya is blown out of the water as Repulse turns on her pursuers. However, by mid afternoon Kongo steams over the horizon and instantly targets Repulse.
| Kongo! |
Weakened by the constant combat of the past few days, Repulse is finished off by Kongo's concentrated firepower. However, Indomitable has launched the last of her Albacores which are able to exact revenge by crippling Kongo. Yet, as a further two heavy cruisers and six destroyers speed past the damaged Kongo, Indomitable is crippled by their combined firepower. Admiral Phillips elects to remain on the doomed aircraft carrier as the surviving crew abandon ship. As the sun sets on the burning and sinking remains of Force Z, Brewster Buffaloes from Singapore, tasked with protecting Admiral Phillips, finally arrive to witness its destruction.
Conclusion
Well, there you are, a rewritten version of an historical event. Jon and Russ played the British very aggressively, and Mark and Phil had a much more difficult situation to play than the Japanese actually faced. I think you all played a very good game and it was very enjoyable to umpire. I think the Japanese were unlucky not to spot Force Z on the first day, in which case the campaign may have been over very quickly. However, with the immediacy of a table top game to play at Kota Bharu, I think the Japanese made a mistake not deploying their aircraft on reconaissance searches on day one. The air support on the beaches was useful but not decisive and allowed Force Z the initiative which they kept right until the end of the game. However, that is with hindsight and I do not think it was apparent whist we were playing the game, and it is with hindsight that we too often regard military history.
The points were 25 to the Japanese and 26 to the British as opposed to the historical result of 20 to the Japanese and 1 to the British!
I do wonder whether this relative British success would have made any difference to the real outcome. Percival and the British army showed little imagination in the defence of Malaya and Singapore and I attempted to portray this with the poor attempts to exploit the weak position of the Japanese 25th Army. Maybe we might try and wargame this aspect in the future but allow the results of our naval campaign to influence the opening moves.
Thanks again for every ones contribution and I would welcome all feedback on the game and the after action report.
SWORD & SPEAR - WAR OF THE ROSES INTRO GAME
Sword & Spear Review - War Of The Roses
Thursday evening and time to test out the Sword & Spear rules written by Mark Lewis.
I have been looking forward to trying these out since I bought a pdf copy of the rules in the Autumn.
Mark was good enough to put on an introduction game which helped understand the game mechanics.
Seen as master Shakespeare already has a very fine collection of Heroics & Ros War Of The Roses figures we thought it would be a good starting point to get these on table and have a bash of the rules.
We decided in the interest of time just to deploy both armies and camps quickly so we could get straight into the game. With 16 units on each side roughly balanced at around 600 points the armies were deployed....
Yorkist C in C - Longbows and men at arms

Another group of York units

Armoured Knights

The house of Lancaster elects to deploy in one large line

More Armoured Knights

These longbows turned out to be very handy on several occasions!


With all the forces deployed we began. I provided a brief run down on the mechanics of the turn explaining action dice and discipline, together with how to use captains and generals. This all made sense and everyone seemed to pick things up pretty fast.
We opted for a 90mm frontage for our units in two ranks so to keep things simple I decided to use 2" as a DU which is near enough !
Turn 1 - York advances forward...
The movement rules are precise and clean. Nothing that really hinders the game play which we all thought was refreshing. Too many other rule sets do very badly with their movement rules by trying to be to clever and overcomplicated. With these rules you can either advance or if you get the action dice to exceed the units discipline then you can perform a manoeuvre which allows you to move in any direction (even backwards but at a loss of distance) so long as no part of the unit moves further than allowed.

One mistake I did make was not to allocate our units into commands and use 4 different coloured markers as we had a 2 v 2 game. It was not an issue really as we just wanted to play out a game and test the rules. Something to remember for next time as it would be important !!!
York C in C attached - we grasped the group move rule very fast

General Jon of Lancaster....
He's just realised that he forgot to clear that A380 that was holding at 8.30 this morning.

The Yorkist's quickly realising that Lancaster was not budging pressed on the attack

It doesn't get any better than this.
A solid unbroken line of troops just waiting to inflict a whole lot of pain and a flagon of fine ale!

I opted to use gems instead of dice to draw out the bag. These were kept to one side and we rolled dice and allocated as normal but placed gems next to activated units.
A novel idea but I think I will just stick with using dice for our next game!

Lancaster orders some longbows forward with a manoeuvre.
We found to our dislike that these units were rather good.
With 3 strength and the extra impetus dice PLUS the change of using a bonus on a 6 or double meant that there was a lot of dice coming in when shooting took place. The rules do a very good job with Armour in that certain weapon types either reduce or nullify (in the case of artillery and two handed weapons) the effectiveness of armour.

Things are starting to heat up now. We had spent around 1 hour (with permitted Gabbing allowed) moving our forces forward. In hindsight I probably would of A: used smaller armies for this intro game (Mark and I can't resist the lure of big battles sorry!)
B: Deployed the forces closer to each other

Over on the right flank the Yorkist army was possibly stronger as we had more armoured knights, this proved not to be the case as the battle unfolded.

Jon kept his cool over on the left flank but moved a few units closer to pour down some fire.

Mark and I agreed that we should of perhaps concentrated on one area of the table and used our action dice more wisely. It turned out that we tried to move everything and keep some lines.
We found out later that it was handy to use bonus dice to give units the extra distance so it was possible to charge in with some units which normally would be out of normal range.

Here are my two fabulous units of knights.

And here they are again routed a few turns after....

I lost both of these down to some pretty crap dice rolling in response to a volley of arrows from the Lancastrian longbows. The longbow reduces one level of protection making the weapon particularly deadly. When I played the first game with Mark Lewis most of the shooty units in ancients were all strength 2 and did not pack any punch.
It's good to see that the rules do a good job for each period they cover

Back over to the left and we were struggling to get our units close enough to charge and the combination of the artillery and arrows was slowly chipping away at our strength...

Spearmen advance....

Over on the right despite losing our knights we were nonetheless feeling optimistic as we staretd to close on the Lancastrian position.

I had one unit of cavalry left, not as good as the Lancastrian knight's they faced.
I originally wanted to get around the flank and rear but after checking the movement restriction rule out (and I think we played this correctly) we said that the cavalry had to end its move facing the knights because they were in front of them at the start of the move.

On the Lancastrian phase they quickly reacted to the threat and managed to move some units into better positions.

On our next turn we got cheeky and used a 6 on an action dice to move an extra 1 DU (2") and elected to charge a unit of longbow with our previously unused billmen.
They ended up eating them and we quickly realised that with a strength of 4 these guys were just brutal. We resolved the rout and pursued straight ahead into the corner of the knights, pivoting and conforming as shown. We then fought a round of combat but with no impetus for either side but ended up taking a casualty!
I really like this mechanic as it allows a victorious unit the opportunity to roll up the line (we just unlucky on the dice here but against other troop types pursuits could be very destructive given the right circumstances)

Back to the action on the left flank and surprisingly we managed to flank charge a unit of Lancaster knights which had previously pursued after routing one of our units in the earlier phase.
A rash move which left their flank exposed!
We still could not beat them enough though in the fight!

10.30 and time to call it
The Lancaster's earn a fine win by having routed 2 of our York units to 1 of their's.

Well played to Ian and Jon and thanks to Mark for the use of his armies.
Post game thoughts
I think it fair to say we all enjoyed the game and the rules were quick to pick up. They are the best written set of rules I have used to date which is a huge plus for me. The command and control rules are perhaps the most interesting feature of the rules and really do make you think about how you direct the troops on the table.
Mark has been very clever with how he has written these rules, everything is kept simple enough but at the same time allows you to do everything you need.
Movement rules are slick, there are no areas for any "gamey" tricks to be used
Shooting and combat rules "work" and with no tables / charts to consult things move along at a rapid pace, again excellent thinking. There are a few modifiers which come into play but these are both necessary and kept to a minimum.
Morale rules in a rule set are a must for me and I like the the way that these work. It is simple and effective.
I have read a few other reviews and some people have mentioned the amount of dice on table, this never bothers us so was not a negative!
We will be playing these rules again soon and I will be putting a theme Month on next Year at some point.
Subscribe to:
Posts (Atom)