Tuesday, 16 May 2017

Update, schmupdate

As everyone else is doing this, I thought I might as well get in on the act.

Priorities at present are sorting out the base boards for winter warfare.  I have luckily fallen upon the ideal material (interlocking flooring material)at the ideal price (free).  The Karate School around the corner was moving out on Saturday and I noticed a stack of these (1m2) outside his unit.

A quick conversation and a handshake later, 20 of these bad boys were mine. They are around 2cm thick and so have a degree of solidity.

The only problem is cutting them into 2' x 3' sections as this creates a lot of wastage - but as you can see there is the possibility of joining two offcuts together to form another base board.


These are then 'painted' with Artex (or at least a lower cost version of Artex).  This not only seals the board but also provides a ready made texture.  Rather than covering in PVA and putting talus over the top, for the winter environment (i.e. snow) it just requires stippling with a sponge to create a texture.  When dry, just a couple of coats of white emulsion creates a very nice snowy effect (clearly not the original pinky tones above!).

Four boards have been completed, leaving just 16 to knock out.  The production line is set up though - cut 4 boards, Artex 4 boards, cut 4 more boards, paint first 4 boards, artex 2nd 4 boards, cut next 4 boards, paint second 4 boards...you get the idea.

Once painted white, a quick dusting with grey primer just breaks up the monotony and gives a bit of depth.  Then I need to knock out some hills using the same format as above so they should fit seamlessly into the base board.  Winter trees are already done although given the scale of the operational game I was fortunate to have bought another 200 trees last year which will be converted into winter trees.  The roads I'm now doing in thin strips of grey felt with a dusting of white and the bases for the trees will be patches of white felt which actually work really well as they cling onto the base boards and so don't shift.

 All Russian and German units are now ready (I'm toying with the idea of doing a limited number of German Eastern Front allies - Romanian, Italian, Hungarian - using German equipment where appropriate) to add some more dimensions to the period.  I have added a couple of bits to the Russian forces - including mainly AA quads in trucks and some SPG's.

I also (on Sunday) bought two rolls of material which are great for fields.  I got about 10 meters all told so enough to create tons of different fields.  Maybe not to the quality of the felt fields Russ has got but with a bit of flocking etc. you never know....


On the near horizon is finishing off the Austro-Hungarian army (mainly artillery and cavalry to do) - together with a couple of funky colour scheme aircraft from their German friends.

And then wrapping up the Renaissance Spanish (mainly just producing some tercios for the 'back end' of the renaissance period) as its time they got onto the table with their hidey / shooty / stabby tactics of the early reniassance followed by their shooty / pikey tactics of later renaissance.

I will then look at doing an American WW2 winter based army at some stage...


Monday, 15 May 2017

A Brief Introduction to the Armies in North Africa; Regio Esercito

My final roundup of the armies of North Africa leads me to the Regio Esercito or Royal Army.  The Italians are the most maligned and misunderstood army of world war II, the biggest victim of propaganda; it's own, it's ally and it's enemy!


Image result for italian army ww2 north africa young fascist


Mussolini had spent his time as leader of Italy extolling the dynamism of Fascism and that Italy must embrace a destiny with war if it was to assume its position as a great power.  "We will darken the sky with our aircraft!" and "A Million Bayonets will March!" were headlines written by Mussolini and backed by prewar propaganda that convinced everyone, at home and abroad, that Italy meant business and that its armed forces were at the cutting edge of effectiveness.  However, the Italian industrial base could not meet the demands of total war.  The armed forces owed their loyalty to the King and not Mussolini, and lacked the political fanaticism of Hitler's Germany or Imperial Japan.

When Italy joined the war on the back of Hitler's triumph it met defeat in all its endeavours.  The British had been wary of Italian military capability but when their first counter attacks destroyed Mussolini's forces they feigned to despise the Italians and mocked them in their propaganda.  And when Rommel was sent to bolster the Italian position in North Africa, Goebbels was quick to broadcast Axis triumphs as German, whilst Rommel always blamed his allies for all his setbacks. Thus, the Italians have suffered from a poor press ever since!


                                                  Image result for italian army ww2 north africa young fascist

The Italian army was poorly equipped.  Many design and production decisions were made for financial reasons and the economy struggled to meet Mussolini's ambitions, and so the army remained an infantry force, dependent on WW1 vintage artillery for support and lacking the armoured mechanisation that was vital for victory in the desert.


Image result for italian army ww2 north africa artillery

Italy began the war with under powered, under armed and under armoured tanks which just about held their own during 1941.  By 1942, they were outclassed by the British and Fiat was struggling to build improved designs with the resources available.  Nevertheless, the armoured formations, Ariete in particular, developed tactics and a battle plan that kept them in the campaign and ensured that they were an essential part of all Rommel's designs.


Image result for italian army ww2 north africa


Alongside Ariete, the Italian's formed the Trieste Motorised Division which was the other fully mechanised formation that the Italians deployed.  Well trained and led, it fought throughout the campaign.

Image result for italian army ww2


Bersagliari, the Folgore Parachute Division and Engineer units were also well trained, and the Young Fascist units were highly motivated troops.  However, the bulk of the infantry divisions, especially the colonial units, were poorly supplied and led, and without sufficient transport they struggled to survive in mobile desert fighting.  Rommel often used these formations for besieging fortified positions or for maintaining the defence of essential areas but once the mobile Axis units were forced to retreat they were left to their fate without any choice but to surrender.  At Alamein, Rommel alternated the units of Italian infantry with German formations as by this time he had lost faith in their ability to hold the line.

Image result for italian army ww2 north africa artillery

The artillery units, however, were renowned for their bravery and effectiveness.  During Britain's first offensive, Operation Compass, the Italian gunners fought to the death.  Their weapons were old fashioned, many of which were booty from the defeat of Austria Hungary in the last war.  Yet, throughout the campaign, if dug in and with well established communications the Italian artillery was very effective, able to prepare fire plans that were more sophisticated than the Germans.

On balance, the Italian army was an essential auxiliary for Rommel.  Without its contribution, including the weak infantry divisions, there would have been no Axis successes in the desert.  However, on its own it is probable that the British would have secured victory in North Africa by early 1941!

Friday, 12 May 2017

A Brief Introduction to the Armies in North Africa; The Afrika Korps


Image result for afrika korps

Next up on this short series is the German contribution to the desert campaign.  In fact, the title of Afrika Korps was only used for a short period and Panzer Armee Afrika superceded this title once Hitler had committed significant forces to his Italian ally.  Italian armoured and motorised formations were a significant part of the Afrika Korp and have often been ignored in histories and it is a mistake to look on the Axis successes as solely due to the German  contribution.  However, the German units were vital as they gave the experience, professionalism and mechanised firepower which Mussolini's forces lacked on their own.


                Related image

Rommel dominates the history of the Afrika Korp, and even his British adversaries admired his brilliance.  Absolutely ruthless in the pursuit of his own career, he had cultivated the support of the Nazi leadership who promoted him in-spite of opposition from the German General Staff.  His subordinates were devoted to him but his colleagues and superiors found him a difficult General to work with.  He was quick to play up his successes and found a ready scape-goat with his Italian allies for any failures.  He was relentless on the attack and a leading exponent of Blitzkrieg but he had little interest in logistics relying on his subordinates and allies to keep him supplied.  If his enemy was disorganised he instinctively exploited any weakness, but his defeats were largely due to overstretched lines of supply.


Image result for afrika korps

The German equipment was good but not significantly better than the British.  The advantage lay in the earlier German rearmament of the 1930s which gave the Afrika Korp a more advanced industrial base from which to draw their armaments; but this was a diminishing asset as the campaign progressed and Allied war production soared.  

Image result for afrika korps


The Germans were also handicapped with some poor equipment.  Motorbikes were not ideal in the desert or really suitable for moving large formations, there were never enough trucks in the Afrika Korp and the Wehrmacht had absolutely no experience of fighting in the desert.


Related image

The first uniforms were poorly designed and reliant on the German textile industry copying ideas from other European colonial armies.  However, experience was quickly gained and the German formations were fast to adapt to the unique battle conditions.  The 15th and 21st Panzer Divisions were veteran formations which had won their laurels in Poland and France.  The 90th Light Infantry Division was comprised of Germans who had joined the French Foreign Legion but who had been captured during the fall of France. They were ordered to redeem themselves in North Africa.  Rommel had some of the toughest troops in the Wehrmacht upon whom he could totally rely.


Image result for flak 88

Special mention must be made of the Flak 88.  In the desert, over large open spaces, this high velocity weapon tore through British armoured formations.  Crewed by the Luftwaffe, they were a small component in the Afrika Korps anti tank establishment but on several occasions they made a significant contribution to Axis battlefield successes.  Rommel used them aggressively in attack and effectively in defence.  I am reluctant to single out any weapon for special attention but psychologically and technically this weapon was very powerful during the campaign.

However, the success of the Afrika Korp was not reliant on a super weapon.  Better training, better doctrine, superior battlefield drill, contributed to an all arms approach that initially outmatched 8th Army.  This was a highly motivated and professional force under an aggressive General who knew how to use it.


Thursday, 11 May 2017

A Brief Introduction to the Armies in North Africa; 8th Army

As my continuing build up to our operational game on 25th June I thought it would be useful to give an outline on the three principle armies that fought the desert campaign.  Their difference in doctrine, equipment and generalship is the main element effecting the battles and is very apparent in the Spearhead rules.  First up is 8th Army.

The British


Related image

It must be said that there wasn't actually a British Army or airforce fighting in the desert but an alliance of Commonwealth, Dominion, Imperial and British units.  8th Army included Australian, Indian, New Zealand, South African, Polish, Czech, French and Greek formations.  The British dominated the tank forces because of the industrial capacity of the British economy, but Australia, New Zealand and South Africa supplied their own divisions and as allies, these divisional commanders had the political power to veto the British commander in chief.  Churchill was forced to accept the replacement of the Australian division defending Tobruk during the middle of the siege because of public opinion in Australia and several offensives had to be altered because South African and New Zealand commanders did not approve of the plan.  Therefore, the command of 8th Army was often loose and reliant on political expedients rather than purely military factors and the commander in chief had to be diplomatic with many of his key subordinates.

Image result for 8th army tripoli parade


The equipment for 8th Army, especially logistical equipment steadily improved throughout the campaign until it had reached overwhelming proportions under Montgomery in the final year.  The tanks have often been criticised for poor design and reliability.  In truth, they were ok and the British were always able to maintain a superiority in numbers for most battles.  The 2 pounder anti tank gun was an effective weapon in 1941 to 1942 but what let it down was its lack of HE - in Spearhead, this is why it has no anti infantry stats - and so British tactics relied on charging enemy infantry and anti tank guns and over running their opponents.  The 25 pounder could and was used in support but as a divisional commander do you penny packet your artillery or concentrate it?  Again the British struggled to coordinate their infantry and artillery in support of the tanks and relied on numbers and better logistics to beat the Axis.  The arrival of the Grant and Sherman gave 8th Army a better all round tank with HE and the arrival of the 6 pounder anti tank gun with HE evened the odds during 1942.

The Royal Artillery units were excellently trained but were often spread thinly to give more support to individual units.  It was not until 1942 that British commanders were able to concentrate this arm into a decisive weapon that punched holes into Axis defences or stopped armoured units in their tracks.


Related image


The infantry was always trained and of good morale.  It must be remembered that there were few regular units in the 8th Army and the bulk of officers were territorials or recalled veterans from the Great War.  However, the Indian troops were all volunteers and very professional, and 4th Indian Division was a crack unit that served at the forefront of most actions in north Africa.  The Australian and New Zealand divisions were especially feared by the Axis and were effective in offence and defence.  Rommel claimed that if he had an army of New Zealanders he could conquer the world!

The desert campaign was the grave yard of many a British generals career.  British tactics and command were often ponderous due to a lack of training in an army that had no experience of fighting on this scale.  Individual units were often excellent but the experience needed to lead divisional, corp and army sized battles was lacking in an army that was continually expanding and training whilst in the field.  In many ways, Montgomery was fortunate to take command when he did, when the army was fully trained and equipped, and its previous defeats had forced Churchill to limit his interference in his plans.

Image result for kittyhawk


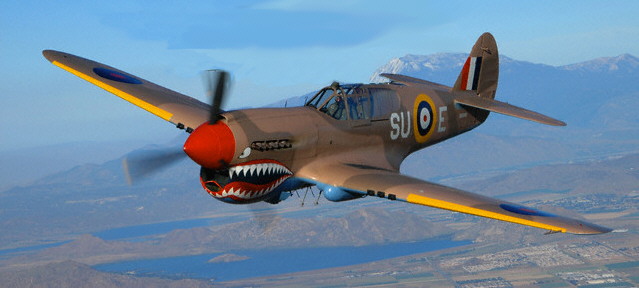
Finally, I must emphasise the importance of the Desert Airforce.  Throughout this campaign they challenged Axis dominance and developed tactics in support of 8th Army that brought them a massive superiority by late 1942.  The overwhelming dominance of Allied airpower in Normandy was forged and won in the desert.

Monday, 8 May 2017

English Civil War Action!


The Battle of Shield-field 4th Feb 1644

It was only Phil and Ozzy and myself available for a game last Thursday so I thought I would put on a game at my place and introduce Ozzy to Pow.

Newcastle in the top right and the Covenanters attacking from the bottom.  The sconce by the bridge is only partially finished and Ozzy has sent the Scots cavalry on a wide sweep on his left to attack the Royalists from the rear whilst his infantry storm across the river.  The shell holes are coal pits - Newcastle was a vital source for the growing city of London.

Ozzy took the Scots Covenanters, keen to take Newcastle for Parliament.  Phil commanded the Royalists who intended to hold the river line as long as possible whilst awaiting reinforcements.  The loss of the half built sconce at the river would be a draw whilst a Royalist loss of the field fortifications would be a defeat.  If the Scots storm the city gates, then this would be an outstanding Covenantor victory.


Phil had to roll a three D6 and get less than the number of turns before his reinforcements turned up.  Unsurprisingly, he rolled very high until turn 9!  Above, dragoons and cuirassiers hurry to save the Royalist cause.
Ozzy picked the rules up quite quickly, but a deliberate approach robbed him of the time needed to organise a coordinated attack on the main field fortifications.  Nevertheless, the Royalists on the river line were overwhelmed and the Scots infantry were still relatively fresh, having used their superior firepower and frame guns to inflict heavy casualties.  The Scots horse, however, had struggled against the Royalist infantry and their aggressive commander, and there weren't many of them left for the follow on attack.


At the close of the game, initial Scots attacks had been held by the garrison but plenty more Covenanter infantry were massing for a final push.  On the far left Phil has strung his cavalry out in support, ready to attack any shaken Scots units.

A great little game well played by both sides.  Phil's defence was tenacious but Ozzy's attack was relentless.  The final result of a draw seemed fair as both sides still had plenty of fight left.  Definitely worth putting this one on again.

Saturday, 6 May 2017

China Trip (it is historical !) and back to the painting project update for 2017


Still jet lagged from the return trip but had a great time visiting China.


Terra Cotta Army was something else and you cannot begin to understand how the emperor Qin Shi Huang decided to spend 40 years preparing for his own death and by his cruel desires enslaved hundreds of artisans and peasants to build these fabulous statues.

They are actually cast in moulds, and if you ordered them from H & R you would probably have to wait just as long as the real things!


Great Wall photos - again an unbelievable achievement. I never thought I would be so impressed until I actually got there to see it. When I discovered it runs for over 5000 miles it puts a whole new perspective on things historical.

I am so used to other history and never really thought a lot about the Chinese side of things. When you read into the history it really makes you realise that the Chinese where miles ahead of the Western civilisations.
 Another photo - you can see how far the wall climbs up that mountain ridge and no we did not walk up there, it was 30 degrees C that day but there were people up there!


Now I am back I have had time to contemplate on what I am doing on the Project side of things.

It's been a relatively benign 6 Months for me, other than Star Wars Armada I have otherwise had no interest in my Wargaming pursuits since last November.

I think I was suffering some burn out after painting up my British and German WW1 corps so the rest has done me good.

Thanks to Frank for picking up my Russian cold war army and a copy of the modern spearhead rules I can now focus on getting stuck into this project but I also need a sidekick to this and have been chatting to Jon about doing a French 6mm Baccus Napoleonic army for Age Of Eagles.

Jon has ordered his copy of the rules and I think he is going to order some Austrian and Russians so we can build up to Austerlitz.

I just ordered a load of French infantry, commanders and artillery for my army from Baccus today which I will collect from Phalanx on the 16th June.

I am looking forward to working on this Project with Jon so we can further expand into the Napoleonic period.

Phil has a load of of British Baccus stuff which he is willing to re base for this rule set so that adds a bit more flavour already without too much expense.

This lot will keep me busy for the remainder of 2017 and into 2018 for sure.


Monday, 1 May 2017

Fire & Fury rule clarifications and news

Firstly, excellent game on Thursday between Mark (conf) and Ian (Union) on the operational table. Fought with a 3/2 advantage on the attacking Union side it proved to be a good indication that the ACW operational game will work very well.

In other news Fire and Fury brigade level 2nd edition goes on sale on 2nd June , so that's my birthday sorted.

Finally, I spent a little time on the fire and Fury website to clarify s few small points that where raised in the game on Thursday.

Firstly , irrespective of formation a breakthrough charge can only be made up to 45 degrees at the Nearest enemy unit and if the charging unit cannot reach that unit it stops when it's movement is exhausted.

Secondly a brigade in field column can wheel once at the start of it's charge onto any facing but then must charge directly forward at the unit it is charging. It cannot do multiple turns in a charge. It still has the advantage over a line formation that can only echelon or wheel up to 45degrees.

Finally a unit in woods ,forced backwards ,only has to retreat out of line of sight rather than musket range, the retreating unit cannot decide to retreat further and if it gets caught by a breakthrough that is the luck of the draw.